Thursday, August 15, 2024

Procedural Building Door Handles

I've been experimenting with different types of handles for the doors in 3DWorld's procedural buildings. This will be a very short post on that topic. I have several different door textures for use with buildings. Two of them are used for exterior office building doors, one is for interior office doors, and one is shared for both house exterior and interior doors. I'm mostly concerned about handles for the interior doors because these are more likely to be close and visible to the player. They're also the ones the player can directly interact with.

These doors were originally simple box shapes with a door texture drawn on each side and white quads added to cover the exposed edges of open doors. The door handle (and lock, in the case of office doors) was included as part of the texture. This was very efficient and looked acceptable, though some amount of lighting was baked into the door texture and didn't always match the lighting inside the building. The biggest problem was that these handles were only 2D decals and didn't have any depth.

I decided to experiment with different forms of door handle geometry. The requirement is that door handles must rotate with the door when opening and closing, and also must be relatively efficient to draw. (Some of the larger buildings have as many as 1000 doors!) My first attempt was to add some cube/box shapes for the plate, shaft, and handle. The plate and shaft extended through the door to both sides while handles are added separately to each side, resulting in four boxes per door. This was quite efficient and also matched the rectangular geometry uses with most of the other interior objects and details. However, it didn't look all that good. In particular, there were no curved surfaces to catch the specular reflection from ceiling lights.

I wasn't too happy with this result. It was time to find a proper 3D model that I could use with doors. The most efficient model for this purpose is one with a somewhat low poly geometry and a single material, to minimize the number of draw calls. Fortunately, there were a number of free 3D models available online that worked.

The most difficult step was calculating the proper transform (rotate + translate) needed to make the handle move with the door when opened or closed by the player or AI people. The next most difficult part was to make door handle drawing efficient. I was able to enable both view frustum culling and wall/floor/ceiling occlusion culling using the same code as the other 3D models placed in buildings. In addition, I only consider drawing handles of doors within one floor of the player, and skip handles on the opposite side of closed doors from the player. It may still be possible to see a missing door handle in rare cases such as when looking down multiple flights of stairs. Fortunately, the door texture still has a handle visible underneath, so it's not too obvious when the handle geometry is missing. Exterior door handles are not drawn, and neither are handles for doors in buildings other than the one the player is in.

I added a variety of door handle colors. Houses use brass and various shades of white to gray. Office buildings use black and darker shades of gray. Technically, the grays should really be silver/metal, but there's currently no reflection drawn on the surface of the material.

Here is what these door handles look like. I changed the code to randomly add {no (texture), boxes, model} handles to each door, and found a room in a house and office building that had all three types of door handles visible.

House door handles, from left to right: cube geometry, 3D model, texture. These are brass colored.


Office door handles, from left to right: texture, cube geometry, 3D model. These are black painted metal.

That's good enough for now. The model handle colors don't always match the door plate and lock colors, but it's still better than not having them. I made door handle type a config file option and left the default as 3D model, since it looks the best in my opinion. The added draw time appears to be insignificant, maybe ~1% longer. I may go back and work on this again later.

Saturday, August 3, 2024

Procedural Buildings: Interior Dirt, Damage, and Messiness

I'm going back to work on building interior details. Up until now building interiors have been mostly clean and in perfect condition, except for the occasional flickering or sparking ceiling light. The only mess I've added since I started on buildings is clothes lying on the floor. I did also add trash in the form of paper balls in some trash cans, but that doesn't make the room look very messy. I'm going to show the various "imperfections" I've added to building basements, in approximately the order that I added them. This will be a mostly show-and-tell post with screenshots and very little technical detail, since most of these were relatively simple building improvements.

My first non-clean addition was empty swimming pools with deflated pool floats such as the one shown in the screenshot below. Deflated pool floats have been scaled in height by one tenth and use a darker opaque material. There is no water and there are no fish in these pools. Since the edge of an empty pool represents a significant drop onto a hard surface, this is one of the rare locations where the player can take fall damage in gameplay mode.

Empty basement swimming pool with sad, deflated pool floats. Empty pools have player fall damage.

It's time to add some dirt and damage effects. I'm starting with building basements and parking garages, since these tend to be messier in general. These areas are used for storage and are less likely be seen by visitors. Dark and dirty basements with their creepy sounds provide a good contrast to the clean and bright rooms found above ground.

The first damage effect I added was water damage, which reused the existing rain puddle shader effect to add random patches of dark/wet areas to surfaces using procedural noise. Material colors are gradually shifted toward moldy black and the specular lighting component is increased to produce a reflective, wet effect. Each building has a random threshold selected to control the frequency of water damage spots so that the strength of the effect varies across buildings. This applies to every fixed building surface in the basement. It doesn't apply to objects such as people, cars, and animals. The effect uses 3D noise so that it properly wraps around surfaces and works even on objects with complex curved shapes such as the sprinkler pipes.

Parking garage with water damage on the walls, ceilings, and floors.

The second effect I added was cracks to walls and floors. It's not as simple as drawing a crack texture as a decal over the existing geometry. This would be complex and slow because it requires drawing all crack-enabled geometry twice, the second time with a custom shader that applies an alpha mask so that it only applies to certain pixels. A texture-based solution would need to tile and could have obvious repetition in the crack pattern. There are also potential problems with blending and Z-fighting of the fragments.

My solution was to use another shader effect that applies the same 3D noise as water damage, except using a threshold and large exponent to create dark lines along the surface contours. Any noise value within a narrow band is shifted toward a matte black color. The approach is similar to how marble patterns and mineral veins are created in some shaders. These aren't quite the same as real cracks because they can form loops and don't branch very frequently. However, the technique is quite simple and efficient.

I only apply cracks to basement interior walls and floors. Ceilings of some houses are wood, and cracks don't look good on wood, so I disabled the crack effect on ceilings entirely. Walls are always plaster/stucco or concrete. The floor is usually concrete or tile, but can occasionally be carpet. Neither the drawing code nor the shader actually track which sections are carpet, so it's not easy to avoid carpet cracks. Objects on walls and floors such as pictures and rugs don't have cracks enabled. 40% of buildings have basement cracks present.

Basement with cracked walls and floors, and a bit of water damage near the ceiling.

The third effect I added was stains on the floor. I had an existing system to draw blood and bug guts as decals using a custom colored alpha masked texture atlas. This can be modified to add random stains or puddles of liquid with various colors such as red (for blood), green, and black. Since stains are small and locally applied, it's okay to draw them over the existing geometry. These stains work equally well with all floor coverings including concrete, tile, carpet, and rugs. Here's a screenshot with an excessive number of floor stains.

Extended basement rooms with stains on the floor in a variety of shapes and colors. The number of stains was set larger than normal for testing purposes.

What about adding stains to walls? That should work as well, though it requires more effort to check for blocking objects and set the orientation of stains to align to arbitrary surfaces. I also added more random size and orientation variations for stains to make them less repetitive. Here is what this looks like in a different building's basement pool room.

Room with both wall and floor stains. (The top surface of the pool table reflects a green color from the ceiling light.)

Now it's time to make a mess of some of the room objects. One idea is to scatter items such as books across the floor in random locations and orientations. Another idea is to rotate objects to non-orthogonal angles so that they're no longer parallel to walls and other objects. Maybe some of the larger items such as bookcases can be pushed over and/or broken in some way. I would apply the broken glass texture to TVs, computer monitors, and mirrors. The problem is that these generally aren't placed in basements.

I just need to be careful not to block the path of the player and building AI people with these "clutter" objects. The placement system will add most of the larger items along walls in a way that they can't block the center area of a room. But tall and narrow items such as bookcases could extend further into a room when pushed over. Fortunately, the existing collision detection logic should allow the player to walk over and stand on low objects, which means they don't truly block the player.

Books from the basement library are scattered around randomly on the cracked floor.

We have books on the floor. What about adding furniture that's fallen over? I can see that working with objects such as bookcases, chairs, tables, desks, trashcans, etc. I just need to rotate these objects around a pivot point such as the back legs of a chair, make sure there's space for the fallen over object to not collide with anything, and draw it in the new orientation. Of course it's not enough to simply update the drawing code, I need to also change the detailed collision detection logic for chair legs vs. balls, animals, etc. Here's what this looks like for chairs.

Basement room with fallen over chairs and books scattered on the floor. Here you can see what cracks look like on carpet.

That cracks effect looks pretty bad on carpets. I mentioned this potential problem above, but it actually looks worse than I imagined. I'll have to fix this with some nasty special cases that test if the filename contains the string "carpet" and set the crack effect scale to zero for those materials. Here, this looks better. The cracks are only applied to the walls, not the carpeted floors.

Office building basement with cracks effect applied to the walls but not the carpet.

Fallen over bookcases can be added as well. In this case they can only fall away from the wall and toward the center of the room. I do worry that zombies could be blocked by fallen bookcases and not be able to chase the player into a room. However, in this case they can probably walk around them.

An extended basement library where some of the bookcases have fallen over, spilling books onto the floor. There's also water damage in this room.

I can create broken objects as well. The player can currently break mirrors, TVs, and computer monitors by throwing objects such as balls at them. Broken objects use a crack texture as a decal drawn over their surfaces. I can apply this same crack texture to some of the basement glass table tops. The only difference is that I need a special transparent version of this texture that only has opaque pixels along the crack lines. These cracked tables, along with other broken items, have less value to the player when taken.

Basement room with cracked glass table and another fallen over chair.

How about more trash on the floor? One idea is to scatter empty bottles of random types and in random orientations across the floor. I had to add custom rotation logic for drawing bottles that aren't aligned to a coordinate axis. Here you see a mixture of water, coke, beer, wine, medicine, and poison bottles thrown everywhere in this house. Some are upright, but most are on their sides. I did make sure that spiders and rats can properly collide with floor clutter objects.

Empty bottles are randomly strewn across the floor in these basement rooms with random rotations.

It would be nice if there was an easy way to make some of these bottles broken. I can't think of a good way to do it, but I can at least add some piles of broken glass on the floor. This reuses the same broken glass pile drawing as cars where the player has broken a window to steal the items inside. This screenshot shows one of my favorite rooms with a bottle on top of a stain and broken glass on a rug nearby.

A pile of broken glass on the floor, next to my favorite wine bottle with a stain under it that looks like the wine was spilled.

Adding floor clutter definitely improves the feel of these underground rooms. I need to add trash as well, and for this I can place paper balls drawn with the same random distorted spheres that I use for trash in trashcans. These are distributed randomly on the floor with a variety of sizes and colors.

Office building basement rooms with randomly sized and colored balls of paper trash scattered across the floor. This is an excessive number of paper balls.

That's definitely too much trash for a single room. And the earlier screenshot probably has too many bottles on the floor as well. These tests were good for checking object distributions and overlaps with other room items, but I need to reduce their counts by an order of magnitude. I've set the max number of bottles to 10 and the max number of paper balls to 5. The screenshot below looks much more reasonable, and is better for performance. There's still a decent mess, but not an excessive amount.

A more reasonable number of objects placed on a basement room floor: several books, several bottles, and several pieces of trash.

That covers everything I've added so far. I'm moving on to other tasks now, though I may get back to this topic later. Leave a comment if you would like to suggest other items or effects that I can add.

Tuesday, July 16, 2024

Procedural City: Skyways

It can take too long to walk around the procedurally generated cities in 3DWorld. There's currently no public transportation that the player can use. I have cars and other vehicles, but they can only be followed in spectator view, not actually driven. Maybe someday the player can actually drive cars. I need to add another form of transportation for now, something that's easier. Possibly something with fixed tracks?

My first though was to add a monorail because it would look cool. But it's quite difficult to add in practice. I wasn't sure if I could create or find a 3D model that looked good enough, and I was even less sure I could make the player interact with it properly. Another problem is how to connect to all the cities with mountains and valleys in the way. Should there be tunnels and bridges like with roads? I figured I would solve these along the way, and got started creating the track and stations within individual (flat) cities.

The first problem I had to solve was how the player (and future AI people) were going to enter and exit. Street level is already pretty crowded with buildings, roads, and all the random items I've added and shown in the dozens of previous procedural city posts. Moving the monorail vertically into the sky above the roads seemed like a good solution. I already had walkways connecting buildings to each other, so it wasn't too difficult to create walkways connecting buildings to the monorail. Then I had to add ramps and stairs connecting walkways of different heights compared to the monorail platform. And I had to update the placement of other objects to make space for vertical supports, avoid placing parking lot solar panels under the track, prevent clipping through trees and existing walkways, etc. It was pretty simple to avoid walkways and trees: just move the track to a high enough elevation to avoid everything.

At this point I had a big rectangle that ran most of the length of the city with a transparent roof and walkways coming out of each side to connect to nearby cube-shaped buildings. I place them on top of the center-most road to avoid intersecting buildings. The player could walk on top of and inside this structure, but it didn't make movement any faster. In fact it took longer to navigate to the walkways rather than walking at street level. The next step was to add the actual transportation, but I still had no idea how to create and draw a functional monorail.

So I decided to create moving walkways instead. These are the typical "horizontal escalators" that you often find connecting airport terminals with moving tracks going in both directions and moving hand railings. They're much easier to draw and implement player interactions for compared to proper monorails. It can all be done with cubes! And this system works well for moving the player around, assuming I can get away with making them dangerously fast. Then I can add gaps (stations) between the walkways for people to enter and exit at each point where a walkway connects to a building.

As some final touches, I added dividers for the glass roof panels, building/company name signs above the walkway entrances, and ceiling lights for nigh time illumination. Here is the result:

Skyway seen from above. The player can walk on the roof.

I called these "skyways" since "walkways" was already taken and "sky bridge" makes more sense when connecting only two end points. They're basically larger walkways that are higher up in the air and closer to the sky. If I ever decide to connect these between multiple cities they may be renamed again.

It's easier to tell how skyways are built when viewed from above in flight mode. The player can walk on the glass if they can find a way to get up there. The typical player view is from inside the skyway. You can't tell from this static image, but the black belts on the floor are moving. The lighter gray stripe helps the player know which direction they're moving in. I used the same convention as roads where you always move forward on the right side. Maybe I should add signs on the ceiling or floor as well?

Skyway viewed from inside, in front of a moving walkway and next to a building connector walkway.
 

The above two screenshots show a skyway lit by the sun. It's quite dark at night time, so I have the ceiling lights turn on when the sun angle gets low. These lights use the same code as streetlights and include shadows. It's not as bright as when lit by the sun, but I feel like it's a good fit with the rest of the city lighting below and to the sides.

Skyway lit by ceiling lights at night time.

Skyways may not be that useful in practice. To use them, players must take stairs or elevators to and from upper floors of tall buildings. Only buildings near the skyway are connected to it, and only cube-shaped buildings. Should there be multiple skyways in a city? Or maybe have them curve around? Or connect them between multiple cities? I'm not sure.

Would skyways look better if they had glass or windows on the sides as well? Maybe, but it could hurt performance. I'll have to experiment with this later.

What about people? Can they use the skyway too? This would require quite a few complex changes. I would first have to make people use walkways, and then have a system where people can enter and exit buildings. Maybe I'll add it sometime in the future.

Update: Here is a YouTube video showing a skyway.


Friday, June 21, 2024

Procedural City: Additions and Improvements

I've been considering adding another form of transportation to 3DWorld's procedural cities. Maybe elevated monorails connected to the upper floors of buildings? I could possibly reuse the existing walkway/sky bridge system to connect to the monorail. But I'm not sure how to do this yet, so it will have to wait until another post.

The past month has been mostly bug fixes and smaller incremental improvements to walkways, hotels and apartments, and cities in general. I'll list the additions and improvements here, along with some screenshots. The majority of my bug fixes aren't really visible and are probably too boring to mention.

Hospital Emergency Signs

I showed white and blue hospital signs placed outside hospital doors in a previous blog post. The problem with these signs is that they're small and difficult to see, especially in the dark. Now I've added emissive "Emergency" signs that are much easier to see due to their bright color and high contrast with building textures. These signs are visible in shadowed areas and at night time. I still think there's more work to be done with hospitals, though this addition improves them incrementally.

Vooj Hospital now has an illuminated (emissive) "Emergency" sign that's visible during both the day and night.

Police Cars and Ambulances

Something about adding those emissive emergency signs got me thinking about ambulances, which got me thinking about police cars, which got me thinking about flashing lights. This seemed like something that was easy to add and would produce a great night time visual effect.

I started with police cars, since I already had a police car model that was used on city streets. This model has geometry for the typical red and blue rooftop emergency lights. I used a combination of the existing code for headlights and brake lights to implement this. Police lights alternate between the red and blue sides, where each side is modeled as two wide area spotlights. One half faces to the front and the other half faces toward the back for a nearly 360 degree coverage area. I added a shadow map to each face, which may not have been required, but definitely improves the look. This also avoids having the lights affect the car interior.

I then added an array of four adjacent circular blur billboards to each front/back side of the light that's currently lit, and later added an additional circle to the end of the light. These use the same code as car brake lights, except that the blue light has a different color. The array of four merge into a bar pattern with additive blending disabled. The total set of 9 lights form a three sided illuminated rectangle. Here is what these additions look like in a night time city.

Police cars with shadow casting flashing lights at night. The car nearby has its red light on while the car in the distance has its blue light on.

Only one in four police cars is in emergency mode with flashing lights. Half of these also play a siren sound when close to the player with volume based on distance. The siren is somewhat annoying, but limiting it to 1/8 of the total police cars made it relatively rare. None of the parked police cars have active lights or sirens. Police cars will turn their lights and sirens off if they park, then turn them on again when leaving the parking space.

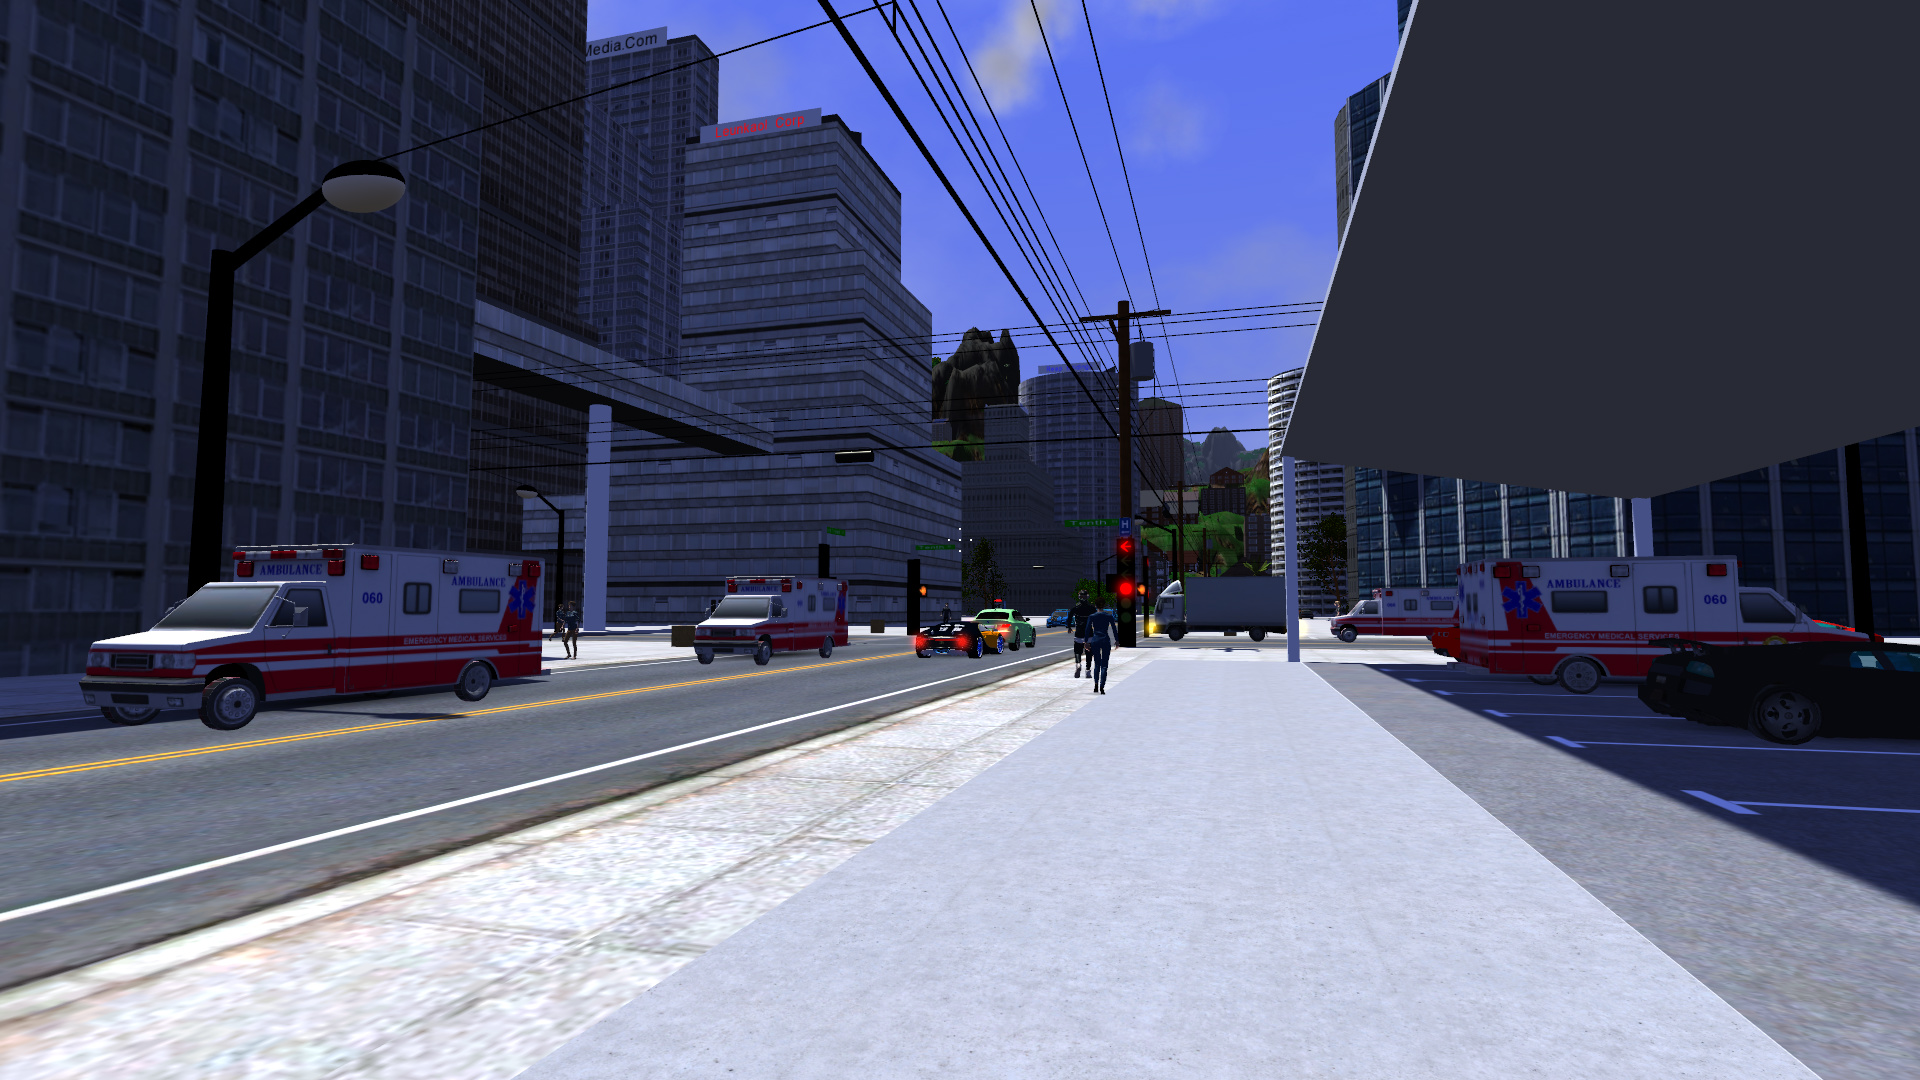
At this point I had police cars and hospitals, so ambulances were the obvious next addition. It was relatively easy to find a free 3D ambulance model online. I went with a lower polygon detail model this time because some of my other vehicles have too many vertices and hurt the framerate on lower end systems. My process of adding a new vehicle is streamlined and takes only ten minutes or so. All I have to do is add a line to the city config text file listing the model filename and various numerical parameters. Here is what these ambulance models look like when driving and parked.

The new ambulance model with four visible in this scene. It's somewhat low poly and low texture resolution, but this means it's fast to draw.

You'll notice that this parking lot has a roof. I'll explain this part later.

I added lights to ambulances as well. There are a total of 14 of them, all red. I used a light schedule that cycles between various combinations with an average of three lights on at any given time. This produces a seemingly random pattern of quickly flashing red lights that should be convincing to the user. Each light has a single red emissive circular billboard, including the ones that are more bar-shaped. It was quite a bit of effort to manually assign each light to (x, y, z) coordinates offset from the center of the model! Here is what this looks like in action.

Ambulance with flashing red lights at night time. This one is stuck behind a truck at a red light.

Ambulances also use the same siren sound as police cars, which is enabled in 1/8 of the ambulances. Police cars and ambulances in emergency mode currently behave the same as other cars, with a few exceptions. They're allowed to run red lights and have priority at stop signs. However, they often get stuck behind other cars waiting at traffic lights and can't go around because there's only one lane. At some point I may change their destinations to be hospitals when in emergency mode, then have them turn off any lights and sirens when they reach it. Maybe I can even add police stations.

Here are some videos showing the flashing lights and sirens in action in night time scenes. I made improvements to the lights between the first and second video. In particular, the first video doesn't have emissive quads enabled.


Interior Windows

Some of the screenshots in the previous blog post showed apartments and hotel rooms without windows. This is unrealistic for rooms such as bedrooms. I'm happy to say that I've now added interior windows to city buildings, including offices and residential buildings. These have the same window frames and blinds as houses. The windows aren't visible from the outside though, because they don't correctly line up with the exterior building wall textures and night time window light patterns. I'm not sure if this will ever be fixed. You can think of them as reflective, tinted glass. I somewhat like the look of the custom exterior textures, and the variety I get compared to the non-city buildings with their regular pattern of nearly identical windows.

Hotel rooms with windows, blinds, and matching beds. The blinds are closed on the window near the center of the screen. Maybe lighting is too bright?

Office buildings have interior windows as well. They have frames but no blinds.

City office buildings now have interior windows with trim, though the exteriors of the buildings still appear to be windowless.

Even non-rectangular office buildings have windows. Sometimes these windows are placed on curved walls. I haven't figured out how to add window trim and other effects on these curved windows because trim only supports axis aligned boxes, so these windows look somewhat bare. I feel like they still add a lot of value to the city and make it easier for the player to keep track of their location and orientation.

Even city buildings with angled and curved exteriors have windows. These windows can also be curved, but they currently have no frames.

These new windows also give great views of the night time city lights! Police and ambulance lights are visible from windows, but they don't shine through them into the building. I'm currently using a different lighting system for building interiors vs. city exteriors, so the lights can't interact between them.

Improved Walkways

I wasn't too happy with the state of walkways in the earlier post. Adding windows actually caused even more problems, because now I had windows clipping through walkway doors. The system in place that adds windows to exterior building walls was only designed to handle exterior doors on the ground floor. So what I did was to draw the doors on top of the windows, and clip the window trim to the door bounds. This looks somewhat odd, but I don't think it's too bad. I certainly like how the player can now see out onto the walkway through these windows even when the door is closed. Maybe it would be better if I could center the door between two windows?

But this definitely complicated the code. Now I had to handle drawing of lights, walkway interiors, exterior doors, and window trim that may be visible even when the walkway door is closed. This was more of an optimization problem though, since I can always fix it by drawing everything all the time. Instead, I enabled the drawing of these features when the player was in the room connected to the walkway door, which worked well enough. I later extended this to include any room adjacent to the walkway that could have a window looking into it. It's not perfect because the player can occasionally see through walkway windows from an adjacent room's open door. I didn't even realize this was a problem until I intentionally tried to find a building room layout where this was possible.

While I was working on these windows, I also added a darker trim around the windows inside the walkway itself. This trim matches the trim used in the main building windows. Here is what these changes look like.

Walkway interior visible through windows in an adjacent room. All windows have dark trim. Should the door trim be dark gray rather than white?

Later I made some other changes to allow the light to pass through an open door from the building into the walkway. The door frame, door, and player all cast shadows into the walkway. This effect isn't too noticeable in the day time since the walkway is already pretty well lit. I made this change after writing the bulk of this blog post, so you'll have to wait until later to see a screenshot of it.

Solar Parking Lot Covers

My next improvement was to add roofs to some of the city parking lots, and place solar panels on top. I'm not quite sure what made me think of this addition. The roofs and panels are slightly sloped to face the south, assuming they're in the northern hemisphere. East-west oriented roofs have a randomly selected slope sign. I place roofs over a random 40% of parking lots with the height of the lower side tall enough to fit the truck model. Parking lots aren't placed under other objects, so they should only see shade from the nearby buildings. Here are some examples.

Some parking lots have roofs with tilted solar panels on them.

Each roof is held up by four square metal poles at each corner. These act as collisions objects for the player and pedestrians crossing through/by the parking lot. It did seem a bit odd to me that very long roofs had only four pillars, so I added more of them. The constraint is that the pillar must fit between parking spaces to avoid blocking them, which means I can only add them to lot sizes that are multiples of 2, 3, 4, etc. Any lot size with a prime number of parking spaces such as 11 or 13 only has the original four corner supports.

More parking lots with solar panel covers. Some of these have more than four support pillars.

I had to add extra logic to avoid placing trees that may overhang the roofs. This will avoid both the problem of leaves clipping through the roof and trees shading the solar panels.

Improved Doors

I've had that same interior house door texture in every building for a few years now. One reason I kept it is because it's so difficult to find a free high resolution texture of a clean door that doesn't have any lighting or shadows on it. Nearly all of the door textures I found look like someone took a photograph of an installed door in normal room lighting conditions. But now the strange look of house doors inside office buildings has finally convinced me to use a different door texture. The texture I chose has uniform lighting and no shadows, except at the very corners of the door. This actually looks quite good when the door is closed, but the dark edges aren't convincing when the door is open. I tried to edit it with the Gimp image editor but wasn't able to improve it much. If I adjust the color histogram to remove the shadows it will also remove the door handle and key hole. Oh well, I guess the user can always think of the door has having a darker edge trim.

Office buildings have new door models that look less like house doors, though they have dark edges when open due to the shadows on the reference image.
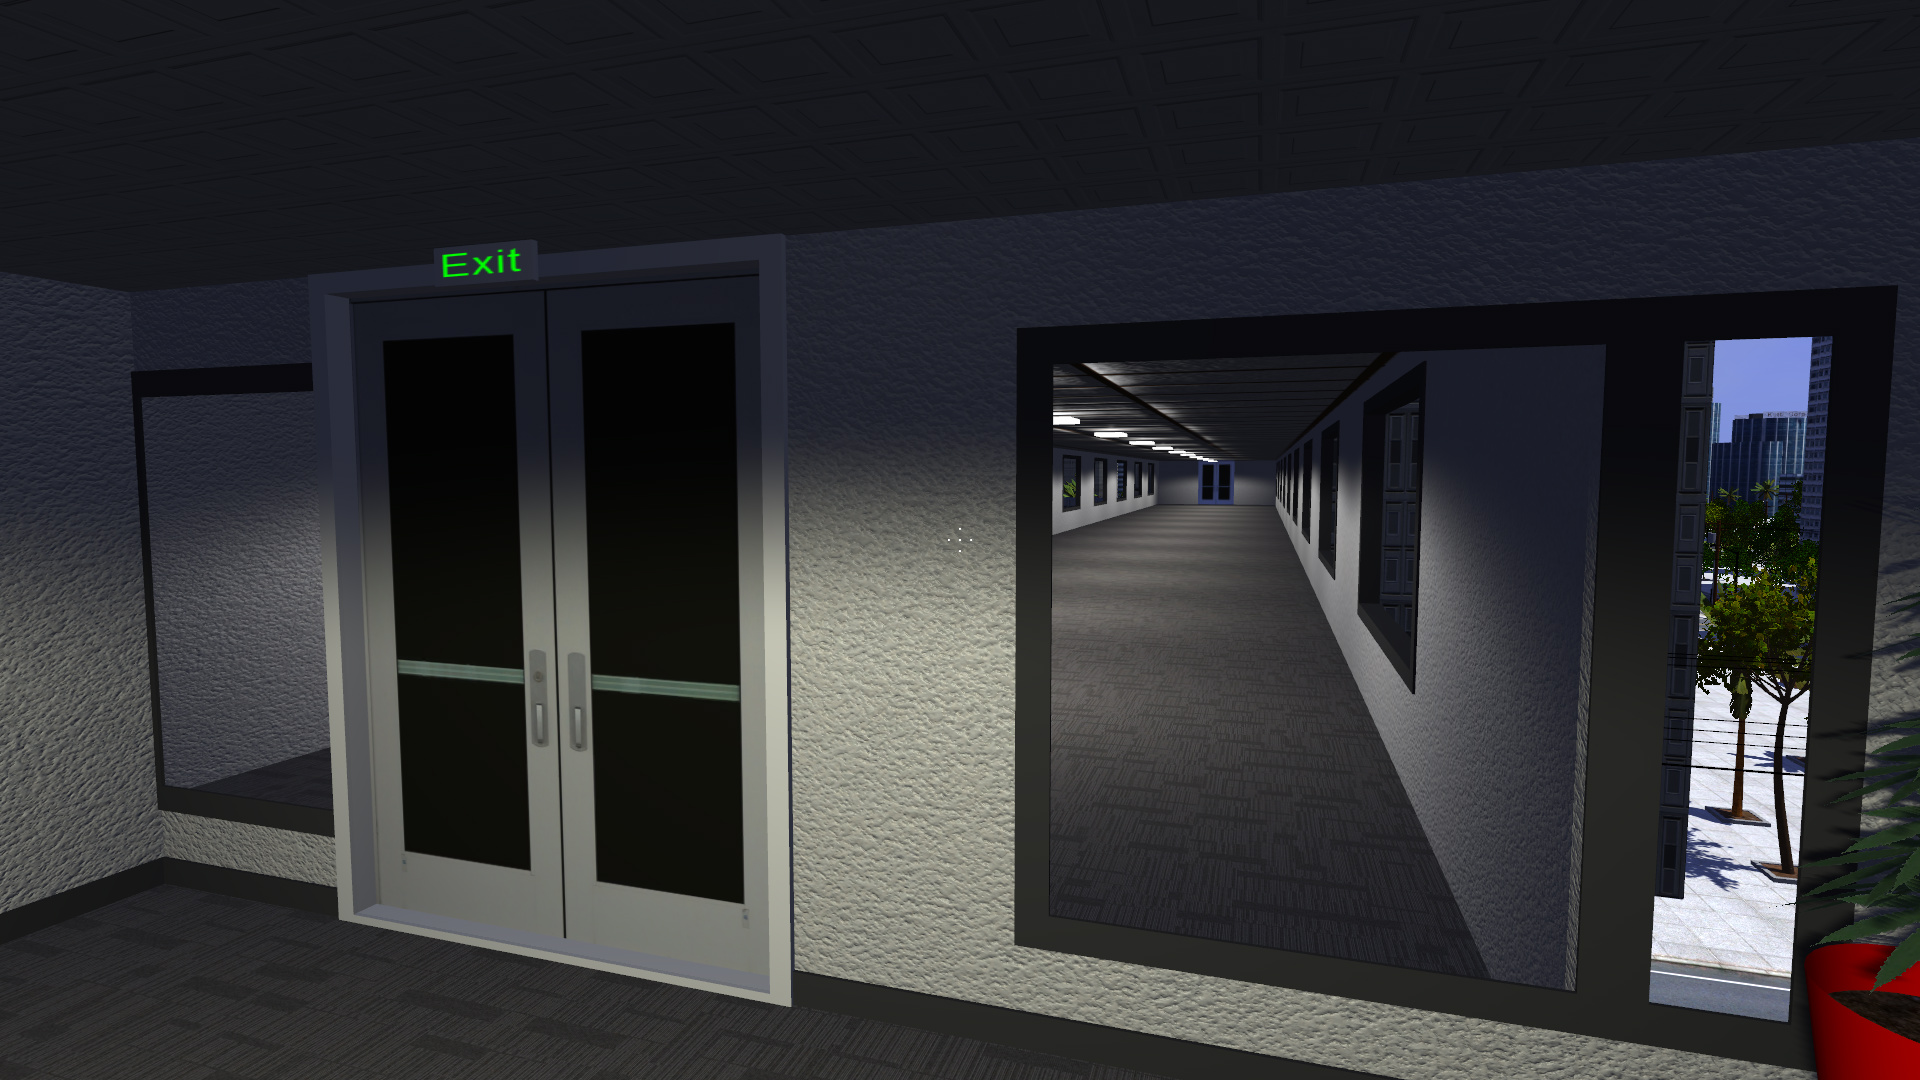
Unfortunately, neither of these door textures look that good for rooftop doors at the tops of stairs that the player can use to get onto the roof. I did have a texture of a double metal door with window slots that I was using for the back doors of office buildings. So I cut this in half and used one side of it as the rooftop door texture. I also added these upper stairs sections and doors to non-cube shaped buildings. Now the player can get onto most building roofs.
Rooftop doors are now metal rather than wood, and they're added to non-rectangular buildings. The white rectangle on the right is the back of a company sign.
Some buildings still didn't have player roof access. This may because the building was too small or irregularly shaped to have an interior, or because there was no valid location to place stairs that could reach the roof. Normally this is fine, but it felt wrong for those buildings with helipads on their roofs. How is anyone supposed to get to the helicopter without roof access?

My solution was to add a fake door. First I placed a tall rectangular block somewhere off to the side of the helipad, then I added a door to the side facing the center of the building. The player can't use these doors, but that's fine. There's no way for the player to get onto these roofs anyway! These were only meant to be seen from above in "flight" mode.

This is a fake door that leads to nowhere. The player can't use it, but it gives the illusion that this helipad is reachable from inside the building.

Conclusion/Summary

That's it for this post. There were other smaller city and building additions, but I feel like I've reach my screenshot budget for a single post. I need to make sure the page loads quickly.

Maybe next time I'll have something to show for the sky monorails I'm considering adding. (If not I may need to edit this post to remove this comment!)

Thursday, May 23, 2024

Assigning Functions to Procedural Buildings

So far I only have two types of procedural buildings in 3D World: office buildings and houses. Technically, some houses are multi-family units, but they're still considered houses in the code. It's time to add more variety by assigning special building types to office buildings. This was something I had been considering for awhile. It must have been the walkways that finally encouraged me to look into specialized buildings.


Hospitals

My first attempt was to make some of the larger cube-based city buildings into hospitals. The newly added walkways seem like a good fit for hospitals, and city buildings are large enough for this function. I don't have any hospital specific room objects yet, so the only thing I can add right now are exterior signs.

I found a hospital sign image with a white "H" on a blue background and added the word "Hospital" under it using an existing sign drawing function. These signs are about the height of a person and are placed to one random side of each hospital front or side door. I check for intersections with other buildings and city objects. If the placement is invalid, the other side of the door is considered as an alternate candidate. The distance from the door was determined experimentally: too far, and the sign might intersect an adjacent building; too near, and it may block the path from the sidewalk to the door.

"Vooj Hospital" with a hospital sign by the front door. Yeah, that's a strange generated name.

I considered adding signs to the roof of the building as well, but they're not very easy to see from the ground level. Maybe if they were larger? I'm not sure. For now the signs are only on the ground.

I also added garbage dumpsters to the back sides of some buildings. These aren't specifically added to hospitals, though hospitals do often have dumpsters. I'm mostly showing them here because they don't fit any other blog post category and would not be shown otherwise.

Two garbage dumpsters placed in the alley between the back sides of two office buildings.

Dumpsters have a clearance area in front of them that must not intersect other objects. This placement check is similar to the checks done for hospital signs. The extra clearance is required to allow the player and pedestrians to walk through alleys like the one shown above with dumpsters on both sides. If the clearance check is not met, a new random position is chosen. They're not interactive at the moment, though I may make it possible for the player to push them around at a later time.


Hotels and Apartment Buildings

Next, I decided to reassign some office buildings to hotels and apartment buildings. Several of the "office building" textures I've been using have exterior details like balconies, window AC units, window curtains, etc. These definitely look more like residential buildings than commercial offices. I tagged each building texture with a probability for being a residential building: 0% for office textures, 100% for residential textures, and 25% for brick and stone textures.

I started with only city buildings using skyscraper textures, but these don't have interior windows. They only have exterior windows that are drawn as lit rectangles at night time. (More on that below.) Brick and stone textures are used in secondary buildings placed outside cities, and these do have windows present on both the interior and exterior. Apartments and hotel rooms definitely look more realistic when they have windows. As my old roommate once stated: windowless bedrooms are really just live-in closets. Maybe it would help if I slapped a sky texture on the ceiling? Maybe not.

Anyway, I started writing the code to assign cube-shaped buildings above a minimum size as hotels and apartment buildings. These use the same central hallway template as office buildings, but there are no secondary or ring hallways. Instead, the larger rooms to the sides of the hallways that would normally be turned into offices with cubicles are now converted to residential units. Since there's only a single central hallway, all of the units are adjacent to at least one exterior wall and can have windows. Er, if I was actually adding windows to these buildings. At least there's more freedom to place room objects if the placer doesn't need to worry about blocking windows with showers, TVs, bookcases, etc.


Lounges

I pretty quickly ran into a problem in cities though: Walkways connecting to a hotel room or apartment bedroom look very wrong. I feel really bad for the people staying in those units. I'm sure it's no fun when people are walking through your bedroom at all hours of the day and night. It's not as bad as having the walkway open into a bathroom stall (see previous post), but it's still pretty invasive to privacy. I left the rooms connected to walkways as offices for commercial buildings. I suppose they're "shared" offices. I need to create a new room type for this. How about a lounge?

Lounges started out taking up the entire space of the unit because I hadn't added interior walls yet. This left plenty of space for adding furniture and other objects. I added a table in the center, couches, chairs/bar stools, bookcases, potted plants, rugs, a TV on the wall, and maybe a refrigerator. I even added a fish tank to some of the residential building lounges. Here are some examples of furnished lounges.

Early attempt at lounge room.

Another lounge, on the floor below the previous image.

Okay, I need to make some improvements. That acoustic ceiling tile texture doesn't work for residential buildings. I changed it to use the same white patterns and stucco ceiling textures as houses. The table also looks wrong without any chairs, so I'll have to add some. Next, it was time to add the walls to split apartment and hotel units into multiple rooms. This causes some problems with lounges.

First, they became smaller. I had to replace the large table in the center with a smaller, taller table with smaller bar stool chairs. I added long thin tables in front of couches where they fit. I also changed the sizes, distribution, and object placement order to have a better chance of placing a variety of different object types.

Smaller lounge with tall table and chairs, couch with table, and indirect lighting enabled.

Another lounge room with different furniture arrangement. The TV is attached to the wall rather than sitting on a small table as in living rooms.

The second problem was that lounges only replaced one of several private rooms. Remember how 3DWorld's buildings work: Each cube-shaped "part" is divided horizontally into rooms, but all floors share the same vertical floorplan. This means that rooms and walls extend through all floors/levels. This is a much more compact data representation, but it does complicate the placement of lounges. Walkways only span 1-3 floors rather than the entire height of a part, which can be as many as 20 floors. It's not possible to remove the walls and merge the rooms in a subset of the floors contained in a part.

However, room assignments can be customized per floor. I had to implement this so that I could, for example, place bedrooms above living rooms in houses. So we can still have a lounge with bedrooms on the floors above and below it. The only real problem is that we may replace one room of an apartment or hotel unit with a lounge while leaving the other rooms as their original private room assignments. Maybe the bedroom doesn't have the walkway door inside it, but it could be connected to the lounge so that the resident must walk through a public room to get to their front door. That's clearly no good.

I tried various solutions that didn't work. In the end I realized that I had to track the entire unit as a whole, and tag each room with the unit number it belonged to. A first pass iterated over all rooms of a unit and determined whether any of them connected to a walkway or stairs. [Yes, in the process of working on this I realized that some rooms had stairs connecting to parts (stacks) above or below as well. Stairs also make rooms public.] Any unit with a walkway or stairs was tagged as "non-private" and all rooms associated with the unit were reassigned for that floor. Bedrooms and kitchens became lounges. Living rooms stayed as living rooms since they basically had a subset of the items as lounges anyway, though I reassigned the room names to "entryway". Bathrooms stayed as bathrooms, except they had showers and bathtubs removed. Public restrooms only need to have sinks and toilets.


Shower + Tub Combos

Speaking of showers and bathtubs ... There's one more missing piece I had to implement before adding hotel rooms. I only had bathtub and shower room objects. Hotel rooms almost always have those bathtub + shower combinations with the curtains that can be used as either, since these take up less space than a separate tub and shower. I was able to reuse parts of the drawing code to place a bathtub with shower tile along the walls. Then I added a plastered wall at the end, curtain rod, curtains, controls, and the shower head. There are two types of shower controls that are randomly selected between: a single large turning handle, and two smaller knobs for hot and cold. Here's an example shower + tub combo.

Shower plus bathtub combo, typical of hotels. The curtains can be opened and closed by the player.

The player can't step inside and hide from zombies like they can with showers. The water can't be turned on either. I felt like I had to make these shower + tubs interactive though, so I made the curtains open and close when the player clicked on them. The tub part can be filled with water and objects will float or sink in them, just like in normal (non-shower) bathtubs. I get that for free because these are really two objects placed on top of each other!

The only downside is that these objects take up more space than separate showers and tubs and are more difficult to place. They're long like tubs, but unlike tubs, they can't be placed against windows. Fortunately, these hotel bathrooms rarely have windows anyway. As I said above, none of the city buildings have windows. The brick and stone hotels do have bathroom windows, but only for the units on the ends of the building. Sometimes these end units will have shower-less tubs for this reason. Oh, and yes, bathroom windows use a non-transparent glass block material that the player can't see through.

I like the look of these new showers, so I added them to houses as well with a random probability. They come with two tile colors, pink and brown.


Room Interiors

It's finally time to describe the apartment and hotel room partitioning and assignment logic, with many screenshots. I had this code partially implemented for over a week while I worked on the problems related to windows, walkways, and showers explained above.

I decided that there will be two initial room layouts. Hotels will have a living room/entryway connected to the front door, a bedroom connected between this room and the exterior wall (possibly with windows), and a bathroom coming off the entry room to the side.

Apartments will have five rooms in total. A small entry room will connect to the front door and the other surrounding rooms. The bathroom and kitchen will be to the sides of the entry room, with the kitchen on whichever side has more space from the door to the edge of the unit. In the case where the door is centered on the room, I shift the entryway a bit to one side relative to the door to make the kitchen larger than the bathroom. The bedroom will be between the bathroom and the exterior wall, and the living room will be between the kitchen and the exterior wall. The living room will connect to the bedroom and probably the kitchen. The bathroom will have a door to either the entryway or the bedroom, determined by a combination of randomness and the room size/geometry. The entryway may connect to the living room and/or bedroom if there's space for a door, which depends on where the walls happen to be placed. In practice it seems to most often connect only to the bedroom with the current set of parameters. This means that the living room can only be reached through the kitchen, which is odd but not a huge problem. I may go back and experiment with this again later.

Does this sound too complicated? If you can't picture this room layout, I added an overhead map near the bottom of the post that may help.

One issue I ran into is that some of the smaller apartment buildings don't have enough space for these five rooms. Specifically, neither the kitchen nor living room is large enough to place a table, which leaves the unit without a table or chairs. I solved this in two ways. Sometimes apartment buildings have unequal room sizes with a somewhat larger end unit with an extra window. When at least one unit in the row is large enough for five rooms, I kept this as an apartment building where some rooms have no kitchen. But when none of the units can fit a kitchen, I change the type from an apartment building to a hotel. These two cases are about equally likely, which means that we end up with more hotels than apartment buildings. The apartment buildings tend to be larger though, which somewhat balances things out.

Apartments currently have a single bed in the bedroom. Hotel rooms have two matching beds that use the same style, size, color, and texture. They can be in different orientations or have different blankets. The other room objects such as dressers, nightstands, desks, and closets are placed the same as in houses.

Here's a series of screenshots of the same hotel room, in a non-city building that actually has windows. I have indirect lighting turned off because it makes the interiors too bright. Maybe I need to adjust the constants to work better with hotel rooms, or reduce the size of ceiling lights instead. These screenshots remind me of house listings typically found online that have photographs of each room.

Hotel room with matching beds and bathroom visible in the back. Flooring is carpeted like office buildings rather than using hardwood floors as in houses. This is a corner unit because it has windows on two sides.

Hotel room entry area with couch, bathroom to the side, and bedroom with windows in the back.

Below is another screenshot series showing an apartment. I couldn't find an apartment building large enough for five rooms in the player's starting area, so instead I used a windowless city building. Just imagine there will be windows along some of these walls. I have indirect lighting enabled here because it helps to make up for the missing window light.

Apartment living room with couch, table, and TV. Bedroom is to the left, kitchen is at the back. Windows have not yet been added. They should be on the wall behind the player, and on the wall on the right (with the picture) for end units.

Apartment kitchen with table, chairs, counters, sink, and appliances. Living room is to the left, entryway is to the right.

Apartment bedroom with bed, dresser, and nightstand. Entryway is to the left, living room is to the right. Windows have not yet been added. They should be on the wall behind the player and the wall on the left for end units.

Apartment entry area with bathroom to the left and kitchen to the right. The bedroom door is behind the camera. The front door is open, showing the main hallway beyond.

Here's an image of the hallway outside this apartment unit. All private apartment units and hotel rooms have unique room numbers, even on one side and odd on the other. Room numbers also vary with floor as you would expect. Hallways are the same as in office buildings and have stairs, elevators, cameras, and possibly fire extinguishers and water fountains. However, there are no security rooms with camera monitors in these buildings.

Apartment hallway showing numbered rooms on each side. Hotels are very similar.

I almost forgot, I have this neat debug drawing mode for building interiors. Here is part of one floor of an apartment building. Walls are drawn in white and room objects are shown in various colors. You can see that the floorplan/walls are regular and consistent, but the room object placement has more variety.

Note that the spacing around objects is larger than what's normally found in real buildings to prevent the AI (people and zombies) from getting stuck on objects. Their bounding volumes are large enough to include all animation frames; they can't squish their arms against their bodies to fit in tight spaces. AI diameter is slightly smaller than the width of doorways, which show as gaps in the thin white walls.

Overhead floorplan of part of an apartment building showing rooms and placed objects. Larger rooms are 15-20 feet on a side. The building is about 90 feet wide and 150 feet long (off the bottom of the image).

Color code - based on average textured color of room objects:

  • Gray: floor (inside), concrete courtyard/sidewalk (outside)
  • Lighter gray (inside): bathroom tile
  • White cubes: walls, closets, showers/tubs, toilets, sinks, refrigerators, and stoves
  • White circles: ceiling lights or ceiling fans
  • Brown: wood items such as kitchen counters, tables, chairs, dressers, nightstands, and desks
  • Large brownish/pinkish rectangles: rugs
  • Orange-brown: couches
  • Blueish: beds
  • Black: couches and TVs
  • Lighter gray (in hallway): stairs
  • Blue circles: trashcans or recycle bins
  • Red circle: fire extinguisher
  • Green (outside): garbage dumpster
  • Dark gray (bottom left and top center, outside): walkway, on the floor above or below

I definitely feel like there's more work to do. The obvious next step is to add interior windows. I need a system for city buildings that fakes windows with two different geometries for interiors vs. exteriors. Exterior windows must match the exterior wall textures for night time window lights to look correct. Interior windows must match the vertical floor spacing and horizontal spacing of individual units and rooms. The large variation in exterior office building window size, spacing, and aspect ratio makes it difficult to use the same window geometry for both purposes.


Open Wall / Non-Rectangular Rooms

I started taking the screenshots and writing this post, but then I realized that something looked wrong in the images. Most of the hotels rooms I've stayed in were an open living area. The bathroom was a separate room, but the living room and bedroom were really one larger connected area with no door between them. It's not really possible to create this arrangement with rectangular rooms unless the bathroom is long and thin and runs the length of the unit (from entryway to window), or the guests have to walk through the bathroom to get to the front door.

What I really need is to remove that wall and door separating the bedroom area from the living room/entry area. This will produce a nice L-shaped open area that occupies most of the space of the unit. I had previously tried (and failed) to remove walls during my first attempt involving merging the living and dining rooms of houses. I got stuck primarily for two reasons:

First, I only wanted to remove the wall on the ground floor. As stated earlier in this post, the floorplan, walls, and doors are shared between all floors of a part. I can't simply remove the wall for the first floor but keep the walls on upper floors. I would need to remove the wall for the floors above as well, which may result in merging two bedrooms. However, hotel rooms share the same room assignment across all floors, so this isn't a problem. We actually want to remove the wall for all floors in the part.

Second, wall and door placement happens during the floorplanning step, while room assignment happens during the object placement step. These two steps are separated for performance reasons. Floorplanning is required to determine the placement of exterior objects such as doors. The exterior is generated for all buildings at load time since it's visible from a very large distance, especially when lit up at night. Rooms and walls are shared across floors and are very compact in memory, so it's okay to store these for all 18,000 buildings. Floorplanning can also be run with multiple threads to speed things up. We can't remove walls to merge rooms during this step because rooms such as the living room and dining room have not yet been assigned. I can't assign rooms such as the living room here either because the exterior doors are added to houses after floorplan generation and room partitioning.

On the other hand, object placement must be done at runtime as the player gets closer to buildings. There are far too many objects to store in memory for this many buildings. There are tens of millions of total objects placed across all buildings. Objects are placed separately on each floor and not shared. Much of the runtime is updating GPU buffers, which is not easy to parallelize across threads. It's not possible to remove walls at this point either because this may affect exterior geometry that has already been sent to the GPU for drawing.

Fortunately, this is also not a problem for hotels because rooms are assigned during the floorplanning step. Room types are forced by the placement constraints:

  • Living rooms/entryways must connect to the exterior door, so there is only one candidate.
  • Bedrooms must have windows and be opposite the hallway, so there is only one candidate.
  • Bathrooms are the smallest rooms, so there is only one candidate.

This means that we don't need to remove any walls or doors, we can simply not place them between the bedroom and living room/entryway areas. This produces L-shaped rooms such as the one shown below.

Hotel room with an open/removed wall between the bedroom and entry/living room areas.

Of course, there was quite a bit more work to be done. I had to add extra room blockers so that objects aren't placed in a way that blocks people from walking between the two sub-rooms. I had to flag these missing walls as places where light switches, outlets, air vents, and pictures can't be placed. I had to modify the occlusion culling to let it know that these rooms were visible without having an open door between them. The light propagation code had to treat these rooms as connected. The AI navigation graph had to insert a node in the center of where the wall should have been. Is that all? I'm probably forgetting some changes. It does appear to be working now after all of this effort.

Will I go back and try to solve the wall removal for the living room and dining room cases? It's unclear. I was thinking of removing the walls for single floor houses to avoid the problem with upper floors. This way I can assume the room connected to the front door is a living room and the adjacent room is another public room such as a dining room. I could attempt to add this in the future, though it might be unsuccessful.