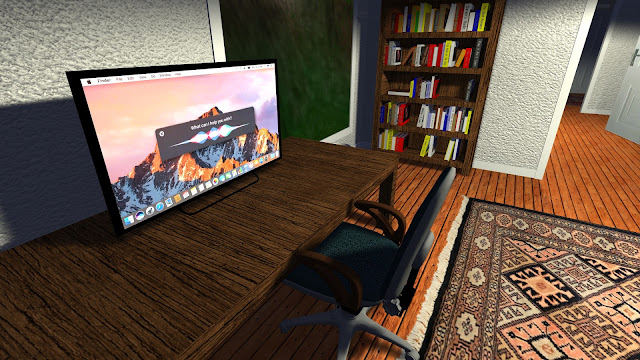
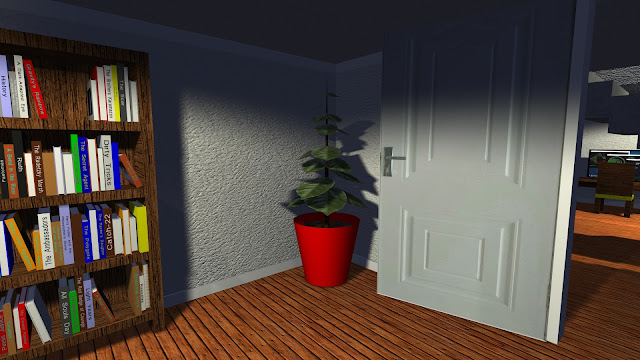
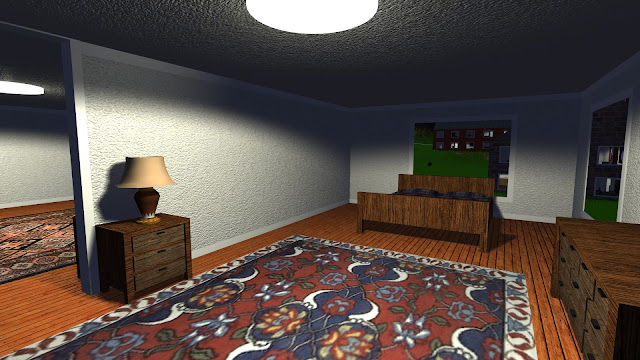
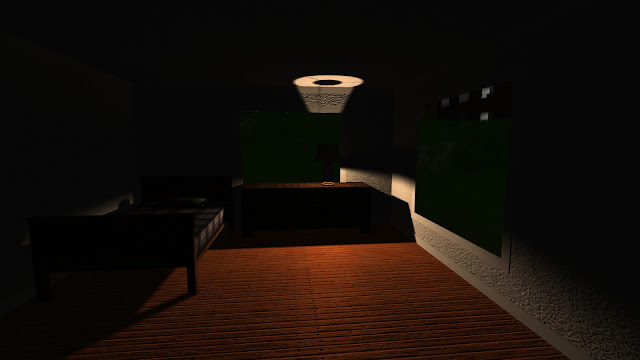
Tuesday, November 17, 2020

Procedural Buildings: Improvements Based on Feedback

Yes, I'm still working on procedural building interiors. It seems like there are an infinite number of things to add and fix. This set of improvements to interiors is mostly the result of feedback and suggestions from my nine year old daughter and Paul Spooner. A few of these were old TODO items as well that I finally got a chance to work on. I'll list them here in the approximate order I that implemented them, along with lots of screenshots.

Lamps with Ambient Lighting

I didn't really like the look of the dark walls next to the lamps in the screenshots of my previous post. There should be some diffuse light passing through the lampshade to reach the wall, and also indirect light reflected from the ceiling and top of the dresser or nightstand. The easiest fix was to add a small radius unshadowed light source inside the lampshade and hope that it was small enough that it didn't bleed through the wall onto objects in the adjacent room. Here is a screenshot of that third light source. It looks a bit odd due to the lack of a smooth transition between the top/middle/bottom lights, but I guess it's better than having no middle light.

Lamps now have a small unshadowed light source inside the lampshade that makes it appear to diffusely illuminate the wall around the lamp.

Bed Posts and Canopy Beds

So far my beds have used simple and plain geometry, with single cube bottom, legs, headboard, and foot board. I decided to add bed posts to some of them. Bed posts are randomly selected to be either square or cylindrical. Here is a bed with square posts.

Bed with square bed posts and a lamp on a nightstand next to it.

I took this a bit further and added top bars to some of the beds with posts, making them into canopy beds. So far I haven't added any canopy material, so they're bare wood. Cloth for things like canopies or window curtains is difficult to add. There are two problems. First, what geometry do I use? Cubes won't work here. This cloth needs to be curved into folds to make it look realistic, which would require a large number of triangles. Maybe that's okay for canopies, but there are far too many windows in a house to add high polygon count curtains to each one.

The second problem is that real cloth transmits some amount of light. It's not quite the same as making the material semi-transparent with an alpha value between 0.0 and 1.0. Instead, they need some sort of two-sided lighting model that includes transmission through the back/lit side, similar to tree leaves. This may require a custom shader. I'll have to get back to this problem later. For now, the canopy beds have no canopy and the windows have no curtains.

A large canopy bed that casts interesting shadows. I haven't added the canopy cloth/material yet.

Storage Room Shelves with Boxes

Storage rooms still looked a bit empty to me. I needed to add objects to the shelves, but what? I guess the only objects I currently have that are intended for storage rooms are the same wooden crates I placed on the floors. I decided to add some smaller crates randomly placed on the shelves. Some shelves have none, and others are full of them. I also added an occasional random office chair in the corner of the room (not pictured below).

Storage room with shelves on all walls and crates on the shelves and floor.

I would like to add cardboard boxes, but so far I haven't been able to create a convincing cardboard material. The don't really look like proper boxes if I make them a uniform tan color. I tried to find good box textures online, ones that had various box-like symbols, text, tape, etc. The problem here is that boxes generally don't look right if I use the same texture on all six cube sides. Do I need three different textures, one for the top and bottom, one for the sides, and another for the ends? Maybe, it's tough to justify adding three new textures and three new materials just for cardboard boxes. Maybe adding plastic storage bins would be easier.

I could also just add random room objects to the shelves: books, lamps, bottles (see below), pieces of wood, etc. I don't know how that would look. None of those are really items you see stacked on storage room shelves. Do I need to create several new objects that only appear on shelves in storage rooms?

Walled Stairs with Railings

Most office buildings have enclosed stairs. I hear that's related to fire safety, which I suppose makes sense. I changed my office building stairs so that they at least have walls on the sides. Walls are skipped when the stairs are up against an existing exterior wall of the building. There's still no stairwell door, but this is an improvement. Railings are connected to the walls of the stairs and continue to have vertical support poles when they fit. U-shaped stairs don't have vertical poles due to the complexity of adding them at the correct height. Here is an example of office stairs in a main hallway leading down to an open elevator. The dark spot on the ground is my shadow.

Office building walled stairs with railings. There's an open elevator at the bottom of the stairs.

Computer Keyboards

I added computer monitors to some desks a few weeks ago using the same 3D model as the TV. That's good, but monitors aren't usually placed by themselves (except for in the focus rooms where I work). Monitors are usually connected to a computer, and the computer is often connected to a keyboard and mouse. Keyboards are easy to draw, so I added them first. There are no cords, computers, or mice yet.

Desks with computer monitors now also have a computer keyboard. (That Windows desktop is a screenshot of my home computer's desktop.)

Maybe someone was using the monitor and keyboard with a laptop that's no longer on the desk. ... In that case, then why is the monitor showing a desktop? I don't know, I suppose the computer could be hidden behind the desk somewhere. I'll have to add one under the desk later. Maybe then I can add some desktop computers and keyboards to those storage shelves. I may even be able to get away with making them a single textured cube so that they're basically free to draw.

Colored House Walls

Paul pointed out that the contrast between building walls and trim is too low. The easiest way to fix that is to change the wall color, the trim color, or both. I've left some houses with white walls, but made others have light blue, green, pink, and peach colored walls. Some of these are shown in the screenshots below.

Railings with Balusters and Stair Overhangs

My railings and stairs were looking a bit plain. I was originally worried about having too many triangles for detailed stairs, so I tried to keep them minimal. I've made a lot of optimizations since then, including adding a class of "small" objects and materials that are only generated and drawn when the player is close to the building. This is intended for high detail objects with curved surfaces that can't easily be seen from a distance. This form of level-of-detail is what allows me to add so many different objects to thousands of buildings and still draw everything in realtime.

I split stairs into top and bottom cube parts, where the top is slightly darker in color and overhangs a bit. This makes it easier to tell where the tops of the individual steps are. I also added vertical cylinders for railing balusters to keep the little kids (or careless adults) from falling off the sides of the stairs. I placed one on each stair, which looks pretty good. I put another cylinder along the bottoms so that I can skip adding end cap circles to each baluster. These railings work as proper collision objects for the player as well, to avoid the frustration of unintentionally falling all the way to the bottom of the stairs when making a wrong move trying to reach the top floor.

Stairs with railings, balusters, and overhanging steps in a room with light green walls.
 

Dark Trim for Office Buildings 

I wanted to keep office building walls white because that's the most common color. My real life office (which I haven't been to since March) does have some colored walls, but they're mostly white. Instead of changing the wall colors to get good contrast, I'll change the trim color to dark gray. There, that looks much better.

Office buildings now have dark gray trim to contrast with the light colored walls, ceilings, and floors.

Maybe I should add trim along the ceilings as well like I have in houses? I haven't quite gotten the angled ceiling trim to meet properly at outside corners of hallways. You can see this on the corners of closets in houses as well, though it's difficult to spot. I think for now I'll add ceiling trim to smaller office buildings, but leave it out of larger buildings with intersecting hallways. That should help with polygon count as well since the largest buildings can have over a thousand rooms.

Reception Desks in Office Lobbies

Most large office buildings don't have their front doors open to a long hallway with rooms on each side. The doors open to a lobby instead. What better object to place in the lobby than a nice big reception desk. I can put one at each end of the hall/lobby to handle both doors.

I originally wanted to use the desk model I created in my earlier (hand made, not procedural) office building scene with the rounded corners created from cylinders. I attempted that, but I couldn't get the textures to line up using the texture coordinate system I implemented for building interiors. There's just no easy/automatic way to remove texture seams from the intersection of a cube and a cylinder. Oh well, I guess I'll just have to make the top surface out of cubes and settle for square corners for now.

An office building lobby reception desk.
 

Office Building Libraries

3DWorld already places libraries with up to eight bookcases on an upper floor of some large houses. I can reuse that code to turn offices into small libraries for office buildings as well. I need to make sure to limit the number of libraries, because all these books really add up for thousand room office buildings. This was an easy change and adds some variety to offices. Here's an example with a rectangular table. Some libraries have round tables.

A library inside an office building with many bookcases and a rectangular table in the center.

Bathroom Showers

My daughter asked me why there are no showers in the bathrooms of houses. That's a great suggestion! I can create a simple shower out of mostly cubes. I found a nice bathroom tile texture to use and got to work. My showers are always placed in an empty corner of the bathroom against two interior (windowless) walls. The back and floor are made of tile, with a shiny metal frame and two transparent glass panes on the outside. One of these panes is the door. One of the walls has the shower head, and there's a drain in the tile floor. That's a minimal design, but it works well enough.

A shower placed in the corner of a bathroom with light blue walls.

It took some effort to update the material drawing system so that I could draw transparent objects last, which is required for proper alpha blending. I did eventually get everything to work properly, even when viewed through a mirror.

This shower has an additional door handle, which I later realized was missing in the previous version.

A shower (with door handle added) placed in the corner of a bathroom with peach walls.

I also used that same tile texture for kitchen counter backsplashes. I only added these to interior walls because the windows on exterior walls are large enough that there's no exposed wall space for a backsplash.

Kitchen counter with a tile backsplash added to non-window wall sections.

Improved Light Culling

I was having lots of problems with room lighting, both fragment shader performance issues and light leaking though walls. I already have a system in place that performs ray casts in various directions to determine the bounds of each room light. This allowed me to do some light culling on the CPU side. Rays that hit room walls mean the light is confined to the room containing it, while rays that exit through doorways allow the light to influence other rooms. This lets me to use large light sources while constraining their areas of influence to only a few rooms. I store the computed bounding cube of each light in a texture and use it inside the fragment shader for light source culling.

It took me a few months to finally add fragment shader support for this. I was originally worried it would be very complex to pull this off, and would hurt framerate. In reality it only took about two hours, worked the first time, and actually improved draw time. I guess the ability to early exit out of lighting computations more than offsets the dynamic branching cost in the fragment shader.

This change allowed me to increase the radius/brightness and angle of upward pointing, unshadowed room lights without having to worry about light bleeding through walls into adjacent rooms. You can compare the two shower screenshots above and see that the lower one has more light on the upper walls. I was then able to go and re-tweak other lighting parameters to remove some of the annoying light leaking and unwanted shadows. This really makes a big difference when moving around the city as well because there is far less "popping" from shadow maps being switched on and off.

Bottles and Wine Racks

Paul suggested I add wine racks. I'm not sure how common wine racks are, and I definitely think I'm missing some other household objects that are far more common. I do have a very small wine rack built into a kitchen counter in my house. I guess I can add wine racks, but first I have to add wine bottles. Fortunately, a bottle is pretty easy to make by gluing spheres and cylinders together. I already have support for this. Here is a green bottle with a white cap and label. It's not a wine bottle, but that's fine, I can add other types of bottles on top of tables, desks, and kitchen counters.

A bottle of Sprite, 7Up, or maybe beer on a table.

Once I had a bottle, I could combine those with a modified bookcase to get a wine rack. Real wine racks normally are angled or have extra pieces so that the bottles can't roll around, but this is good enough for now. Maybe I can reuse this geometry for storage cubes later. I added wine racks to 75% of dining rooms, at most one per house. Here is one example.

A wine rack full of wine placed in a dining room with light green walls.

Wait! I can add these bottles to my storage room shelves as well. Now they sort of look like supermarket shelves where customers put their returned items back in the wrong place, or shelves in a recycling center. Or maybe the janitor is an alcoholic. Or the employees had a party down here.

Bottles next to boxes on storage room shelves. This room also has a spare chair against the wall.

Sunday, October 18, 2020

Adding Content to Procedural Buildings

Now that mirrors have been completed, it's time to get back to adding content to the interior and exterior of buildings. Maybe after I've added enough object variety these will start looking like real buildings.

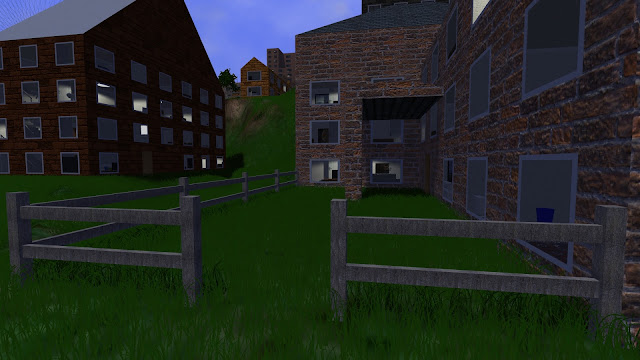
First up, I've added fences around the yards of some houses. These are very simple wooden fences with vertical posts and two horizontal slats. Some go around only one side of the house, and others enclose a section of the yard with a gap for a gate. Fences are only added to L-shaped houses that have an area of yard interior to their bounding cubes.

House with a simple wooden fence around the front yard, and an opening where a gate should be.

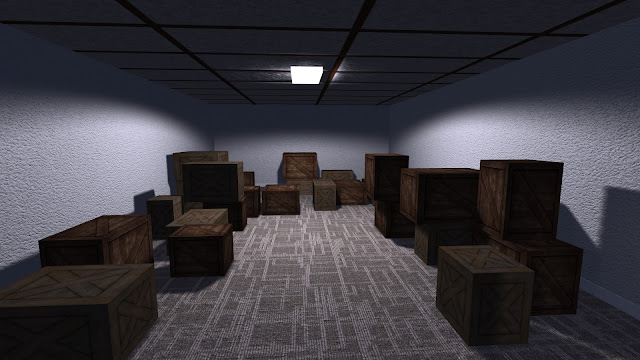
That's it for exteriors. Moving onto interiors, some first floor windowless rooms of office buildings have been made into storage rooms containing stacks of crates and boxes. I would like to add some sort of shelves on the walls, but I haven't gotten to that yet.

Storage room with no windows and two different types of crates stacked up along the walls and back.

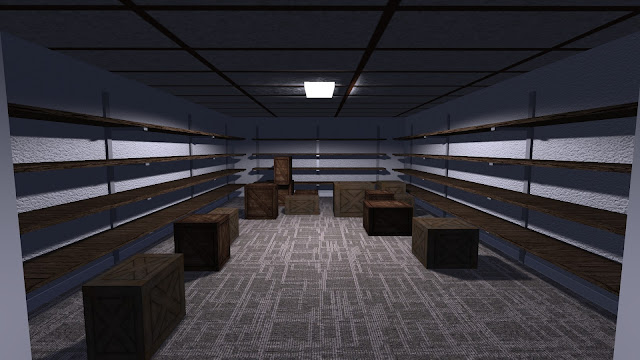
While writing this post I decided that shelves should be easy to add, so here they are. Some walls have 2-4 shelves stacked vertically and held up by regularly spaced metal brackets. Here is an example of a storage room with 4 stacked shelves along three walls. That looks much more like a storage room to me. Now I just need to figure out what objects to add to the shelves. More crates/boxes?

Storage room containing various crates and empty shelves along three walls.

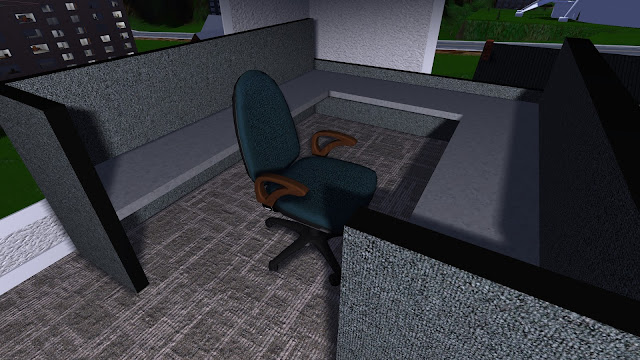
I've updated office swivel chairs to a model that has textures and is more interesting than the uniform black color of the previous chair model. In addition, I replaced some of the simple cube chairs with these chair models for desks that have computer monitors in houses.

A cubicle with the new office chair 3D model, complete with textures.

Office chair at an office desk and a computer monitor that's turned on.

I went back and made a second attempt at potted plants. The pots had looked good, but I wasn't able to get the alpha blending to work on the leaves. This time I switch to a second (more expensive) shader that has alpha testing and alpha blending enabled. Now the plant leaves are drawn properly. Pots come in a variety of different colors, and there are five different plant/leaf textures. One or two potted plants can be added to a living room, and one plant can be added to some other room types such as dining rooms.

A potted plant in the corner of a room. Plants come in various sizes, aspect ratios, pot colors, and leaf textures.

Now that bedrooms have dressers and nightstands, I can place smaller objects on top of these. What objects should I add? Well, I have lamps on some of the dressers and nightstands in the bedrooms of my real life house. Lamps are a good place to start.

A lamp has been placed on the nightstand to the left in this bedroom.

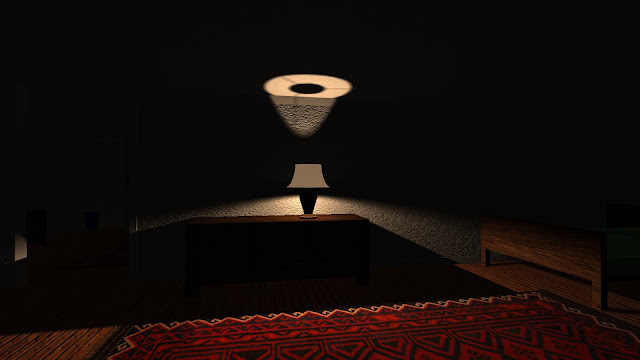
I haven't made the lamp a light source yet. Light should be partially transmitted through the lampshade, which isn't something I can currently do. I suppose if I wanted to attempt this, I would need two shadow maps, one pointed up and the other pointed down. ... Okay, I can't resist. I added those two light sources for lamps. There's no indirect lighting, and no transmission through the lampshade, but the shadows on the ceiling look too good not to enable this. I also managed to get the light to cast a faint upward unshadowed area to sort of simulate light passing through the lampshade.

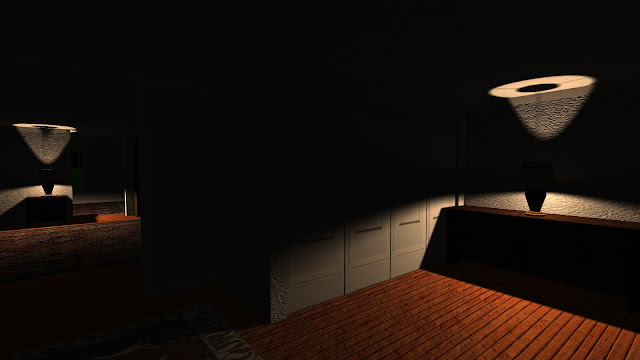
A lamp placed in an otherwise dark room at night, with shadow maps, shining on the ceiling and floor.

Two lamps can be see turned on in adjacent rooms at night.

I think it would look better if the lampshade was lit, but I'm not sure how to actually do that. Use two different lamp models, one with an emissive lampshade for the lamps that are turned on? How about just setting the emissive color before drawing the lamp if it's turned on, and reset it after the draw? Yes, that last one seems to work. Here is a new lamp screenshot with an approximation to diffuse light transmission through the lampshade.

Now the lampshade is emissive when the lamp is turned on.

Monday, October 5, 2020

Mirror Reflections and Player Models Gone Wrong

This is just a short post to show off some of the interesting and amusing mistakes I made while working on the previous mirror reflection post. Well, they're not all mistakes, a few were just experiments I decided to do.

Here is a screenshot that's similar to what I saw when disabling (or, um, incorrectly implementing) the reflection operation. The mirror is an image of the player's view of the mirror itself. Since it's updated in realtime, each frame takes another image of the previous image, zoomed out a bit based on the camera distance from the mirror. This stacks up some number of reflection images on top of each other, which will converge to something like this when the player stops moving.

The original bug looked a bit different from this where the mirror was a smaller recursive zoomed in copy of the mirror itself where the mirror-in-mirror converged to a tiny point in the middle of the screen. Unfortunately, I never saved a screenshot of the original problem and I can't seem to get the code back into a state that looks like that. Like this.

Here is what happens when I make the same "mistake" but also draw the player model in the reflection image. Rather than the mirror, we see the inside of the player model's head, since that's where the "camera" is. It looks like someone stretched the skin from a man's head over a canvas and hung it on the wall like a picture. I have no idea what's up with the eyes.


Did you ever try to look at something on your face very closely in a mirror, and you lean in so close that the front of your face goes through the mirror's surface and you're looking through your head? Yeah, I hate it when that happens to me.


Yeah, I know, that's not realistic. You can't see through your face when looking closely into a mirror! In the real world, ... there's no back face culling. You'll see inside your head instead, like this:


If I move a bit closer so that my entire face is through the mirror plane, all I can see is the back of my head. Yeah, that's right. That's the inside surface of my hat. No brain in there!


Okay, what if I draw the player model even when reflections aren't enabled? Did you ever wonder what it would look like if you had only one eye? And it was inside the center of your head rather than on the surface? And your head was empty? Well, wonder no more, here is what it would look like:

That kind of looks like the inside view of an oversized rubber Halloween mask. Except there are no eye holes cut out. Is that how people feel when inside those big mascot costumes? I tried to remove the eyes so that you can see through the eye holes, but unfortunately the face model is a single mesh using a single texture. That's a shame, it could have made a fun gameplay mode to only allow the player to see through tiny eye holes. Who needs peripheral vision, right?

Friday, October 2, 2020

Building Mirror Reflections

This time my post is not about objects I've added to building interiors. Well, technically that's not true. I have added mirrors to office and house bathrooms, but most of the content isn't about mirror placement because that was a trivial task. This post is about how I implemented mirror reflections, which also required me to finally add a player model.

I started by copying parts of my existing water plane reflection code. This was all oriented in the Z (up) direction, while I needed mirrors oriented in X or Y to place on walls. That required changing all of my code for reflection matrices and the camera frustum to work with different reflection directions, but fortunately I only had to handle the axis aligned cases.

Then I had to deal with the mirror changing the winding direction of all polygons in the scene, which affects the front vs. back face culling tests. I had to hunt down various face direction tests in the building drawing code and invert them in the mirror reflection case. I also had to fix problems with polygon bias direction in some of the passes. At first I didn't quite understand what was going on and fixed it using trial-and-error to flip signs.

The next task was to avoid drawing the other side of the wall behind the mirror. Mirror reflections work by moving the camera to the other side of the mirror and negating the view direction. This effectively puts the reflection camera outside the bathroom looking in through the back side of the mirror. But there's a wall behind the mirror, so the camera will be looking at the other side of the wall! I had to add a custom clip plane at the mirror surface to remove everything behind it, which would have been in front of the back of the mirror for the reflected camera.

Finally, I had to handle the case where multiple mirrors were visible in the same office building bathroom. This produced a reflection of the opposite mirror, which didn't work correctly because the opposite mirror wasn't drawn as it was outside of the player's view frustum. After various failed attempts, I decided to simply limit bathrooms to having a single mirror when reflections were enabled. That's good enough for now.

After all these steps (and more), I finally had it working:

Realtime reflection in a mirror in the men's room.

Unfortunately, it was pretty slow. My first implementation nearly doubled the frame time when a mirror was visible. Fixing this required some combination of selective drawing, object occlusion culling, screen space stencil testing, and visible surface determination. At first I drew the reflection at half screen resolution, which helped. That's why you can see a bit of blurriness if you fullscreen these images.

One of the easiest optimizations was to check if the mirror was in a windowless room, and if so, only draw the building the player is in. None of the other buildings can be seen (unless a window is visible across the hallway, in the reflection of the doorway). Some of the other outdoor scene content can similarly be ignored. This was easy to do, but didn't help very much because I was limited by the fragment shader lighting calculations rather than the vertex shader or OpenGL driver overhead.

Next, I had to determine when a mirror was visible to the player. If it's not visible then there's no reason to create the reflection image. First, it must be within the camera's view frustum. Then I added a check if the player was actually inside the room containing the mirror. That almost worked, except for the case where the player was in the adjacent hallway looking in through an open door. So I included the connected hallway in the set of rooms for which the mirror needs to be drawn. But the hallway could run the entire length of the building, while the mirror is only visible for a small subset of the hall. I added a check for distance to the room/doorway based on the room size and hallway width. That mostly worked, but there were still a few situations when it either drew the mirror unnecessarily, or failed to draw it when some part was visible. My final solution was to trace a number of horizontal rays from the camera to points on the mirror's surface and skip drawing it only if all rays hit a building interior wall. That solution worked pretty well, so I left it at that.

The last optimization was to render only the interior part of the mirror rather than the entire screen. When the player is relatively far from the mirror, this makes a considerable difference. The mirror only occupies a small fraction of the pixels in the images above and below. I used a stencil test for this. The mirror was drawn in the stencil buffer, and the downstream room draw calls all tested the stencil buffer for each pixel/fragment. That optimization was surprisingly simple and effective compared to the ray intersection optimization. With that change in place, I was able to go back to rendering the reflection at full screen resolution.

I also finally added a model for the player. I used whatever human person model is specified first in the config text file. It happens to be the model of an old man. If you look closely, he (we the player?) even casts a shadow on the wall behind him. The player now always casts a proper shadow, even if not in a room with a mirror. The legs of the shadows are even animated when the player walks.

A reflection of the player model in a bathroom mirror that also casts a shadow. Oops, I think this is the women's room because there are no urinals!

But really the player model can be anything specified in the config file. For example, it can be a car. Here I had to fly up toward the ceiling to show off my new "player" model because it's so low to the ground.

The player as a car, reflected in the bathroom mirror. Who says a car can't use the bathroom?

What other fun model can I use? Let me see. How about this one. Can you guess what it is from only its shadow cast on the bathroom floor?

The player's shadow. What do you suppose the player is?

I'm sure you guessed it was a toilet. What else were you expecting, right? After all, we are in a bathroom.

That's okay, I'm beautiful on the inside ... as long as you flush me first.

Next, I added mirrors to bathrooms in houses. This was more difficult because these bathrooms usually have windows that can be seen in the mirror. That means I have to draw the outdoor part of the scene with terrain, vegetation, exteriors of other buildings, etc. This was challenging because I was creating the reflection texture from within the building drawing code by clearing the depth and color buffers before drawing buildings. Some of the outdoor objects that had previously been drawn into the frame buffer were cleared in the process. It wasn't as easy as drawing the reflection to a different buffer (FBO or PBO) because I needed a color buffer, depth buffer, and stencil buffer. I also couldn't easily move the reflection creation to somewhere else in the drawing control flow because it depended on the room lights setup code at the top of the draw function. So far I haven't come up with a good solution to this problem.

In addition, my logic to swap front vs. back faces interfered with the multiple rendering passes used to cut windows and doors into exterior walls, so I had to go back and rework that. Eventually I was able to get some of this to work. Here is a screenshot of a small mirror above the sink in a house bathroom. This one was drawn at full screen resolution.

Small mirror above the bathroom sink. It's on a medicine cabinet and spaced somewhat away from the wall, though it's hard to tell from this angle.

I have 3DWorld drawing window cutouts of the current building so that the exteriors and windows of other buildings can be seen through them in mirror reflections. I don't have the interiors of other buildings or terrain, vegetation, or roads working yet. I'm not sure how to do that in a clean and efficient way. Moving the reflection texture creation out of the building drawing loop and higher in the control flow would partially fix this, but it may be more complexity than I'm willing to add at this time. For now we'll have to avoid looking into the mirror in such a way that an exterior window can be seen.

Also note that bathroom mirrors are only added to interior walls to avoid having them overlap windows cut into exterior walls. I could check for window intersections like I do with some other room objects, but I believe most of them would intersect. This probably wouldn't be worth the trouble. Maybe I should also avoid putting mirrors on walls opposite exterior walls to work around the other problems.

Tuesday, September 15, 2020

Procedural Buildings: Improvements to Interiors

I've continued to improve 3DWorld's procedural building interiors over the past few weeks. I added some new room objects and models, some of them based on suggestions from other people. I'll describe the additions to houses and office buildings, and show some pictures in the approximate order in which I added them.

Houses

Bedrooms were often too large and sparse. One way to use the available space in larger bedrooms is by adding closets against one wall. There are large closets with 4 panels of folding doors, and smaller closets with a single door that opens. Closets can span the entire length/width of a room or only part of it. Closets must be placed to avoid blocking windows, doorways, or access to furniture such as beds.

Here are two screenshots showing a large closet and a small closet. I haven't yet added door handles to large closets.

Bedroom with a large closet in the back.

Bedroom with a small closet in the far corner.

Next I added trim along the edges where walls meet the ceiling and floors. Then I added trim around doors and windows. This makes it easier to tell where the wall and ceiling meet for buildings like the one below that have the same wall and ceiling textures. The screenshot above also shows trim along the walls and door.

House interior with wall trim around floors, ceilings, windows, and doorways.

Note that this trim accounts for a large number of polygons when you add up all the small quads needed, especially around all of the windows. Sure, they're only individual untextured white cubes, but there are more of these in a building than any other object (except for maybe books). This does finally add real 3D geometry for windows, which are cut into the zero width exterior walls using textures. As an optimization, trim is only generated and drawn when the player is very close to a building. Office buildings don't have quite as much trim.

Kitchens needed a bit more work. The kitchen sink was previously only a basin with no faucet. I added a simple two-cube faucet as a placeholder until I find a better model. I also added a dishwasher under the counter next to the sink if there was enough space. The most difficult part was disabling the cabinet doors around the dishwasher and adjusting their positions so that they start and end on either side of the dishwasher with no clipped or small doors.

Kitchen cabinets, counters, sink, dishwasher, and stove. The dishwasher has a shiny metal handle.

I decided that I liked railings better than straight vertical walls for the smaller sets of stairs that appear in houses and some other building types. It took a bit of work to add support for arbitrarily oriented cylinders, but I now have that working. I also added specular color support to the building materials system so that railings reflect light like proper shiny metal objects. You can see this used on the dishwasher handle above as well. This looks much better (and safer) than stairs with no railing at all. Here is an example screenshot, with the railings in beautiful gold.

Simple cylindrical railings have been added to open stairs.

Offices

When I was happy with houses, I moved on to improve office buildings. All those cubicles looked pretty bare. I decided to find a 3D model of a rolling office chair and place one in most cubicles with a random rotation. Right now the chairs are untextured black materials because I couldn't find a free model in a supported format that had proper materials with textures. This doesn't look too bad though, especially considering my chair at work is completely black with little texture.

A large office building room containing cubicles and rotating office chairs.

Adding chairs makes offices look better. But they're not lit very well with a single light in the center of the room. I increased the number of lights for some rooms using an X by Y grid of lights based on room size. Smaller rooms still have a single light, but larger rooms can have a 2x1 or 2x2 array of lights. There may be rooms with more than 2x2, but I haven't come across any yet.

Large offices can now have multiple light sources, usually an array of 2x1 or 2x2.

Desks were too empty, even though some had books on them. I decided to reuse the TV model as a computer monitor to put on some desks. I downloaded several screenshots and used one of my own desktop to create illuminated texture images on some of the monitors. These desktops are a mix of Windows, Linux, and MacOS. Monitors are more common in offices but can also be placed in houses. For now I haven't attempted to make the operating system consistent within a building.

Office desk with a monitor on it, turned on and showing a desktop.

The next step was improving bathrooms. Those individual tall sinks looked fine in residential bathrooms, but larger office bathrooms usually have a single long slab containing multiple sinks. I reused the kitchen sink code with some modifications for these bathrooms. Now the sinks are part of one counter with multiple basins and faucets, as seen below. Also, office bathrooms can have multiple lights as well.

Individual sinks have been replaced with a single long counter with built-in sinks for office bathrooms. They can now also have multiple lights.

I finally found a usable free urinal 3D model to place in the men's restrooms. I even added short walls between the urinals for privacy. Now they look like a proper men's restroom.

The Men's restroom now contains urinals.

I made various other fixes and improvements as well. Some houses have brown wooden front doors instead of white front doors. Straight stairs have walls on the sides or railings to keep people from falling off. The room object placement algorithm has been adjusted again to take into account clearance around objects to prevent the player and AI from getting stuck/blocked. Refrigerators are no longer placed in locations that block windows. Oh, and houses now have a number of bathrooms that scales with the size and number of total rooms in the house.

Friday, August 21, 2020

Procedural Buildings: More Room Details

This post continues my work on procedural room object placement from the previous few posts. I don't have too much new technical content to show this time since most of the work was in the details of room classification, room partitioning, object selection, and model placement. This is easiest shown with images. If you want to see the details, have a look at the 3DWorld buildings code on GitHub.

Here is an overview of the recent changes I've made. Office building bathrooms now have multiple bathroom stalls and sinks. Large office rooms are sometimes divided into rows of cubicles. Some office buildings have illuminated exit signs, and some houses have welcome signs above their doors. I assigned a room in some of the larger houses to be the library. I added kitchen sinks, and cabinets and counters with doors and handles. I added nightstands and dressers to bedrooms. I also finally started implementing interiors for the office buildings within city blocks, which is incomplete and not shown here.

I put a lot of time and effort into populating houses while leaving other types of buildings somewhat neglected. To start off, I decided that having a single toilet and sink in an office building bathroom was too little. We don't want to see the employees lining up in the hallways! These rooms often have a large amount of space, enough to fit several stalls and sinks. Each bathroom above a minimum size is now assigned a row of stalls with toilets and a row of sinks along one or both walls. I even had to add interior room occlusion culling to avoid drawing the hundreds of toilets and sinks in a large office building.

Office building bathroom with three stalls, two sinks, and a trashcan in the back corner. Yes, I need to change the floor from carpet to tile.


Some office buildings contain very large open rooms. It seems odd to place only a single table with chairs in the center of the room, or a pair of desks with chairs along one wall. The building where I work has many of the large rooms filled with rows of cubicles, and offices in the central area of the building. I modified the room population algorithm to divide some of the rooms above a minimum size into multiple rows and columns of cubicles, as many as could be fit while allowing all of them to be accessible through the aisles. Cubicles near windows have shorter walls to let in more sunlight.

Large office room divided into cubicles, some of them against the windows.


Very large office room with a center row of cubicles. Maybe it should have more than one light?


What else do buildings have? How about signs, both on the interior and the exterior. I added illuminated "Exit" signs, "Women" and "Men" restroom signs, and "Welcome" signs to some houses. Exit signs are visible in dark rooms and can be either red or green. I plan to add more types of signs to the exterior walls and roofs of buildings eventually.

This office has a green illuminated exit sign above the door. Others have red exit signs.


Office buildings look much more interesting now, though there's still plenty of work to be done. It's time to move back to houses. I really like the look of bookcases filled with books, and I put quite a bit of time into this feature. Up until this point, a room could contain at most one of these. I added a new room of type "library" to upper floors of houses that have a table with chairs and as many as five bookcases. The bookcases are currently all randomly sized and placed. Maybe later I'll go back and make their sizes and spacing more consistent with an organized home library.

Some houses have an upper floor library, basically a room with lots of books on shelves.


Kitchens with only a table, chairs, refrigerator, and stove seem too bare. Most kitchens have counters with cabinets above and below. Also, don't forget the kitchen sink! I added code to attempt to place counters and cabinets around the walls of the kitchen wherever there's space. Cabinets have upper and lower rows with many doors, each with a handle. Everything is formed from simple cubes, which makes it a lot easier to create these objects and fit them into the gaps in the room. Then I choose a location to cut a cubic hole into the counter to make the bowl of the kitchen sink. Sorry, no faucet yet.

A kitchen with table, refrigerator, stove, sink, counters, and cabinets. The sink is the hole in the far counter to the right of the stove.


Bedrooms were next. At this point they only contained a bed and possibly a bookshelf and/or trashcan. Bedrooms are the most common room in a house, accounting for nearly half the total rooms. Many of them are large and have plenty of space for additional furniture. I placed dressers and nightstands in bedrooms using code similar to kitchen cabinets. Each object has between two and three rows of drawers, with 2-4 drawers in each row for dressers.

I used the same rough wood texture as most of the other furniture. At some point I'll need to go back and add a larger variety of high quality wood textures that vary by house or room. Or at least vary the color and texture scale a bit.

Here are some example screenshots of bedrooms.

Bedroom with bed, dresser, and nightstand. These use similar code to kitchen cabinets.


Bedroom with bed, dresser, nightstand, bookshelf, and picture


A different bedroom with bed, dresser, and nightstand. The dresser has multiple drawer sizes.


I also attempted to add potted plants to living and dining rooms. The pots looked fine, but the plant leaves didn't work out well. I tried to reuse my procedural plant generation code that creates landscape vegetation, which was using a different shader from building interiors. Building shaders don't yet support full alpha testing and alpha blending. It's easy to enable, but will result in early Z (depth) testing getting disabled, which hurts the frame rate. Buildings have very high depth complexity when considering all of the walls and ceilings, and the fragment shader is heavy with lighting and shadow calculations.

After adding all of these new room objects, I found that it was easier for the player to get stuck. Some rooms had furniture placed close enough together that the player couldn't cross from one side to the other. My solution was to ensure there was a player diameter of clearance in front of most objects, meaning the side facing away from the nearest wall. This seemed to work very well. I can no longer find a room that can't be crossed. I wonder if the AI people can also navigate these rooms?