Monday, December 16, 2019

Procedural City: Stairs, Elevators, and Room Lights for Buildings

I've made lots of progress on building interiors since the last post two weeks ago. I started working on adding stairs and elevators to connect the floors together, but then I got distracted trying to add lights to room ceilings to improve the visuals. I was able to complete stairs, and they look much better when lit with shadows. I didn't get very far with elevators yet. The placement code is written, and the basic drawing code for elevator shafts is written, but I haven't gotten to drawing elevator interiors and details.

I'm going to show what I have at this point because I'll be flying to PA next weekend to visit my parents for Christmas and won't be able to work on 3DWorld for a few weeks. I can't really do graphics development on my old work laptop.


Room Lights and Shadows

It wasn't too difficult to get lighting and shadows to work for building interiors by using the existing lighting system I had in place for city blocks, which itself was adapted from fixed (non-tiled) terrain lighting for gameplay mode. I used the same lighting settings from the city config file, which is currently set to up to 1000 light sources and 40 shadowed spotlights. That was enough for city blocks, but is somewhat short of the number of lights and shadows needed inside buildings. Well, at least it's enough for the interior when the player is inside a building. It doesn't work as well when the player is outside looking in through the windows.

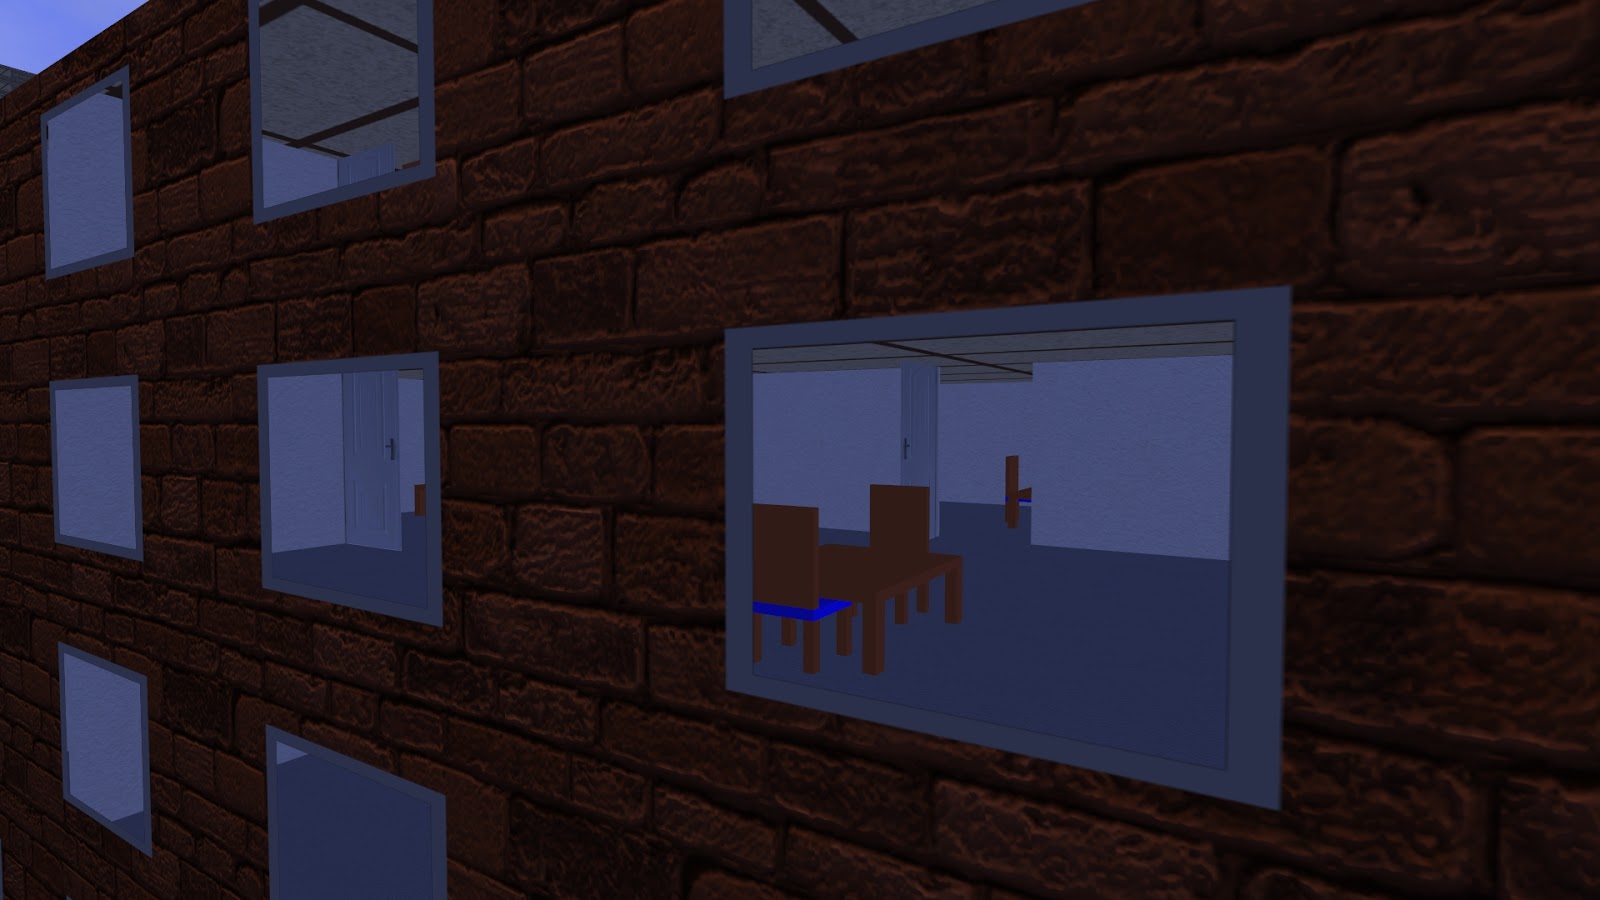
A rectangular light is placed in the center of the ceiling of each room. 50% of the lights are on, based on a random number. Rooms with stairs and elevators have a higher probability that the light is lit. These lights illuminate their respective rooms and sometimes the light extends into adjacent rooms through open doors. Here is a screenshot of a lit room with a table and some chairs, where everything is casting shadows. I use a 9-tap percentage closer filter with Poisson sampling to achieve smooth shadow outlines.

Room with a table and chairs, lit by an overhead light with soft shadows.

If you look closely you'll notice that the ceiling isn't very well lit. That's because I've modeled this light source as a spotlight pointing down. It's a bit misleading drawing the light as a rectangular cube on the ceiling. The problem is that 3DWorld doesn't support area light sources that have shadows. I only have shadowed spotlights and point lights. Point lights need six shadow maps, one for each cube face, which is a bit too much for these scenes. Spotlights can use a single shadow map (shadow plane), but the trade-off is that they're limited to somewhat less than a 180 degree (hemisphere) field of view. That means the light can only point downward and can't illuminate the ceiling.

My fix is to add a second light that has a wider field of view. To save on performance, this second light is smaller in radius and doesn't use a shadow map. I can't set it to more than 180 degrees because it will shine on the bottom surfaces of any objects on the floor above. But I can set it to right around 180 degrees so that it at least illuminates the ceiling somewhat. I need to be careful to make it small enough that it doesn't light the walls of adjacent rooms. That's why the light on the upper walls and the ceiling is somewhat dim. Well, the middle part of the wall is also light by both lights.

There's no real indirect lighting yet. I do have code to calculate the average ambient lighting in each room as a function of room light on/off state and incident sun/moon light through the windows, normalized to the room's surface area. So far I haven't figured out how to use this properly. The shaders I'm using don't have any easy/efficient way to set per-object/room material properties. So I use a simple constant ambient lighting term as a hack to avoid having the unlit surfaces appear black. It works well enough for now, but it's likely something I'll have to get back to later. At least the ambient lighting varies with the time of day so that it's darker at night.

Here's another screenshot showing some connected rooms with multiple lights and objects. This is the sort of geometry generated in buildings formed from overlapping cubes. The wall placement algorithm can't quite figure these out because of the irregular floorplans produced by the overlaps. It ends up with walls that end in the middle of rooms. It's not entirely wrong - I've seen offices with partial walls like this. It's not what I was intending to produce though. Oh well, there are more important problems that I need to fix, so I'll have to live with this for now. Just one more minor todo item for my list. At least this problem is pretty rare. This is the only building near the starting location where I've seen it.

Multiple rooms in an open floorplan with tables and chairs, lit with shadows.

While it was relatively easy to make room lights work, it was quite difficult to make them work efficiently. The first major problem to solve was the interaction between building lights and city lights such as streetlights and car headlights. I was originally combining them both together into a single 2D lighting grid. This lead to poor performance because the different sets of lights had very different scales and densities. Streetlights were spread out over many city blocks far into the distance. Each light covered the area the size of a small building. In contrast, room lights are much smaller and placed very densely. In particular, they're vertically stacked on each floor. It's not uncommon to have several hundred of them, maybe even a thousand, inside a single city block. This same area is shared by no more than a dozen streetlights. The uniform grid structure didn't perform well when the distribution of lights was this nonuniform, where all of the nearby building lights were crammed into a handful of grid cells. In addition, cities and buildings were accessing each other's lights when they didn't need to.

The fix was to split out the lights into two different systems, one for city streets and the other for building interiors. This took considerable time and effort. There were many global functions and variables that had to be moved into their respective city and building manager classes. Of course, it's good to remove global variables. This change resulted in both cleaner (though more complex) code and much faster draw times. Frame rates more than doubled in some of the worse cases. Now the framerate was usually above 30 FPS. That's an improvement, but still not good enough.

The next problem to tackle was related to overdraw and fill rate. The GPU's fragment shader has a ton of work to do with all of these light sources. I'm using a 2D spatial grid data structure to limit the number of light sources contributing to each pixel, but the room lights still overlap a lot in 3D space. Walls and floors block most of the actual light, which is something the shader has to figure out using shadow maps. If you were to stand on the bottom floor of a 20 story building and look up, there would be 20 ceilings drawn above you. Ceilings are added to the list of vertices/quads to draw starting with the first floor and working upwards. This means that the first ceiling will be drawn first and will occlude the others. However, the floors are ordered the same way, so a player standing on the top floor looking down would have to wait until the fragment shader drew all 20 floors. That's terrible for the frame rate! (I guess I should go back and reorder floors. Update: I fixed it but it didn't seem to help.) Even if I can order everything properly, there are still the walls, doors, and other objects to draw.

The solution here is to do a depth pre-pass before the main draw pass to pre-populate the depth buffer with z-values and ensure that each fragment/screen pixel is drawn at most once. This makes a huge difference, nearly halving frame times (again) in some worse case view angles. It did take a lot of work though. I had to add a lot of complexity to select and draw individual tiles of buildings that were near the player. Together these two optimizations made enough of an improvement that walking around inside of buildings ran consistently above 60 FPS, and in most cases above 100 FPS.


Stairs and Elevators

This next image shows a set of stairs that was placed between two floors. Stairwells are generated as vertical slices in the floorplans that extend through all stories of the building. They're cut into the ceilings and floors of buildings using constructive solid geometry operations. Each part of a building has a set of stairs, except for houses, which only have one set of stairs per house. For each set of stairs, a room is selected where stairs can fit in the longer dimension of the room. They're placed so that none of the interior or exterior doors are blocked. Lights are placed only if they don't overlap stairs. Stairs ensure that buildings are fully connected across all floors.

Stairs between building levels, lit with shadows.

Some office buildings have elevators as well as stairs. Elevators are only added to multi-part buildings that already have stairs placed. [To comply with fire code, all buildings must have at least one set of stairs.] Elevators are incomplete at this stage. I have the elevator shafts cut into the ceilings and floors, the wall textured exteriors, and wood panel interiors. The wood paneling is really supposed to only be for the elevator cars, which don't exist yet. I haven't added elevators doors or buttons yet either. I do plan to complete them later, and maybe even add working elevators that the player can use. Here is a screenshot of an elevator tucked into the corner of a building. Elevators can also be added to central hallways of office buildings.

An office building room with an elevator in the corner. Maybe I should make it larger?

Drawing Building Exteriors

The previous screenshots showed buildings viewed from inside. That's actually the easier case to handle. Floors and ceilings are opaque and solid, except for cutouts where stairs and elevators are placed. That means that in most cases, the lights on floors above and below can be ignored because the player can't see them. The exception is rooms that have stairs, in which case we need to include the lights from the rooms one floor below and above as well. This is needed to allow light to shine up or down the stairs. This works well most of the time. There are rare cases when light should be visible from a room on a floor above or below that's adjacent to the stairs. I'm not sure if I'll fix this or not. These optimizations allow the majority of building lights to be excluded when the player is indoors, which reduces draw time considerably.

When viewing buildings from outside, occlusion culling doesn't work as well. It's not easy to determine which room lights are visible. The set of possibly visible lights for a single building can range in the hundreds, which makes performance (frame rate) suffer. I've written an algorithm that tries to approximate which lights are the most visible and uses a priority system to assign shadows to the 40 most influential lights. It works in most cases, but not always.

There are several optimizations that can be made here, which work well in most cases. (These optimizations are in addition to the simple and obvious distance based light filtering and view frustum/visibility culling.) First, only lights in rooms that have windows to the side of the building facing the player are drawn. Rooms behind them are usually mostly occluded by walls and are of less importance. This causes some drawing artifacts though, most notably when a back room's lights shine through a doorway into a front room with no lights on that would otherwise be dark. To help with this problem, this optimization is disabled for building floors that are on the level of the player. This means that if a player looks directly into a window from outside, all lights on that floor will be drawn.

The second optimization is related to viewing angle. If the player is close to a building, then they're unlikely to be able to see anything significant in rooms many floors above or below their position. This is because the exterior building walls block the line of sight through the windows. Fortunately, I haven't added interiors to all-glass buildings, so there's a good amount of occlusion. I use a test of vertical distance divided by horizontal distance from the light source with a viewing angle threshold. This optimization has a minor impact on visual quality but isn't very noticeable to the player compared to the previous optimization.

Finally, the third optimization is to disable the small unshadowed lights that illuminate the ceilings when the player is outside. These lights cost about a third of the total lighting time, but provide only a small fraction of the visible light in the rooms. This can be seen in the screenshot below, where the ceilings are darker. I might add a config file option to always enable these smaller lights later if it seems to be needed.

View of stairs, tables, and chairs through the building windows. Many of the rooms have their lights turned on.

One great thing is that the room lights are all dynamic. I could probably get away with static lights, but I want to allow the player to turn on and off room lights in the future. Or maybe lights can go on and off randomly as time advances to simulate people using the rooms. I guess at some point I need to add people to these buildings as well. I don't think it takes much frame time to redraw the small shadow maps each frame anyway.

Here is a particularly large office building, one of those types that are formed by gluing together different overlapping cube sections. Actually, this is the exterior of that building with the odd half walls shown in the second image from the top. It's 20 stories tall and has 27 rooms in the floorplan of the main section, for around 500 total rooms. If half of them are lit, that would be 250 lights just in this one building! This is the largest building in the starting area around the player and the one that causes the lowest framerate. I was able to improve the framerate from a low of 38 FPS to a new low of 74 FPS using a variety of optimizations. At this point I'm pretty happy with the 74 FPS. Buildings are now taking similar draw times compared to grass. For reference, this view runs at 134 FPS with building interior lighting disabled. Also, the smaller buildings can be drawn at over 100 FPS.

Looking into the windows of a large 20 story office building. Room interiors are lit.

Here is a wireframe view showing just how many walls, ceilings, floors, doors, tables, chairs, stairs, and lights it has. There are thousands of objects placed in this one (out of 14,000) building. It probably has a thousand stairs alone. However, most of  the frame time is determined by the number of lights and shadow maps used. Even though the building is drawn once for each shadow map, that doesn't contribute very much to the total frame time. I should be able to add several times as many room objects without too much of a framerate hit. I guess we'll see.

Wireframe view of the previous screenshot showing the large number of placed objects and lights in this building.

Unfortunately, room lights don't match up with lit vs. dark windows at night. Rooms are lit on the CPU side and statically cached in VBOs. Windows are lit dynamically on the GPU inside the fragment shaders by using the window IDs as random number seeds to determine which windows are lit and which are dark. The GPU doesn't even know which windows along a building exterior wall belong to the same room. I have no idea how to solve this problem. It's not so bad though, at least the window lights fade out when the player approaches the building, making the problem less obvious.

What's next? I have several items on my todo list. I need to finish elevators. I would like to add some better form of indirect lighting for rooms using per-room or per-object ambient values, or something better. I also need to revisit some of the light occlusion culling methods to see if I can come up with something that has a better performance vs. quality trade-off. Finally, I need to place more smaller detail objects into rooms.

As usual, all of the code can be found on my 3DWorld GitHub project here and here.

Wednesday, December 4, 2019

Procedural City: More Building Interiors

I started discussing generation of procedural building interiors in the previous post. I've since fixed various problems so that interior walls and doorways are correct and realistic in most cases. Some of the changes even required me to go back and redesign the building exterior geometry. For example, doors are placed after interior walls now so that they don't open up to the end of a wall. I'm also continuing to work on building interior geometry. I've made a lot of progress over the past few weeks, but there's plenty more work to be done before I'm happy with it.


Walls

I fixed most of the problems with wall placement. Walls rarely end in the middle of windows now. If this happens, the wall placement will be discarded and a new random placement selected. It can still occur for small sections of building walls (for example the interior of a U-shaped building) that have been clipped in a way that a partial window needed to be dropped. In this case, the other windows are spaced further apart to fill in the gap. This part of window assignment is done later in the drawing setup stage where the vertex data is extracted and stored. The wall generation algorithm doesn't know about this extra spacing of windows because it's too difficult to detect it this early in the flow. It uses the wrong window spacing for checking that a wall ends at a window.

I fixed the misalignment of walls at T-junctions where two adjacent parts of the building place walls that intersect each other. In addition, there was a similar case where two parts try to place walls at the same location between them and the doorway positions don't line up. [Where here "part" means a single geometric primitive that is attached to other primitives to form a building, which in the case of houses is always a cube.] This resulted in either a partial narrow doorway or no opening at all. Now the placement of walls and doors between parts is done in a separate step after all parts have placed their own interior walls. This guarantees that all walls that could intersect the part boundary walls are known and can be considered when placing the final set of walls.

Finally, I improved the placement of doorways. Long walls now have a chance of getting additional doorways that improve room connectivity, adding loops and hallways. A doorway can be placed if it  connects two rooms that were previously not connected by a doorway. I believe the current algorithm should guarantee that every story of the building is fully connected (walkable) so that every room can be reached from every other room through some path. I can't quite prove this, but so far I haven't seen any disconnected rooms in the dozens of buildings I've inspected. Larger rooms are often connected on all four sides to adjacent rooms.


Interior Doors

I added placeholder 2D quads (rectangles) representing doors between interior rooms of buildings. They don't have any width right now. In fact a single door is actually stretched to the entire height of the building, where the door texture is repeated for each story. The doors are all open for now. At some point I might have randomly closed doors, or even allow the player to open and close doors with an action key.

I might have to split up the doors into separate quads for each story/floor. On the other hand, maybe it's okay to use a single tall quad. The player can't see any floor other than the one they're on, so they won't know that they're opening all of the doors on each floor at the same time. Of course this will change when I add stairs (more on this in the next post).


Interior Objects

I started placing simple objects in rooms. At first it was just one cube per room, but now I have tables with up to four chairs around each of them. These are placed at random locations within most of the rooms with constraints that they stay within the room bounds and don't block any doorways. I haven't added textures yet, so all tables and chairs are unlit solid colors. The geometry is procedurally generated and very simple, consisting only of cubes.

There are around 600K total rooms in the secondary city buildings. That would translate to around 500K tables and 1M chairs. That's too much geometry to store in memory, so I've created a system to dynamically generate interior room geometry for nearby buildings and delete it when the player moves away from the buildings. This limits the geometry to only a few hundred out of 14K buildings at a time. I'm only storing cubes tagged with metadata for each object on the CPU, which is also needed for player collision detection (future work). Vertex data for each object is sent to the GPU when the buildings are visible but is not stored on the CPU side. This data is freed when buildings disappear from view.

Here is a screenshot of a building with placed room geometry. The camera is outside looking into a room. You can see a table, some chairs, walls, and two doors in the background.

Large house with doors and a table with chairs placed into most of the rooms, looking through the window from outside.

Interior Windows

I spent quite some time trying to get interior windows to work right. The exterior walls of buildings are zero width with brick/stone textures on the outside and plaster textures on the inside. This is done by drawing the front and back faces in two passes using different textures. When the player is outside the building looking in, any face viewed through a window is an interior face and all other faces are exterior. (Note that the previous post still showed brick/stone textures on the insides of buildings.) The entire wall of each building face is a single quad. Windows are cut into it using a depth pre-pass when viewed from the outside and a stencil test when viewed from the inside. I had to implement the inside view a different way because the depth test approach caused artifacts when looking through multiple levels of windows, which wasn't possible until I added interior windows. For example, when looking from the inside of a building out the window into the window of the neighboring building.

The approach I used works because the player can only be inside one building at a time. That building is drawn first using different OpenGL draw modes from the other buildings. Then the other building windows and walls are drawn. It only takes, let me count ... 8 draw passes using different states to get this right.

Here is a screenshot of a room with table and chairs, this time viewed from inside. You can look out the windows and see into other buildings, which also have tables and chairs. I haven't added window panes and frames to interior windows yet. It's quite tricky to get that extra (9th?) pass in there. I also haven't figured out how to let the player look through more than two buildings (a path of interior => exterior => interior windows).

Inside a room of a house with a door, table, and chairs, looking outside at other buildings.

Okay, that solid color geometry and lack of directional lighting on the interior just looks too bad. After adding that screenshot above, I went into the code and enabled 20% diffuse lighting. It's not actually correct, because the sun doesn't shine into the rooms. What I really need is indirect lighting, or light fixtures on the ceilings with shadows. I have no idea how to add either of those for this many buildings in realtime, so that will have to wait until later. I could probably add up to a thousand static spotlights or point lights on the ceilings, but I can't add the shadows. I expect unshadowed room lights to look worse than no lights at all because you would see them shining through walls. I think this lighting looks a bit better than in the previous screenshot even if it's wrong. I also added a simple wood texture for the tables and chairs. Yes, even the chair seats.

Room with some diffuse interior lighting and tables with chairs using a wood texture.

Another view of a room interior.

After adding this screenshot, I went back and added proper support for multiple interior object textures. Now the seat cushions use a ... marble texture? I guess you'll have to wait until the next post to see them though. I can't go using all of my good screenshots on this post.

There's one more problem with these windows. This trick doesn't work when looking out a window into a different window of the same building.This can happen for L, T, H, and U-shaped buildings when the player is in one wing looking across a courtyard at another. The problem here is that the view ray will pass through an interior window, then an exterior window, then another interior window. There's no way to draw both interior windows before the exterior window without splitting the building into two parts that are drawn in different passes. It's the same limitation as alpha with blending. I'm not tracking enough info to draw individual parts of a building at this time. So instead I draw the exterior walls into the stencil buffer to remove the interior windows that look out at the exterior of the other part of the building.

Here is a wireframe view of the edge of the city showing just how much geometry there currently is. The tables and chairs are easy to see. The grass, of course, is the densest and still takes the most draw time. Adding building interior geometry only dropped the framerate from 125 FPS to 120 FPS.

Wireframe view of the edge of the procedural city showing all of the building walls, ceilings, tables, and chairs.

That's all for now. The next step is to connect floors together vertically using stairs and elevators. I've already started working on stairs. It seems like a fun project. There are lots of things that can go wrong, so this step may require going back and rewriting other parts of building generation again.

Friday, November 29, 2019

Procedural City: Building Roofs

This is a shorter post that was originally split off the longer "procedural city update" post I was working on. Let's get back to the house roofs. I want to work on building interiors, but the roofs aren't quite right and don't have enough variety. They're intended to be simple to generate and fast to draw. Most small house types had simple sloped roof sections on each part of the building. Since 3DWorld can currently only generate rectangular, L-shaped, and T-shaped houses, there are either one or two rectangular parts to the house.The roof needs to look correct and interesting for all of these cases.

Here is a list with descriptions of some of the common house roof types. Flat roofs aren't too interesting, so I won't discuss them here. I'll leave them for larger buildings. I was originally adding only gabled roofs to small 1-2 part houses. I recently added hipped and half-hipped roofs into the mix (randomly selected). It was easy to add these roof types to simple rectangular houses, but adding them to multi-part houses proved to be more difficult than I expected. The two different parts of the houses can be different widths and different heights, which makes the math for lining up the roof triangles and quads complex. It took many iterations to get a hipped roof to line up with another roof section that had a different width and peak height. There are quite a few special cases where sections of roof need to be clipped or extended so that they join properly with no holes or triangles that stick out. In addition, I need to make sure the roof from one part doesn't intersect the living area of the other part. This wasn't a problem until I started adding building interiors, in which case it's obvious if the roof extends into, say, a bedroom.

Here are some examples of two part houses and what their roofs look like. There are maybe a dozen different pairs of roof types/intersections. Most of them look correct, but a few of them still look odd. For example, some parts have a roof on each side that end at a horizontal line that would need a gutter between the sections as in the first screenshot. I'm not sure if I'll go back and fix them or not.


Low house with relatively flat hipped and gabled roof sections.

L-shaped house with hipped and half hipped roof. The roof line consists of complex geometry and angles that were difficult to get right.

House with two gabled roof sections intersecting at a T-junction.

Large house with low hipped roof on taller section and gabled roof on shorter section.

L-Shaped house with gabled roof intersecting at a T-junction and a smaller, lower porch roof in the back.

There are plenty of other house roof styles out there. I'm considering adding more of them, but it will probably have to wait until I've made more progress with building interiors.

I might have to go back and improve the variety of office building roof types later as well. Right now there are only two types: flat and beveled edges. This image shows two buildings with flat tops and beveled edges.

Office buildings with roofs that have flat tops and beveled edges.

On a somewhat related note, I added glowing colored lights to those antennas on the tops of tall buildings that appear at night. I think these are supposed to keep planes and helicopters from crashing into them. I wonder if that means I need to add helicopters in the sky above the cities as well?

Night time city showing colored lights on the tall building antennas.

Friday, November 15, 2019

Procedural City: Building Interiors

I finally started working on generating interiors for 3DWorld's procedural city buildings. This has been on my todo list for awhile but I wasn't able to start working on it because there were some previously unsolved problems. The most important problem was determining how the player would actually view building interiors, given that existing buildings have fully opaque exteriors with fake windows and doors drawn on top as decals. There's no point in even generating interiors if they can't be seen. I considered several possible approaches:
  • Let the player fly through buildings to see their interiors. (There's already a key/mode that disables collision detection and allows for flight.)
  • Add a key/mode that will disable drawing the exterior walls of nearby buildings so that the interior becomes visible.
  • Allow the player to open building doors and enter (somehow).
  • Make windows transparent so that the player can see the interiors through the windows.
The first two approaches are the easiest, but they're not very realistic. I want to show the interiors in a natural way that makes the buildings look more real. Allowing players to open doors seems like a lot of work, especially since I would have to implement collision detection with building interiors. So I decided to try that last approach, making windows transparent. An additional advantage is that the windows should appear to be more real/3D rather than a simple texture overlay. While I thought this would be easy, it turned out to be quite difficult. In hindsight, I think adding collision detection for the interior would have been much easier.


Windows

The first task was to cut holes into the exterior walls for real transparent windows. I began with the smaller secondary houses and buildings because they already have windows and doors applied as a separate texture layer. Well, office buildings actually have doors now, but they're placed better in houses and smaller buildings. These generated windows look too simple and ugly and need to be replaced anyway. All I needed was a way to cut square holes into the brick and concrete block walls.

It turns out that this isn't so simple. The obvious solution is to generate quads (rectangles) for each window and subtract them from the walls using CSG (constructive solid geometry) operations. I already have this code from the ground mode collision cube framework. Okay, but how many windows are there? Let's see. There are about 14,000 total buildings. Each one has some number of sides, at least 6 on average. Some of the buildings are tall, but some are small houses, so there are maybe 4 floors on average. Each wall seems to have an average of 8 windows (skewed by the large buildings). So that would give us 14K*6*4*8 = 2.7M window quads, or 5.4M triangles (1 quad = 2 triangles). And that's just the window panes themselves. We also need frames to make them look nice, and all the wall geometry around the windows. That's ... quite a lot of geometry, even with these crude estimates. How many triangles is it exactly? I don't know, I didn't implement it this way. I can't imagine the generation times, draw times, and memory usage would be good!

We need to use a different approach. Opaque windows are currently drawn as repeating textures that cover each wall of the building that's intended to have windows. The same technique can be used here to mask off areas of the walls to not draw, then draw windows and frames in additional passes later. This took quite awhile to figure out. I wasn't able to get anything working that allowed the player to see into the front side windows, through the building interior, and out the back side windows. The best I was able to do was to cut out the windows from only the front facing walls of the buildings. That's probably good enough, considering walls will generally block the view later when I add them in. The steps/draw passes I used are:
  1. Draw building interiors because they're not affected by windows (more on this later).
  2. Draw back facing walls of buildings (for fragments not blocked by an interior wall). Walls are drawn as two sided surfaces so the backs are still visible.
  3. Draw window panes with depth write only (no color writing).
  4. Draw front faces of buildings. Any fragments/pixels that fail the depth test from the previous pass are not drawn. This is what produces the window holes.
  5. Draw window panes + frames with dept test set to less-than-or-equal to fill the window holes.
If you're interested in the details you can find the code on GitHub here.

This black magic allows 3DWorld to draw walls, window holes, and frames with only a few hundred thousand quads rather many millions of them. It's not perfect. For example, there are some non-anti-aliased edges on the window frames, and things get messed up if the player flies through the windows, but it's good enough for now.

Here is an early screenshot showing buildings with windows cut into the exterior walls but before interior walls were added.

Large house with transparent window rectangles cut into the concrete block exterior, showing interior floors and ceilings.

Many buildings with window cutouts. There are too many windows across all of the buildings to use real geometry.

Walls, Ceilings, and Floors

The next step is to draw the basic building interiors: walls, ceilings, and floors. I've decided to only add these to Manhattan buildings formed from combining adjacent and intersecting cubes. This includes all houses and most of the smaller office buildings in the secondary city. These simpler types of buildings can be filled with Manhattan interiors and is a good place to start.

Ceilings and floors are the easiest. There's one of these for each story of the building. Ceilings and floors together form the separators between the different stories of the building. The first separator has only a floor and the last one has only a ceiling. [There are no ceilings in the attics of houses because there are no windows through which the player can see them.] These are added separately for each cube of the building's footprint where the number of stories is determined from the cube's height. At this point I haven't added any cutouts for stairs or elevators.

Walls are more difficult because they require procedural generation for placement and cutouts for doorways. I decided that all stories can have the same floorplan, which makes generation much easier. Walls can extend the entire height of the building cube, through all floors, greatly reducing the number of quads needed for drawing. This brings the number of walls down to a reasonable number so that I can generate and draw them all up front. Once I have enough details I'll have to start batching the generation and drawing by tile to spread the time out over many frames.

Walls are placed randomly one at a time into each cube of the building. Any walls that extend to an interior face of the cube where two parts of the building meet are converted to T-junctions. I had to spend many hours removing all of the interior parts of the exterior brick/stone walls so that they don't intersect with the interior plaster walls in strange ways. Each cube is recursively subdivided with a randomly placed wall, generally in the longest dimension, until the resulting space is below a certain user-configurable size. This forms individual rooms. Then I go back and remove sections from the walls to make open doorways that connect the rooms together. The resulting geometry is somewhat maze-like and not exactly representative of a real building. However, it's hard to tell by looking at it from outside through the windows. It should at least be the case that all rooms are connected together in any given floor.

There is the occasional misplaced wall that I can't figure out how to fix. Sometimes walls end in the middle of a window. It's difficult to prevent this at this early stage because window positions haven't been generated yet. I think it should be possible to calculate window locations at this point int he generation though, and I'm working on solving it. Sometimes doorways are cut too close to T-junctions so that a wall ends in the middle of the doorway. This isn't easy to fix because the individual cubes don't yet have a way to access the walls placed by their neighbors. I think I need to add cubes at wall end point and check for them when placing later walls. This is still a work in progress, but it's a good start. Now I need to place some furniture into the rooms!

Here are some buildings with interiors added. I didn't add too many walls yet. I think I need to find some better wall placement algorithm that divides interior space in a more interesting way. There also isn't any direct lighting for interiors as they're generally always in shadow. At this point I only have ambient lighting, though at some point I may add some sort of room lights. I'm not sure how to add the thousands of lights that I need for nearby buildings.

Buildings with some (sparse) interior walls dividing internal space into rooms.

More buildings with interior walls, ceilings, and floors.

After writing the text of this post I went back and attempted to generate a more regular building floorplan for rectangular office buildings consisting of a central hallway along the longer dimension with rows of rooms on each side connected by single doorways. I think it will be easier to place furniture and other items in rooms like this because the dimensions are regular and known. I suppose this is more realistic as well, though a bit too simple for a large building.


Rectangular office building with rows of rooms on each side of a central hallway.

Drawing Performance

Let me go off on a tangent about draw times. You can skip this if you're only interested in the procedural generation part. The original idea was to generate and draw interiors for only the visible nearby buildings. It turned out that generation time was only about 200ms, and draw time wasn't much affected by visibility culling, so I ended up generating and drawing them all. Once I add more interior geometry I'll likely have to go back and change the way this works.

One more side note. I find it interesting that performing view frustum (visibility) culling on the CPU on buildings doesn't help much. The GPU is very fast at drawing all that geometry. It helps somewhat when the buildings are mostly off-screen, but it actually hurts when the player is outside the city looking into it because the culling doesn't reduce the number of shapes that need to be drawn. There's some CPU runtime overhead for doing the culling that isn't helping to reduce draw time. This is actually the worst case, so if we want to optimize for worst case framerate it's better to disable view frustum culling.

With this rendering system I get around 140 FPS (frames per second) without interiors and 125 FPS with them in the default view (where the player spawns). This view is at the edge of the city looking away from it. You might think that this would be an easy case, but the framerate doesn't drop if I turn around to look at the city center. There are two reasons. First, I'm sending all geometry to GPU vertex pipeline each frame. The GPU does a good job of culling but it's generally pretty fast about handling buildings. Second, buildings aren't the slow part, grass is. If I disable grass the framerate increases to 260 FPS. Grass isn't drawn where buildings are placed. This means that if I'm looking at buildings, then I'm not looking at dense grass. If I'm looking from the city outward where there are few buildings, then what I see is a huge field of grass. The framerate is actually a bit lower in that case.


Other Changes and Future Work

I made a few additional changes to improve buildings in the process of adding interiors:
  • Added a cross-shaped building type/template.
  • Removed windows that were partially occluded by sloped house roofs.
  • Removed partial windows that were clipped by the other sides of a building.
  • Buildings are now an exact number of floors and no longer have floors of different spacing in different parts.
  • Building exteriors no longer have intersecting geometry that causes problems with z-fighting.
  • Fixed incorrect house brick texture alignment on roof triangles.
There are also a few unfixed problems, and some new problems that need to be dealt with later:
  • Windows are still drawn behind small structures such as porch roofs that partially block them.
  • Interior walls can end at windows so that the wall edge is seen through the window. [I think I know how to fix this one.]
  • Interior walls can end in the middle of doorways in the random maze floorplans.
  • Some rooms are odd sizes/aspect ratios or simply too large.
  • Players can't see completely through buildings (back facing windows aren't cut out of exterior walls, making them opaque).
  • Building interior lighting is flat and uninteresting.
  • No furniture or other interior details!

Monday, October 21, 2019

Procedural City Update

It's been a few months since I posted something to the 3DWorld blog. I've been busy with various other things and most of the work I've done on 3DWorld has been optimizations, bug fixes, and cleanup. I've made various minor improvements to my procedural city in the past few months:
  • Grass is now properly scaled to match buildings (it was previously much too large)
  • Added chimneys to some of the generated houses
  • Secondary buildings now show up in overhead map view
  • Overhead map view optimizations (~2x faster)
  • Added doors to some building types (cube based buildings for now) 
  • Pedestrian destinations now include parked cars in parking lots (in addition to buildings)
  • Fixes/improvements to tunnel end point placement to reduce the oversized facades
  • Bug fixes to building and tunnel ray casting/queries and collision detection
I'll provide more detailed descriptions of some of these items and a few screenshots showing what I've done.


Grass Scale

the original grass scale was way off. Grass blades were half the height of the door in the house below. This was because I was using the same grass scale/size for both ground and tiled terrain mode, even though distance scales are different in these modes. The grass looked bad enough that I disabled it when capturing most of my city screenshots in previous blog posts. It was time to fix that.

I've finally scaled the grass 4x smaller, and it looks much better. I suppose it's still a bit too large. I think it's good enough though. Smaller grass comes at a somewhat reduced framerate because there are more blades drawn. Technically, the level of detail (LOD) falloff scales as well, so there should be the same number of blades. In reality the LOD is determined based on the distance between the camera/player and the closest point of the grass block within a tile. This means that LOD can only be applied per grass block and the nearest blocks must all be the highest detail. I lose some fine LOD control due to the coarse granularity of the LOD blocks. If I make the grass much smaller (denser), the performance will be unacceptable.

Here's a screenshot showing the current quarter length grass height in tiled terrain mode.

Houses with more realistically sized grass blades. They're still a bit large, but much better than they were before.

House Chimneys

I decided to add chimneys to 67% of houses. This makes them look a bit more interesting and realistic. Now houses can have multiple sections, sloped roofs, doors, porches, garages, sheds, and chimneys. I wonder what I'll add next? Swimming pools? A screenshot of some houses with chimneys is shown below.

Procedurally generated houses now have a 67% chance of having a chimney.

Overhead Map View

I went back and made another pass at city and building support in overhead map mode and made two significant changes. First of all, secondary buildings are now shown. There are a lot of them, as can be seen in the image below.

Overhead map mode showing both city buildings and secondary buildings (and all cars!) at around 12 FPS.

Map view can be zoomed out to show the entire city with pixel-sized buildings, and zoomed in to show individual (moving) cars and benches filling the screen.

Overhead map view zoomed in on a city showing buildings, individual parked and moving cars, and benches.

This looks good, but really hurt performance. Map draw time was increased from 100ms (10 FPS) to around 160ms (6 FPS). [Note that this mode colors each pixel on the CPU by doing ray queries into the scene, which is flexible but somewhat slow compared to drawing on the GPU.] The framerate doesn't have to be that high for map view because the player isn't walking around. It only supports pan and zoom with the arrow keys and mouse, similar to Google Maps. However, 160ms made panning feel too slow. I made various optimizations such as adding improved acceleration structures for querying buildings and cars. Now draw time is down to around 80ms (12.5 FPS), which is about half of what it previously was.


Building Doors

I added building doors to complement my house doors. These use a different texture of a pair of glass doors rather than the single white wooden door used for houses. Each building has between one and four pairs of doors randomly assigned to an exterior wall on one of the four sides. Doors look reasonably good on brick and stone buildings, but tend to conflict with windows and other features present in the textures of metal/glass office buildings. The problem is that I can't move the windows around to avoid the door in these buildings because I'm not placing individual windows. They're part of the building textures. Here are some screenshots of what these doors look like on various building types and textures.

Door placed on the side of a concrete block building. Note that the entire bottom row of windows has been removed so that the door doesn't overlap them.

Door placed in a glass office building. The style of the door matches that of the building, though the vertical height isn't quite aligned with the windows.

Door placed in another office building. The height is correct compared to the windows, but it's placed over/next to a window.

The door texture I used contains a reflection that doesn't match the scene in 3DWorld. Almost all of the real door textures (from photographs) I was able to find online had reflections. I tried filling the glass windows in the doors with a uniform gray, but that made them look too artificial. So for now I'll keep the false reflections.

Maybe at some point I can generate real reflections for nearby doors as the player moves around the scene using a system similar to how 3DWorld does water plane reflections. Or maybe I could use the system I have for cube map reflections in ground mode. However, I'm not sure how many people would actually notice the reflection on such a small door. It's a lot of code complexity, development effort, and frame time dedicated to a minor feature that could go unnoticed.


Pedestrian Parked Car Destinations

The original pedestrian navigation system chose random buildings as destinations. Once a pedestrian reached the building, he/she was re-spawned at a random location outside the player's view. I decided that it would be interesting to have some of the pedestrians (25%) choose to walk to parked cars instead to add a bit of variety. This mostly worked, but I did encounter two unexpected challenges.

First, some of the parked cars were walled in between other parked cars such that pedestrians couldn't reach them without intersecting the bounding cubes of surrounding cars. There isn't always enough space between parked cars for pedestrians to fit. They would just walk around the block of parked cars and never reach their destinations. The fix was to group blocks of contiguous cars in a parking lot into a bounding cube and consider the pedestrian at their destination on a collision with any car in the group, even if it wasn't the correct car. How can the player tell which car was the destination anyway? Yes, I do have debug visualizations for this, but that's really for my own use. Problem solved.

The second problem was related to using separate threads for updating cars and pedestrians. This caused 3DWorld to crash after running the simulation for a few minutes. I was eventually able to track it down to the code that sorted cars by city and distance to the player. This sorted parked cars as well as moving cars. If a pedestrian happened to query a car that was in the process of being moved by the sort algorithm on the other thread, it could occasionally read incorrect values that lead to asserts and other odd behavior. I tried a number of fixes that failed to solve the problem, then came up with something simple. All that's really needed is the bounding cube of the car for collision detection purposes. I can simply generate a vector of bounding cubes for the cars in each parking lot, and use that for pedestrian destinations and collision detection. Since this vector never has to be sorted, the other thread won't touch it and everything works correctly. That changed fixed the second problem, and now car destinations are working.


Tuesday, August 6, 2019

Lightning

It's time to take another break from my procedural city project and work on something different until I figure out what the next steps are. Last week someone posted a video of real lightning in slow motion on Reddit, which reminded me of the lightning effect I added to 3DWorld way back around 2008. I went back and looked at the lightning in 3DWorld, created a video, and posted it on YouTube. Here it is, but I'll warn you that the lighting doesn't look very good.


Here's an image of one lightning strike and some fires that have been started in the trees and grass. Keep in mind that I haven't worked on lightning in many years.

Original lightning paths were mostly vertical, heavily overlapping, snapped to a grid, and not very realistic.

There are several problems here. First, the lighting is too vertical. Some of the lines are entirely vertical and others are mostly vertical. Second, the individual paths are too close together. They should diverge rather than converge and intersect each other. Third, you can somewhat see the regular grid structure in the individual path vertices, which are spaced too regularly from each other. So of course I went back to try and improve the lightning path generation algorithm.

I won't go over the details of how lighting is formed and the physics of a lightning path. If you're interested, you can read about it here. I'm only trying to model cloud-to-ground lightning. In 3DWorld, I start with a uniform 2D grid of random charge distribution values in a plane at the altitude of the clouds. These represent charged ice particles during a thunder storm. Each lightning strike originates from the grid point containing the largest charge, and depletes the charge in a circular area around that point. This ensures that lightning doesn't start from the same location each time, and models real lightning charge formation to first order. Lightning rarely strikes the same place twice! This part of the system works fine and doesn't need to be changed.

A lightning strike is composed of a number of different paths that recursively fork from the main path and flow from the clouds to the ground in a random path. Any path that reaches the ground without going outside the scene bounds creates a fire and some smoke, unless it hits a water surface. (Yes, even when it's raining.) This sets the trees and grass on fire and will eventually burn the entire scene to black. Lightning hits also damage the player in gameplay mode, though I can't remember ever being hit by lightning while playing. This is probably because players are down below the level of the trees.

Each path is represented by a series of line segments, which are drawn as long, thin, camera-oriented quads. The vertices of adjacent quads in the path are connected together to from a sort of ribbon. These quads are textured with a Gaussian falloff alpha (transparency) value with mipmaps to make them decrease in brightness with distance and toward the edges of the path. In addition, the primary path's end point generates a high intensity point light source. Lightning strikes only last a few hundred milliseconds, but I'm able to freeze-frame them in place with a keyboard key so that I can get good screenshots.

The original algorithm generated paths by building a 3D voxel grid where each grid cell stored the direction of the nearest grounded object (tree, terrain, water, building, etc.) The grid was generated on the first lightning strike and cached for later use. Lighting would start at the point of highest charge and follow the shortest path to ground, with a bit of random variation mixed it. It stored a set of cells that had been previously visited so that each fork would follow a different path. Unfortunately, this often resulted in many of the forks following similar paths straight down to different parts of the same tree. It also had a noticeable grid pattern because each line segment was about the same length.

My new idea was to discard the 3D voxel grid and replace it with a downward biased random walk. A current direction is maintained at each step, initialized to pointing down in -z. Each iteration adds a random spherically distributed vector to the direction, re-normalizes it, and moves the path a random distance in that direction. The z component of the direction is negated if it ever becomes positive to keep the lighting pointed downward. This guarantees it will eventually reach the ground. If a direction is chosen that moves the path outside the scene bounds, a new direction is generated. Each iteration has a random chance of forking the path. The first path created is the primary path, which must continue until it hits a grounded object. This way the algorithm ensures there's at least one valid full path and one hit point. All other paths have a random chance of ending early, resulting in shorter segments.

Here is a lightning bolt generated using this algorithm. As you can see, the individual forks are well separated and hit at very different locations. They're no longer vertical and have more random segment length variation.

Improved lightning path using random walk algorithm and modified splitting constants.

However, this still isn't quite realistic. Lightning doesn't normally hit many places at the same time. There's usually only one dominant path the ground and lots of dead-end "feeler" paths that reached out but went in the wrong direction. These paths ionize the damp air, decreasing its resistance so that more current can flow. The air resistance is still high though. Once the path to ground is found, this much lower resistance channel allows a huge amount of current to flow, generating most of the light and energy of a lightning strike as the charge is sent into the ground.

I decided to try to model this effect. A final postprocessing step is run when all paths have either ended or reached the ground. The algorithm calculates the shortest completed path to ground and makes that the primary path, increasing the brightness by 2x. This is the path of least resistance where the majority of the charge will flow to ground as electric current. The other feeler paths are shortened to the length of the shortest path if there's enough distance from their last fork position. Any paths that reach the ground after this step are considered hits and generate fire and smoke.

Here are daytime and night time images created using the modified algorithm.

Lightning path with random walk and shorter segments that don't reach the ground. The primary path to the ground is brighter and spawns fire.
The same lightning strike as above, but at night, with fog and clouds.

I decided that I didn't like some of the sharp bends in the paths. As a finishing touch, I decreased the amount of random direction change added to each segment. Here are some night time images of the final lightning path code + constants. I haven't really decided if this is an improvement or not.

Lightning path with many branches shown at night, with area lighting effect.

Another nighttime lighting strike. Most of the scene lighting comes from the lightning.

Here's a newer video I recorded and posted on YouTube of lightning strikes at night. The rain looks much better uncompressed at native 1080p resolution. I don't know why it looks so bad with YouTube compression. I can freeze the physics simulation and catch lightning in mid-strike, though I don't get the point lighting effect on the terrain when it's paused. Each strike creates one or more fires in the trees and grass that will eventually spread and burn everything down.


3DWorld's lightning definitely has improved, but it's still not perfect. It's difficult to get a good trade-off between branching forks and jagged edges. If I set the random walk value too strong it tends to produce sharp turns, spirals, and self-intersecting paths rather than a regular forked tree like I see in many photos of lightning. It's difficult to find resources online for generating and drawing lighting. Maybe I'll get back to it later.

I might need to work a bit more on drawing the paths. Blending doesn't always work against transparent objects, it and would probably look better if the paths ended in something other than a sharp edge.

Fortunately, neither generating nor drawing the lightning takes any measurable amount of time, so there's no need to add complexity to optimize this system. That seems to be a pretty rare occurrence in 3DWorld.

As usual, the code is all on 3DWorld's GitHub project. The lightning source code is fairly simple and self-explanatory, and can be found here.

Saturday, June 1, 2019

Procedural City: Doors, New Building Types, and Infinite Buildings

This is another one of those update posts where I show various procedural city changes I've made in the past few weeks. I haven't done any one particular thing that's interesting and complex enough to deserve its own blog post.


Doors

I've finally added doors to houses. Each house has exactly one simple white door. If the house has a porch, the door is placed under the porch. Otherwise, it's placed on a random wall with at least some distance between the door and the other walls and edge of the house. Here is my first pass at adding doors to houses. (I've disabled the grass blades because they're too large relative to these houses and obscure the doors and first floor windows.)

Houses now have white doors under their porches or along a random side (if there's no porch).

At this point, the doors and windows ignore each other's placements, so they often overlap. That's a bit difficult to solve given how doors are generated on the CPU and windows are added in a shader during drawing. I suppose the easiest fix is to remove the bottom row of windows on the wall of the house that has the door. This can be done by clipping the wall geometry in Z (vertical) for the windows pass. However, it was actually more difficult than I expected to get everything to line up again. There was a lot of work with integer rounding and choosing correct scaling parameters to get exact multiples of windows in various places.

That change fixes the overlap case, but now leaves some empty wall space with no first floor windows. I guess it's an improvement. Maybe sometime later I can go back and add some extra wall sections to the left and right of the door. I expect it could be a lot of work to make the windows line up with the row of second floor windows above them. Anyway, it's good enough for now.

Same view with the bottom row of windows removed from the sides of houses that have doors.

New Building Types

I've added more building types. Non-rectangular buildings (cylindrical, triangular, 5-8 sided, etc.) can now have multiple levels and multiple overlapping sections. In addition, multi-section buildings can have roof details and antennas on their tallest section. This adds in some more complex buildings and introduces new variety to the building architecture. Here are some screenshots showing the new building types.

New multipart non-rectangular building types, from left to right: elliptical, cylinder with flat edge, and hexagonal.

New building types with overlapping elliptical/cylindrical sections.

One of my favorite buildings, composed of multiple tall elliptical cylinders with flat sides. There's another interesting building with a large curved face behind and to the left.

Infinite Buildings

I did some experiments with my older city system where buildings are placed within a large region. This is similar to the secondary buildings where there are no roads, but in this case buildings can also be rotated. I was able to increase the building count up to 270K for that scene. That's a lot of buildings! It took over a minute to generate them and used about 600MB of building data. However, once the buildings were generated, 3DWorld was able to draw them just fine. They're not all visible at the same time, but it still looks impressive to see them drawn out to the horizon. Here I've removed the terrain and fog so that you can get a better idea of just how many buildings this is. Larger buildings are in the center, and smaller buildings and houses are further out in the background.

~70K visible buildings from the set of 270K drawn at around 100FPS. The terrain and fog have been disabled to get a better view of the buildings. The gaps are areas of water where there are no buildings.

That's a lot of buildings, but we can have more. How many more? How about an infinite number. The next thing I'm working on is "infinite buildings" mode. In this mode, buildings are generated incrementally in tiles that become visible to the player as the player moves around in the world. That way, cities can be unlimited in size rather than limited to the initial building placement area. This won't work for city grids with roads, only the unconstrained buildings shown in older images and the secondary buildings shown in the previous post.

This mode is intended for use with procedural terrain rather than fixed heightmap terrain. Building generation is fast enough that I can probably pre-generate all of the buildings for any size heightmap that can fit in memory. I've verified that I can generate 40K buildings in a few seconds to fill the 7Kx7K = 50M pixel island heightmap. My 270K buildings can probably fill a 16K x 16K = 256M pixel  heightmap.

Now, that does mean I can't flatten terrain under buildings because that only works with terrain read from heightmaps, not procedurally generated terrain. The underlying heightmap values can be edited and updated in realtime. That doesn't work the same way with procedural functions. I'll have to solve that problem later.

I decided to start with generating buildings for each terrain tile at the same time the tile was generated, and also deleting them when the tile was deleted. That saved a lot of effort duplicating all of the distance update and visibility logic. I was able to get infinite buildings to work in a few hours. At first they were too slow to generate and draw, and it took me much longer to fix that problem. It's a lot harder generating and drawing buildings quickly when they're spread across 300 individual tiles. Here's what I have at this point:

Buildings generated for each visible tile, for any tile the player can walk or fly to.

Yeah, it doesn't look any different from "regular" buildings mode. That's the point. You get the same quality, but you can walk forever in any direction and never reach the end of the buildings. Collision detection, shadows - everything just works. This was one of my long-term goals for 3DWorld. Now I just need to figure out how to add roads, cars, people, etc. Should be trivial, right? I don't know. One step at a time.

Here are some stats. There are between 298 and 316 tiles at any given time, and around 75-80 of them are visible for a 60 degree field of view. Each tile contains an average of 57 buildings for the parameters I've chosen; that's 17K-18K active buildings. There are about 20 different building materials, each with different sets of textures, and about 50 total textures including normal maps. Building tiles take an average of 2.7ms to generate and the entire thing takes 2.3ms to draw. The generation time is acceptable because it's rare to generate more than one tile per frame, even when moving at max speed.

Drawing requires 5 passes:
  1. Draw distant buildings with a simpler shader.
  2. Draw distant windows on top of distant buildings using different shader parameters.
  3. Draw nearby buildings with a more complex shader that includes shadow maps.
  4. Draw nearby windows.
  5. If night time, draw window lights using a different shader.
In some cases the same building may be drawn in both steps 1+2 and 3+4. It took quite a bit of effort to organize all of the drawing passes, view frustum culling, sorting by material, combining vertex buffers, etc. to get the draw time down to 2.3ms. I'm sure there's still some room for improvement, but at this time building generation and drawing are fast enough.

3DWorld is open source on GitHub.