So far I've added people, rats, and spiders to buildings. They can all be considered a sort of enemy of the player in gameplay mode. What other hostile animals can I add? How about poisonous snakes that attack the player when they get close.
Snakes are similar to rats because they stay on the floor and can't climb walls and other objects like spiders. Snakes are limited to the ground floor and currently can't be picked up by the player. They're more aggressive than rats, and will bite the player when in range rather than running and hiding under furniture. However, they completely ignore the player when the player isn't right next to them. This makes them easier to avoid, assuming you're paying attention to your surroundings and being careful when entering new rooms.
There are currently two types of snakes, those with rattles and those without. All snakes can damage the player by biting, but only rattlesnakes are
poisonous and will do damage over time. This uses the same mechanic as
spider bites. The only item that can cure the player of poison is the medicine bottle, which can be found in house medicine cabinets and on rare occasions in drawers. I modified the player inventory to allow medicine bottles to be collected and consumed later if not immediately needed, which make it a bit easier to survive snake and spider venom.
I used a similar approach to spiders when drawing snakes, forming them procedurally in code from transformed cylinders, cones, and spheres. They consist of 18 connected segments, representing individual ribs, with a head at one end and either a tail or a rattle at the other. I found two different textures to use for their scales, and added a random color variation from light brown to nearly black. Each snake has two eyes on the sides of its head and a forked tongue that will occasionally come out.
Four snakes on the kitchen floor. One is a rattlesnake. The center snake has its pink tongue out.
Snakes have a unique movement and animation system. Each segment moves individually in a smooth motion that follows the path of the segment in front. The head moves in a sine wave pattern to give the body movement a wavy, flowing path that I based on the movement of my pet snake Audrey and other images and videos of snakes I found online. Snakes can also curve or straighten their bodies to fit through narrow openings and avoid collisions.
Collision avoidance was by far the most difficult feature to implement. Snakes must avoid the following objects, ordered from highest to lowest priority:
The edges of the building bounding cube (otherwise bad things happen such as the code crashing or the snakes disappearing)
Exterior building walls (outside the building they're not drawn correctly)
Interior building walls
Open and closed doors
Stairs and elevators
Static room objects (furniture, appliances, etc.); fortunately I was able to reuse all of the rat collision logic for these.
Other snakes, rats, and spiders
Themselves; it's important to avoid self intersections; this one was quite challenging
I already had code for most of the items near the top of the list. The only real difference between snakes and rats related to static object collisions is that representing snakes as a bounding sphere is too inaccurate. For the purpose of detecting collisions for the snake itself, I only need to consider a bounding sphere around its head. The rest of the body will follow the path of the head and will also avoid the same static objects. However, checking for collisions with other snakes and the snake itself requires finding intersections with each cylindrical body segment.
It took quite some time to get all of this working. When a collision is detected, a new head direction is randomly chosen within the 180 degrees around the collision normal. Directions closer to the initial head orientation are given a higher weight so that snakes are more likely to continue along a similar path rather than reversing direction and doubling back on themselves. The most common modes of failure for collision detection resulted in the snake getting stuck with its head slightly inside a wall or other object (including its own body).
I was able to fix all but one case of the snake getting stuck with reasonable effort. The final case was where a snake was forced into a curve while colliding with another snake, and it spiraled into itself to the point where its head was completely surrounded by its body and it couldn't move. After several failed attempts, I finally fixed this by setting the collision normal to be the direction of the colliding segment coming from its head. This would force the head to turn toward the direction of the tail on collisions, rather than curving toward itself.
I also found and fixed a pretty funny bug. When the snake was stuck against an object such as the player, it would choose random new direction each frame. This would cause the head orientation to jiggle around randomly. In addition, this triggered the animation system to update, which resulted in the snake's eyes spinning around its head!
Here's a YouTube video showing a number of snakes in the living room of a house. They glide around on the floor and attempt to avoid objects, each other, and themselves. I find it quite interesting how they can weave between the table and chair legs using collision avoidance forces. Note that I already fixed the rat vs. snake collision bug. I was incorrectly using the snake's bounding sphere radius rather than the snake's body radius to move the rat to a non-colliding position.
It's time to discuss indirect room lighting. This is turning out to be a long and technical post. I've scattered some screenshots around in there somewhere for those of you who don't want to read the wall of text. I'll also add Wikipedia links for some of the technical terms.
I want to improve the quality of lighting inside my procedural buildings. Most of my previous screenshots have shown the combined contributions of three types of lighting:
Direct lighting from room ceiling lights and lamps, pointed downward in the lower hemisphere as a 180 degree spotlight so that I can use a single shadow map
A very weak sky lighting representing light coming in through windows, which at least tints walls different colors in otherwise unlit rooms
A fake constant ambient term that varies by floor/basement/attic
This looks reasonably good in well lit rooms where the lights are on. However, rooms with their lights off have very flat colors and all surfaces tend to look the same. This is both uninteresting and unrealistic. Also, places in shadows and along the upper wall and ceiling of lit rooms have very little indirect light and suffer from the same problems.
I've been trying to add proper indirect lighting support for some time now. Has it been as much as a year? Maybe. The difficulty is getting a good quality of lighting with low noise and low light leakage through walls, and having this lighting update in buildings as the player moves around without causing lag and hurting the framerate.
I consider this a solved problem for fixed size static scenes in 3DWorld. I can precompute lighting offline, save it to disk, and reload it in under a second when the scene is loaded in 3DWorld. This works well on scenes of moderate complexity such as San Miguel. I even had this working for my office building basement using player controlled dynamic lights, and in the static Sponza scene all the way back in 2014. This system worked by sending millions of rays from the sun, sky, and local point lights into the scene, calculating their reflections/refractions, and accumulating their paths into a 3D volume texture.
Why can't I use the same solution here? Well, in theory I can. The only problem is that the player has to wait 20 min. for the lighting to be computed before entering a building. [Technically we can also let the player enter the building and wait 20 min. for lighting to appear.] That doesn't work very well in an open world game with thousands of buildings, does it? Now I can hack things and use a few tens of thousands of rays rather than millions to get the computation down to a few seconds. My first attempt at this gave me the following results:
Failed attempt at indirect lighting on building interiors. Did I show this screenshot in a previous post?
That's actually a really neat effect. It looks like the walls are made of dirty aluminum foil due to the way their normal maps interact with the lighting. That's not the look I was going for here, but I can't pass up the opportunity to show off my accidental artwork. I was able to fix this of course, but the floor didn't get much better than that black and gray pixelated mess you see above. So I could get noisy garbage lighting in a few seconds, or wait tens of minutes to get something that looked nice. Neither case was acceptable, so I lost interest in this last year.
... Wait, that screenshot is from Feb. 2020. So this was over two years ago? Wow, I didn't realize it had been that long. Surely I've gotten a new computer since then, it's super fast, and that solved all of my problems, right? Nope, same computer. It's too much effort to install all of my software and development tools on a new PC.
Optimizations
Anyway, I got back to working on this a few months ago. There are actually quite a few optimizations I can use to speed this up and get more rays (= less noise) in less runtime. I can also reserve one of my CPU cores for drawing the scene rather than using them all for lighting computation, which allows me to get a reasonable framerate for walking around in the building while the lighting is being computed in the background.
I'm storing precomputed lighting values in 3D voxels
(volume elements). Each fragment (pixel in non-OpenGL terms) of drawn
geometry queries its indirect lighting from the nearest voxel, biased in
the direction of the surface normal. One of the reasons why tracing light rays is slow is because I need to accumulate light into all voxels along the entire path of the ray rather than only at the hit points. This nearly doubles runtime, especially for long rays in open space when using a fine voxel grid. I need to store lighting data for the empty space in a room to get proper lighting on dynamic objects such as people, animals, and whatever items the player moves around. These objects aren't present during lighting computation, so there are no ray hit points associated with them.
One of the biggest optimizations I discovered is to only calculate lighting on the floor of the building the player is on. It seems so obvious now that I think about it. This cuts the number of active light sources by a factor of 10x for a 10 story building, which is quite good. But it gets better than that! I can build the 3D acceleration structure I use for ray intersection checks for only objects on the current floor rather than the entire building. I don't get another 10x runtime reduction though, because ray query time scales as the log of the number of objects in the bounding volume hierarchy. The actual speedup is more like 20x for a 10 story building. That's still pretty good though. The cost I pay for this decision is incorrect lighting on floors above and below the player when looking up or down stairs.
Another related optimization is that I only need to store the lighting for a few floors of one building at a time, and I only need to draw it for the floor the player is on. This reduces memory usage on both the CPU and the GPU. I pass the 3D bounding cube of the current floor into the fragment shader and use my original constant ambient term rather than the indirect lighting calculation for anything drawn outside the current floor. This way the slice of valid indirect lighting can follow the player around and everything else looks as it did with indirect lighting disabled. I was even able to go back and further optimize ray intersections to simply clamp rays to the range of z-values (altitudes) spanned by the current floor since any rays extending outside the range are ignored anyway.
I chose a range of 5 floors to store in memory. This allows the player to walk between the floors of houses without invalidating lighting data along the way, since all floors can fit within this range. If I had used only one floor, the lighting would need to be rebuilt every time the player walked up or down the stairs. Note that some houses with both basements and tall attics can exceed this range and require some amount of re-computation. Office buildings can be as high as 20 floors and won't all fit in memory at once. I decided to disable lighting updates while the player is in an elevator so that lighting is not unnecessarily computed for floors the player doesn't even stop on. Lighting updates will begin when the elevator door opens, where the first light to be updated is likely the one on the ceiling in front of the elevator.
The next step was to prioritize lights that have more of an effect on the area visible to the player. This includes weighting based on lights near the player and in the view frustum, and lights inside/affecting the room the player is in. This change allowed me to generate lighting almost immediately for nearby rooms, have the lighting follow the player around as they moved from room to room, and compute lighting for rooms not yet visible in the background when the player stops.
Noise
Those optimizations, plus some smaller ones that I won't list, allowed me to have near realtime indirect lighting. It works well for rooms that are fairly well lit. Unfortunately, it still has a lot of noise in rooms that are less well lit due to the relatively small number of rays reaching these rooms from light sources on the ceilings of other rooms. These rays take several bounces to get there. The fewer ray samples there are, the higher the variance, and this leads to random noise. Here's one example:
Indirect lighting in a room with the light off. All light comes from other rooms, most of it indirect. Lighting is noisy in cases like this.
It's noisy, but it's fast. Getting results of this quality before these optimizations involved suffering through a minute of low, laggy framerate before any indirect lighting appeared. If I increase the number of light rays by 10x I can almost completely remove the noise, but the player must wait for the lighting to appear again. It's a typical runtime vs. quality trade-off. I would call this partial success.
Indirect lighting in a kitchen with the lights off again. The area under the chairs is dark.
It's unclear if this solution is worthwhile in these situations, but it appears to work great in basements, parking garages, and attics. There are fewer objects and no windows, so it tends to be faster. Basement lighting is normally uniformly dark, so having indirect lighting is a huge improvement even if it's noisy. The same is true for attics. I added config options to only enable indirect lighting in basements and/or attics where it's faster and more effective. I may make this the default going forward.
Light Leakage
I ran into another problem: light leakage. Indirect lighting is stored in a 3D grid of equal size voxels. If a voxel is wider than a wall, the floor and ceiling on each side of the wall often query the same voxel. This may result in light areas around the edge of a wall in a dark room where the adjacent room has a bright light. Similarly, there may be dark edges around a wall of a lit room next to a dark room. I can't make walls thicker without breaking other parts of building generation, and I can't make the voxels too small due to computation time and memory constraints. Fortunately, my optimization to limit indirect lighting to the current few floors avoids this same problem in the vertical direction involving the ceilings and floors.
If you look closely at some of the screenshots in this post, you can see bands of bright or dark areas around the edges of walls, ceilings, and floors. There are similar dark edges around the curved sides of ceiling light fixtures that are turned off. It's not too bad after I made a pass at tweaking constants in the code.
Indirect lighting in a basement room. There's less noise when the light is on. You can see a red tint on the ceiling from light that bounces on the red rug on the floor. The man standing in the room has indirect lighting as well.
Here's another basement where the noise is almost undetectable. It helps to have lit rooms with dark ceilings. Also, I added a screenshot of a parking garage with cars.
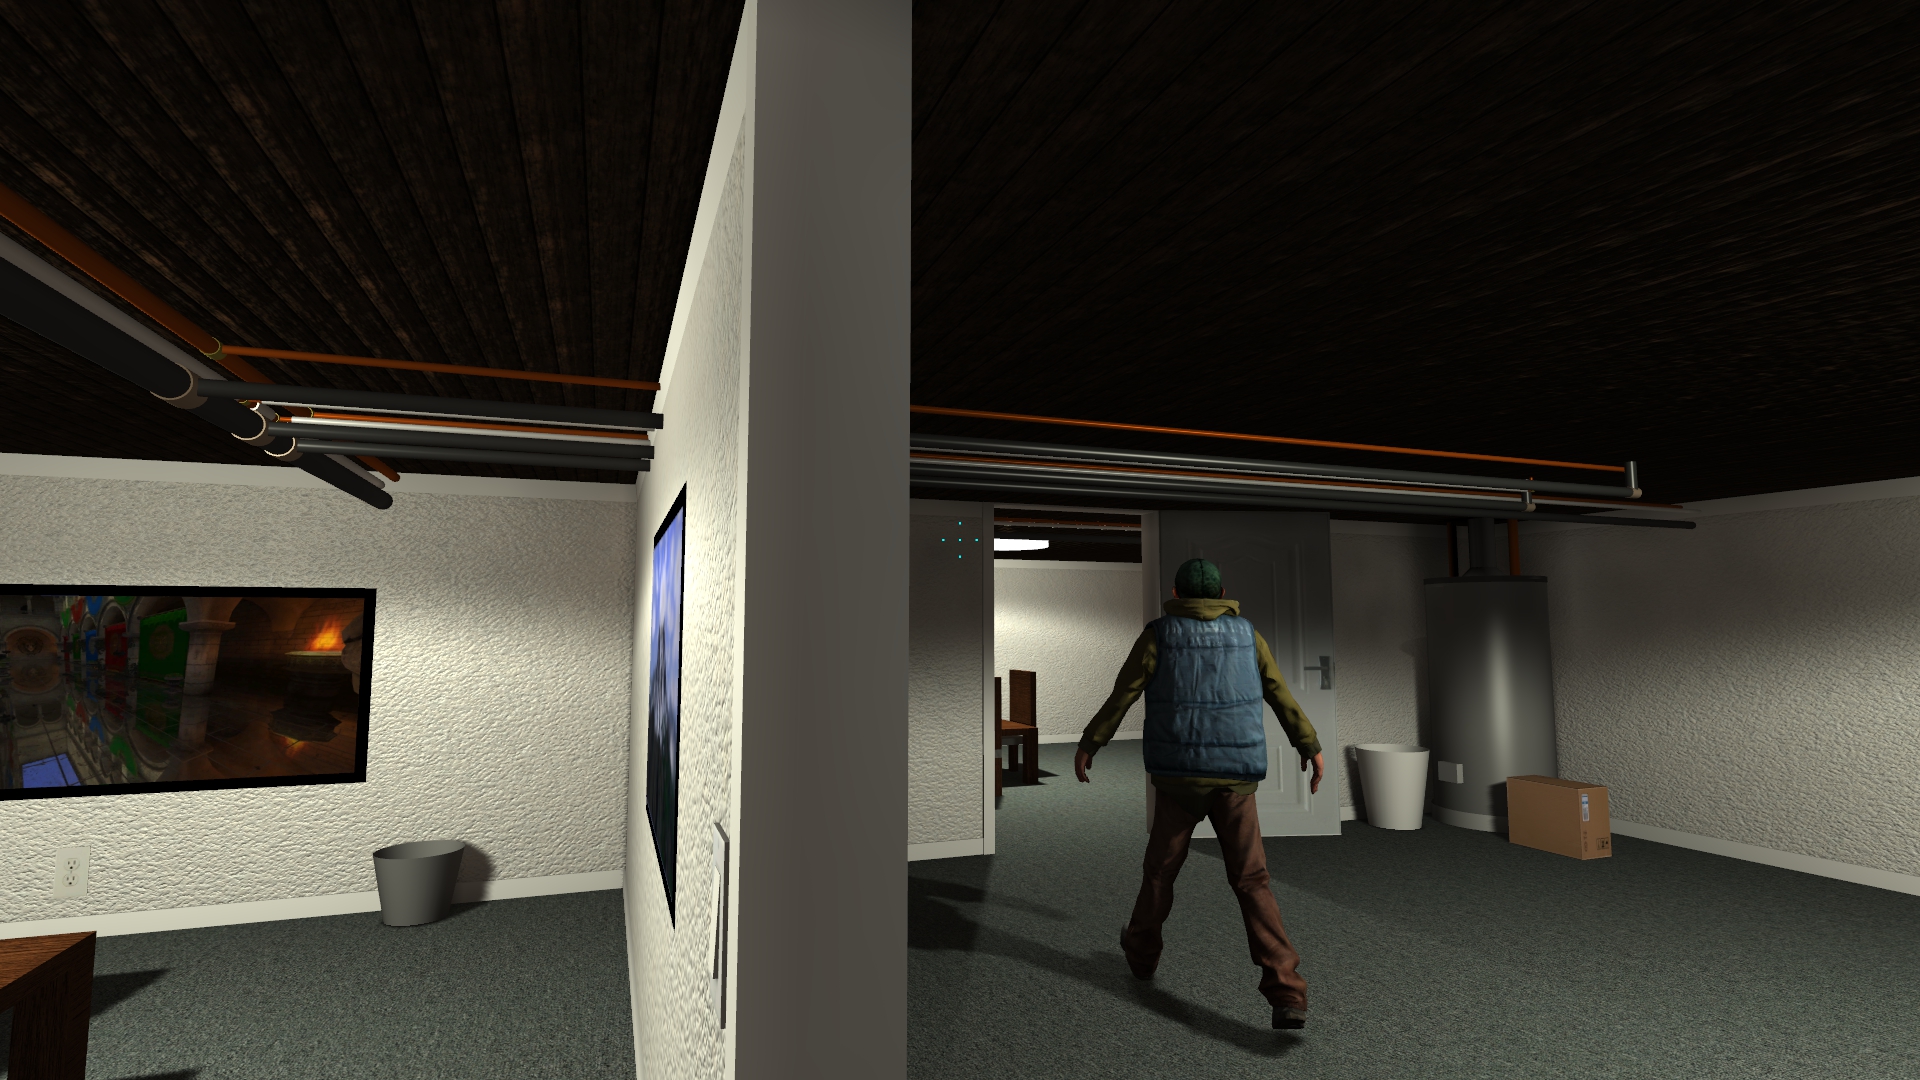
Indirect lighting in the basement makes it easier to see the pipes near the ceiling. Without it they're in shadow and appear very dark. You can also see some darkening above the water heater.
Parking garage with indirect lighting. The indirect component makes the pipes and ceiling easier to see, and softens the shadows under the cars.
Windows
So far I only discussed indirect lighting from room ceiling lights and lamps. There's another source of indirect lighting. Can you think of it? I'll give you a hint: Bedrooms shouldn't be dark like basements when the light is off during the daytime. That's right, I need to include the indirect lighting from the sun (and moon) coming in through the windows. I can treat each window as an area light source and generate rays through it that enter the building. This works well, but sadly now there are more than twice as many light sources to handle in a typical house. On top of that, windows seem to need more rays to reduce their noise, so we're back to having a slow lighting solution. Fortunately, it's still much faster than it was before.
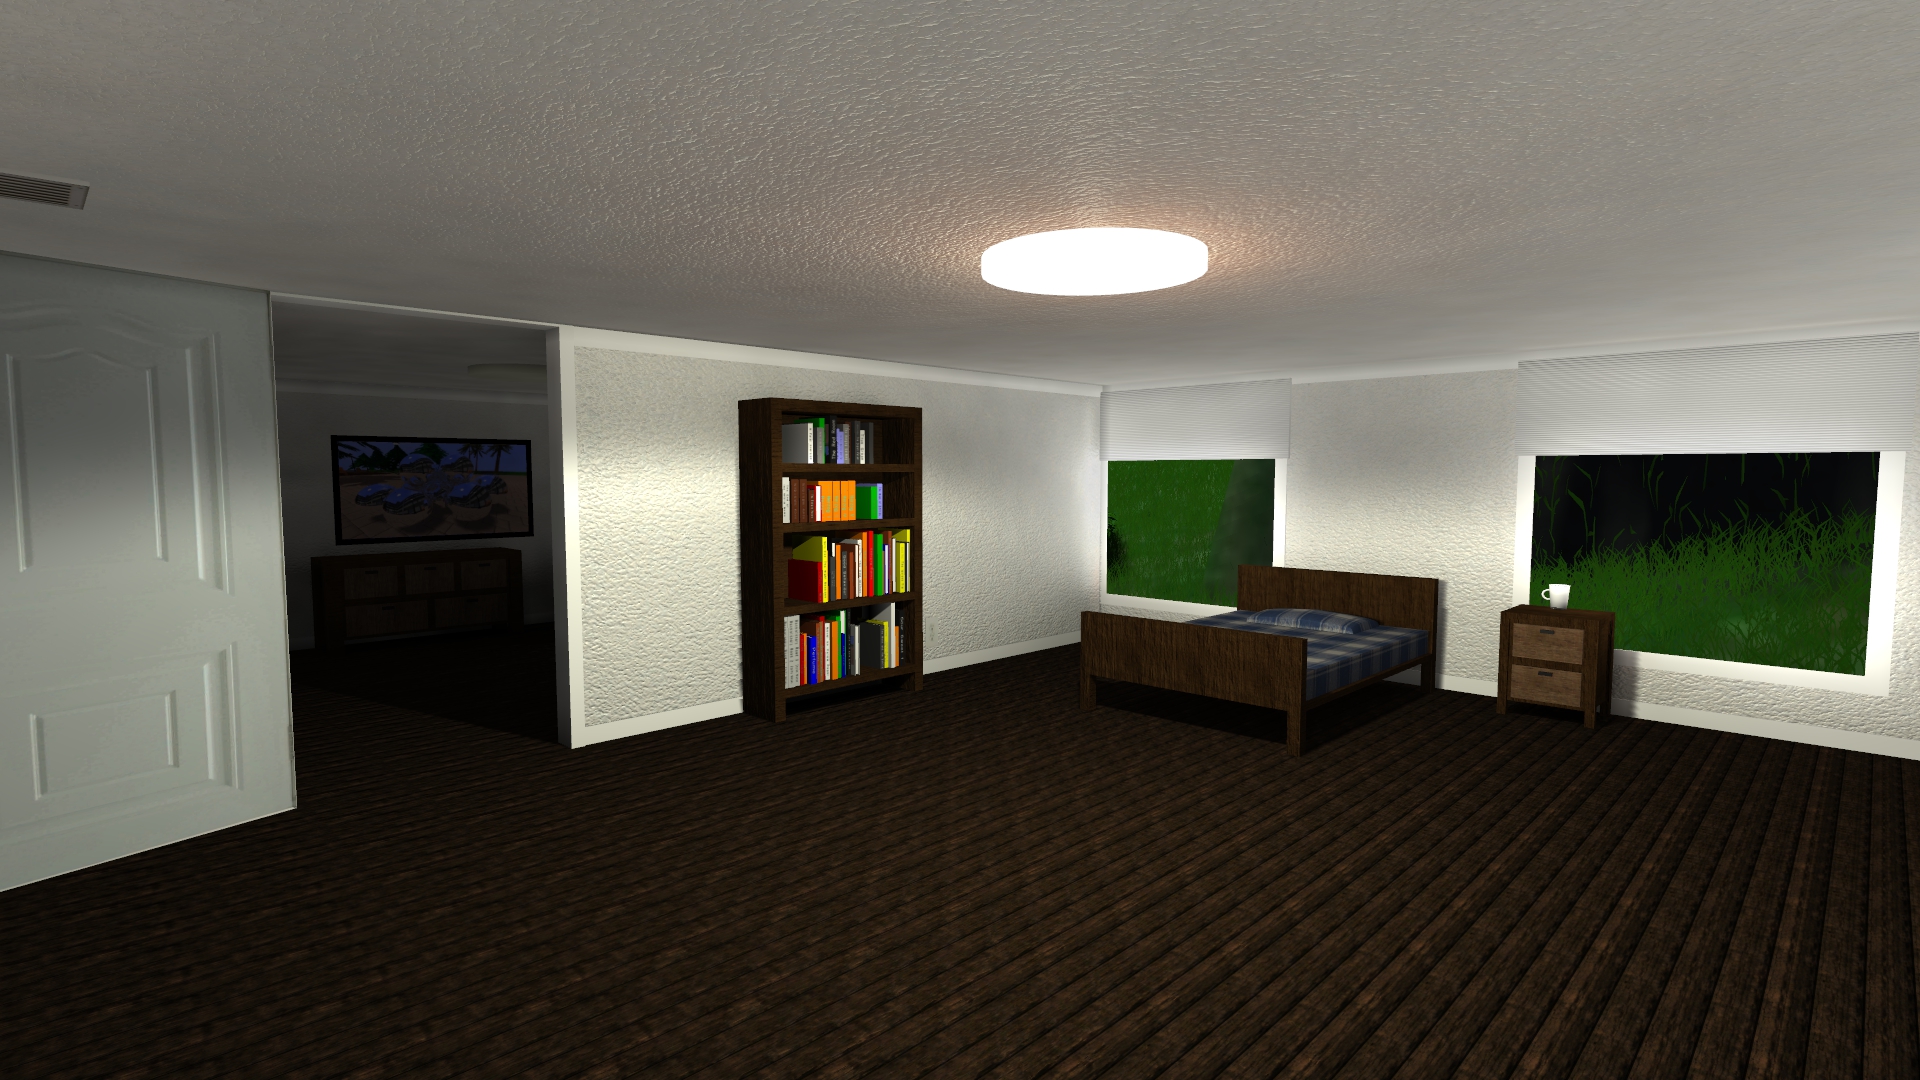
Bedroom with the ceiling light off. All light comes in from the windows. You can see the soft shadows under the bed and dresser.
Bedroom brightly lit from both the ceiling light and the sun outside.
Here's a comparison of the same room with and without indirect lighting. The second image has brighter walls with more color variation and fewer shadows.
Bedroom with direct lighting from the ceiling light (pointed down) and a constant ambient term.
Bedroom with both direct and indirect lighting from the ceiling light, and indirect lighting through the windows.
I'm not quite sure why there's an orange tint around the light on the ceiling. Maybe it's because the color of the light is somewhat orange-ish rather than completely white. It could be that the color is saturated to white in some areas but not around that cylinder. Or maybe there's an orange rug above it in the attic and I'm getting some sort of incorrect light bleeding from that. I have no idea. I should go back and revisit this, if I can manage to find that house again. (It's not one of the houses next to the player's starting position.)
[Update: I found the house again. It looks like the light itself is yellow. It appears white because the direct + indirect/ambient saturates the colors to white, possibly because the gamma correction is off. The light shines downward with a 180 degree field of view in the bottom hemisphere. Therefore it doesn't shine directly on the ceiling. The lighting near the light in the center of the ceiling is yellow light reflected off a dark brown floor, plus the edges of the light fixture itself, which I guess results in that shade of orange.]
Dynamic Lighting / Player Interaction
So we're done, problem solved, right? Not quite. Up until now I've treated buildings as static. In reality the player can turn lights on and off, open and close doors, and move furniture around. All of these things will obviously affect the indirect lighting. As you might expect, adding support for dynamic indirect lighting introduces a huge amount of complexity. I haven't quite figured everything out yet.
Let me start with turning room lights, closet lights, and lamps on and off. It can either be the action of the player, the building AI people, or one of the new motion detection + timer lights. (I added that last one to automatically turn lights on and off in some office buildings.) This also includes the player opening and closing bedroom window blinds, which I have somewhat working. The full precomputed lighting on a building floor is the sum of the indirect lighting from each light source. This means that turning a light on is as simple as adding a new light to our queue of lights to process that will be accumulated into the total. Turning lights off is more complex. It can be implemented by subtracting light by using a negative intensity ray, but we need to be careful to make the rays deterministic so that the positive and negative rays will exactly cancel each other out. A lack of determinism leads to - you guessed it - more noise. Finding a deterministic solution that worked across multiple threads proved to be difficult.
One possible optimization is to cache the contribution of each
light source separately. This avoids re-computation when the player turns lights on
and off, and also solves the determinism problem. The downside is that
this is both complex and takes significant memory. The light volume
itself consists of 128x128x128 = 2M voxels in {X, Y, Z}. Each voxel
holds a floating-point number for each of the {red, green, blue,
intensity} components of light. 2M * 4 bytes * 4 components = 32MB of
data. A single building floor can contain as many as 100 lights, including ceiling lights, closet lights, lamps, and windows. We clearly
can't be storing 3.2GB of cached data across all lights. How can this be
improved? Most lights will only affect a few rooms on a single floor
rather than the entire 5-story horizontal slice of a building. If I was to compute
the bounding cube of influence of each light, it would be constrained to a small subset by the walls, the floor below, and the ceiling above. This would reduce memory
usage to as low as 1MB per light. That would still be 100MB of data for
100 lights, but this number is reasonable.
I was pretty happy with the system I had in place for recomputing indirect lighting when room lights were toggled by the player. I considered doors next. Opening and closing doors is more complex because they can influence multiple lights that illuminate the room on each side of the door. When a door is closed, light rays that previously reflected off the door back into room will instead exit that room and add light to the adjacent room. This requires the indirect accumulation to shift between the two rooms, and possibly other nearby rooms connected with open doors.
It was easy enough to determine which lights are affected by which doors by using the room connectivity graph. The hard part was figuring out how to correctly rebuild the ray spatial acceleration structure when a door opens or closes. The problem is, indirect lighting ray tracing is running in another thread in the background. I can't simply rebuild the data structure while it's being used. Instead, I have to wait for the current light's computation to finish, or kill it if the current light will be invalidated by the door state change. Then I have to remove the contribution of each light that will be updated, using the door's original state. Next, I can update the door's state and rebuild the acceleration structure. Finally, I have to re-add each light's contribution using the door's new state.
This sort of works, in theory. In practice it's problematic because I need to update the door's open/closed state in the drawing code immediately, otherwise it will look odd if the door doesn't move until the lighting is completed a few seconds later. So I have to use two different door states: first the drawing state changes, then the lighting state changes once old lights have been removed. To make matters worse, what happens if the player toggles the door back to it's original state before the lighting has been updated? Or what if the player opens or closes some other door that affects the same light(s)? I can build a queue of door state changes and light update passes, but the system may not be able to keep up with the player. Even if it can keep up, it's probably going to be wasting a ton of CPU cycles recomputing everything.
I experimented with this for quite some time, but was never able to get it working correctly in all cases. Instead I left it as-is, where it only works correctly when the player opens or closes a door when there's no current lighting calculation and no pending light updates. Otherwise the lighting is wrong in various ways. Then I later disabled door updates entirely because the failure cases where light or darkness appeared from nowhere caused too many issues. Door state changes now only have an effect if they happen when lights are off, because the new door state will be picked up and used when lighting is recomputed as lights are turned on.
Doors are trouble for other reasons. Remember the potential light caching optimization I mentioned a few paragraphs above? Well, any door open or close events will have to invalidate cached lights whose area of influence cubes intersect the door. (In fact, any player movement of furniture should affect lighting as well, but I'm going to ignore that for this discussion.) It's only worthwhile to cache lights if they remain valid for multiple on/off toggles without a door state changing in between. So, which happens more frequently, a light toggle or a door open/close? I'm not sure. Given the fact that door state changes affect multiple lights, my guess is that light invalidations are more frequent than light switch toggles, meaning there's not much benefit in caching per-light data. This is why I haven't yet implemented light caching. The cost of high memory usage, code complexity, and frequent invalidations combined to likely outweigh the benefits.
Indirect lighting is still a work in progress. I have it disabled by default and can toggle it with a key press. I'll probably enable it for basements and attics where it works best, and for screenshots. If I can find more ways to either improve computation time or reduce noise then I may enable it by default later.
The technical reader may wonder why I don't simply use screen space ambient occlusion. I've considered this approach, and done some experiments, but I found that it doesn't work very well in this application. First, I'm using Forward+ (tiled forward) lighting and don't have normals available in the fragment shader. This makes SSAO more difficult to implement. Also, there are lots of partially transparent materials (windows, glass tables, car windshields), alpha masked leaves and grass, ray marched clouds, and various other drawn objects that are unfriendly to SSAO. Besides, it's not a physically correct approach and it doesn't add neat effects such as color transfer between surfaces.
This is a follow-up post to my previous one on house attics. After I had written the initial code to populate attics with random items, I decided that I was missing air ducts. I already had furnaces in some attics, and I already wrote a system for placing a network of pipes. Surely it won't be too difficult to add ducts next, right?
I started by adding vents to the ceilings of most of the rooms in houses using code modified from what I wrote to add vents to the walls of office buildings. It's actually easier because I only have to avoid ceiling lights, stairwells, and attic doors, which are the only objects currently placed on ceilings. This means it's almost always possible to place a valid ceiling vent. For now I'm only attempting to connect vents on the topmost floor (below the attic) with ducts, and only when there's a furnace in the attic. The ground floor could probably have vents in the floors instead and air ducts in the basement or crawlspace. I'm not sure how to handle middle floors since I haven't lived in a house like this that I could use as a reference. I suppose the ducts are in the walls or between the ceilings and floors in that case. Sadly, my walls and ceiling-floor gaps are currently too narrow to fit ducts. For now I left these vents unconnected.
I added an extra duct on top of the furnace for the air return, and routed that down around the back to a larger intake vent on the ceiling under the furnace. Sometimes the furnace is too close to the attic roof and it won't fit. In this situation I omit the air return in the hope that the player doesn't notice. The intake vent wasn't always landing in a convenient location, so I changed the furnace placement to position it above a hallway or larger room with stairs and not above the ceiling light. This worked well because the furnace has no other placement constraints and can be put almost anywhere, as long as it's not too close to the edge of the attic and not blocking the attic access door.
I started with ducts that have rectangular cross sections as that seemed like it would be easier. Each section of duct is divided into an integer number of metal cubes with one tile of a texture applied to each face. This gives it the look of a modular air system. Here's an example attic.
Attic with wood panels and furnace next to open attic access door. This one has many air ducts but not many other objects.
It took me many attempts at placing ducts correctly and realistically. I settled on sorting vents from furthest to closest to the furnace to form the main routes first. Vents that happened to line up with the furnace were connected with straight segments. Otherwise, they were connected with an L-shaped connection consisting of a segment in X and a segment in Y that met at a right angle. There are two such possible segments, one starting in X and the other starting in Y. I chose a random one of these and selected the other orientation when the first one was invalid. Since attics are always rectangular, I don't have to worry about their routing going outside the attic. Therefore, the only constraint is that they don't intersect the wood vertical roof support pillars and don't block the attic access door/stairs. If the path of the duct intersects a previously placed duct, it's shortened and connected to that duct with a straight or T-joint. Then I also generate a straight segment to the nearest existing duct and use that instead if it's valid and the distance is less than the length of the original path to the furnace. Any vent that happens to intersect a previous duct when extended upward into the attic is directly joined to it.
That set of rules was able to successfully route about 90% of vents to the furnace. The remaining failures were cases where the vent was on the opposite side of the attic access door from the furnace and a single jog wouldn't work. I made many attempts to solve this. What I ended up doing was splitting up ducts that had been placed earlier into short segments and attempting to route the unconnected vent to the center of the closest segment with a pair of straight runs with a single jog. This is the same logic used to connect vents to the furnace. If the closest segment can't be connected to, then we look at the next closest segment, until the vent is connected or no segments are left. In theory this can still fail, in particular if all of the vents are across the attic access door from the furnace. However, I haven't been able to find a case like this after visiting dozens of attics. So I consider it solved. In the rare event I miss a vent it's not obvious anyway, unless the player clips through the floor to see that the vent is unconnected.
Boxes and other attic objects are placed after the ducts so that there are no intersections. I had to increase the number of objects in attics with furnaces and ducts to offset the loss of floor space for placing them.
I've also added different floor and ceiling surfaces for attics. Maybe that's a bit off topic for this post, but I may as well mention it since it's obvious from my screenshots. Floors can now be either wood planks or plywood. Ceilings can be wood planks, plywood, fiberglass insulation, or finished plaster. Here's an example of a cluttered attic with ducts and plywood on both the ceiling and floor.
Cluttered attic with plywood, furnace, and air ducts. Yes, the furnace is missing the air return duct on top because it's too close to the wall.
Here's another attic with that pink fluffy fiberglass insulation in the roof between the rafters. I couldn't find a seamless texture for fiberglass insulation. I even tried looking for cotton candy textures, but came up empty handed on that as well. None of the free textures I could find were seamless/tileable. In the end I generated a cloud texture in Gimp and tinted it pink. I suppose it looks good enough.
Attic with pink fiberglass insulation, furnace, and air ducts. Sigh, no air return again.
You can see in this screenshot that the main duct is wider than the smaller ducts connecting to it. This is in fact the result of multiple ducts routing to the same side of the furnace being merged and the max width used for the connection. It often happens to work out this way. It's also pretty common to have ducts coming from each side of the furnace and extending toward different sides of the attic.
When I was finished with rectangular ducts, I moved on to cylindrical ducts. These turned out to be much more difficult to join together. I was able to place rectangular metal boxes over the ceiling vents to make it easier to connect the ducts, but joining ducts together caused a lot of trouble. For example, two ducts running next to each other can't simply be merged the same way as cubes to form a wider duct. Instead, they must be shifted around so that either their ends meet exactly or they form a T-junction. Texture alignment generated additional complexity.
This attic has cylindrical ducts. I like the look of the rectangular ducts better.
I suppose this looks acceptable. I would have liked to use wider ducts for main branches with many vents along them, but I ran into problems with player collision detection when using cylinders of larger radius. I want to keep them small enough so that the player can step over them to make the attic open for exploration. I prefer the look of rectangular ducts, so I made cylindrical ducts appear in only 25% of attics even though I feel they're more common in real houses (including mine).
That looks good for houses. Now what about office buildings? It makes sense that the furnace(s) should go in the same utility rooms as the water heater(s) I added a few months ago. I don't think office buildings generally use the same small furnaces as houses, but I can still add some as temporary placeholders until I figure out how to include commercial HVAC systems. It's easy to add them, so why not?
Office building utility room with water heaters, sink, and now furnaces.
Of course now I need to find a way to connect these to wall vents in offices. Until I do so, the player will have to imagine there are ducts somewhere in the thin walls. This particular utility room annoys me though because there's a wall vent right next to the furnace, yet it's not connected! At the very least I should go back and connect that one, or possibly relocate it to the side of one of the ducts above a furnace.
I'm pretty happy with the current state of furnaces, vents, and ducts. I might go back and add floor vents with basement ducts sometime later.
I was originally planning to work on indirect lighting for building interiors next. This turned out to be a very difficult and time consuming project, and I don't have too much to show for this yet because it's still incomplete. My next post will likely be on the topic of indirect lighting. Somewhere in the middle of that my development was interrupted by someone suggesting I add attics to houses. That's a great idea!
Problem Statement
Of course attics were also quite complex and time consuming to add. I would say about as much work as house basements or office building parking garages. This was primarily due to two reasons: First, attics aren't cube-shaped rooms, they have sloped roof polygons rather than vertical walls and horizontal/parallel ceilings. None of my existing code worked in this case, including object placement, wall decorations, lighting, player collision, and people/rat/spider AI updates. I basically had to special case all of this code to handle attics. Then I had to write custom sphere/ray/cube intersection code to handle roof polygons, which required many debug iterations.
Second, I wanted to add attics without modifying any of the existing interior or exterior geometry. I can't be going back and reworking every system each time I add a new building feature. This means that attics must connect to existing rooms without moving walls and light fixtures. They must handle things like chimneys crossing through them. They can't break the existing people, rat, or spider movement systems. And, by far the most difficult, they must work with multiple sections of roof intersecting at odd angles.
Adding attics introduced a lot of new complexity, but at least I didn't have to deal with windows and doors. I'm sure it's possible to go back and add skylights and ventilation to attics later if I'm up for the challenge.
Attic Roofs
This last case can come up in L-shaped houses that have both cube sections at the same height, such that the roofs of the two parts intersect each other. According to this diagram, these would be the "crossed gable" and "cross hipped" roof types. Up until now the player was not allowed inside the roof area, so all of the polygons clipping through each other weren't visible. But now that I want to make this part of the attic interior, this has to be dealt with somehow. At first I added special cases to skip adding attics to this type of house. Later I got back to working on this and wrote the code to clip roof polygons (triangles and convex quads) to the other existing roof polygons. It wasn't as bad as I thought, and worked pretty well. I still wasn't sure what to do with an L-shaped area and how exactly to add objects such as wood beams in the roof. In the end I added vertical walls to split the area into two separate cubes, and made the larger one the attic.
Now that I think of it, I can probably go back and simplify all of the rooftop solar panel placement logic. The existing system goes through a lot of trouble to detect if a roof polygon clips through another polygon to avoid placing a solar panel on it that intersects other geometry. Maybe this code is no longer needed since polygons no longer intersect? I may be able to simplify roof power line connection logic as well.
Another issue that came up was attics where the ceiling was too low for the player to stand. Depending on how I implemented the collision detection, either the player's head would stick out of the roof, or they couldn't enter the attic. Neither of these is acceptable. My initial thought was to skip adding an attic in this case, but this didn't work because attics were added before the roof. I didn't want to reorder the steps because this would break that "without modifying existing geometry" rule above. So instead I set a min roof height for the part containing the attic to ensure the player could stand inside it. This mostly worked, but generated comically tall and narrow roofs for some thin house sections. I had to go back and skip adding attics to house parts that were too narrow. I don't like this complex chain of logic that was needed, but I'm not sure how else it could have been done.
Small attic with two lights and an open door with a ladder extending down into a dark room below.
Attic Access Doors and Ladders
Attics are accessed by a door that pulls down from the ceiling with a folding wooden ladder. This is how the attic is accessed in most of the houses I've lived in. I placed the door in one of the larger rooms near the center of the house, in the ceiling of the topmost floor. If the house contained a hallway in the correct location then I used that as the access room. I put it off to the side of the center of the room to avoid blocking the room light and the path through the room (in the case of hallways), but not so far to the side that it blocks doors. There's an extra check for clearance in front of the door in both the floor below and the attic above to make sure the player has enough space to enter and leave at both ends.
The folding ladder activated with the player's interact key and only draw when extended down to the floor. It's very steep, near vertical, and doesn't work well as stairs. I made it function as a ramp instead, using the same code as parking garage ramps. I wanted to make the player climb the ladder slowly, so I decreased player movement speed to only 20% when on the ladder. This partially accounts for the fact that zombies can't yet climb attic ladders. This slow movement makes ladders more risky, because zombies can get you when you're climbing and will sometimes wait for you at the bottom of the ladder. The attic isn't supposed to be a safe hiding spot. Of course it's also possible to jump down from the attic on the opposite of the opening from the ladder and land in the room below quickly.
Attic access door and extended ladder in the hallway of a house shown with indirect lighting.
Attic Lighting
Lighting works differently in attics. I don't have a flat ceiling to add a standard rectangular or flat cylindrical light to, so instead I hung spherical lights from the center ceiling beam. Shorter/square attics have a single large light, while longer attics have two lights, one near each end. Attics will be full of random large objects, which creates many shadows. In addition, the light radius and field of view aren't large enough to reach into the corners. I increased the indirect lighting contribution in attics to make objects further from the lights actually visible. I still get nice dark areas in the occluded corners behind larger objects and brighter spots in front of objects, which can be seen in the various screenshots in this post. While this high level of indirect lighting is better for taking screenshots, I may reduce the indirect lighting later because I rather like the creepy dark corners of the attics.
I said earlier that I still haven't completed indirect lighting. At this point it's mostly a problem with performance vs. noise. I can't get low noise with good CPU compute time for volumetric indirect lighting. However, attics are a bit easier since they're one room with only 1-2 lights. I can increase the number of simulated rays and get results in reasonable runtime with acceptable noise. So I've enabled indirect lighting for attics, since I feel it improves the look quite a bit compared to using a constant ambient lighting term. I'll likely get into more detail on this topic in a future post.
Long attic under a gabled roof with a rug in the distance and many objects scattered about. A rat can be seen on the attic floor.
Object Placement
Next I'll discuss object placement. Most attics that I've seen are full of complex wood beams that hold up the roof. I'm not sure what the correct term for these different parts are, so I'll just refer to them as "woodwork". I suppose the beams that run along the bottom of the roof are rafters, but what are the beams that run along the roof line and the vertical posts called? And what about those horizontal support beams that form a sort of A-frame shape? Whatever these are called, I looked at some reference images of attic interiors and tried to add all of the woodwork. There are two code templates I used, one for peaked/gable roofs and the other for hipped roofs due to the difference in the way the roof polygons are placed. In some cases one or more sides has part of a vertical wall, which I also treat as a "roof polygon". All of these beams start as a cube that's rotated into the proper orientation using lots of complex math involving cross products and trigonometry. It took me many hours to get this right. Since the ends of the beams aren't properly mitered, they don't quite meet exactly and have small gaps and intersections. I did my best to try and hide this with small translates and other geometry. I'm not sure how practical it is to calculate the correct faces/angles for every beam, and if I'll ever have the time and patience for that. It works well enough for now. A lot of that will be hidden in shadow in the final attic anyway.
I would love to have spiders crawling around on the rafters and other beams. So far I haven't figured out quite how to make this happen, given how complex all of the surfaces are. My existing solution based on object building cubes won't work here. In fact the rafters aren't even real collision objects, they're drawn as part of the roof when the player is in the building. Only the vertical posts that the player can run into are real objects. At least I can put spiders and rats on the floor and have them run around among the boxes and other objects.
Attics work as storage rooms, but I can't quite reuse the existing storage room placement logic because of the various differences in the shape of the room and the types of objects to be placed. For sure there are tons of boxes and crates to add. Small furniture and appliances such as lamps, nightstands, and chairs will work for attics. In addition, I can scatter balls, paint cans, books, and various other smaller objects across the floor and on top of larger placed objects. (I was thinking of adding something larger such as a dresser, but that currently can't fit through the opening for the attic door. I'm not sure how someone would get it up the narrow attic ladder either.) The more cluttered the better, as long as the player is able to pick up and/or move these objects to clear a path to walk. It might be nice to add some unique items that are only found in attics such as kid's toys. It would be neat to have a rocking chair or horse that the player can push to make it rock back and forth.I'll have to see what free 3D models I can find online.
Attic with an open access door, a chimney passing through it in the back right, and indirect lighting casting soft shadows.
Furnaces
I've also added furnaces to some attics. Furnaces were another side project for me. I've had them on my to-do list for a while, ever since I added vents to office buildings. I started with adding furnaces to houses because at least I know what they should look like from experience. The houses I've lived in have mostly had their furnaces in the basements or attics. The house I currently live in has the furnace in a small room off the central hallway, but I don't think that's as common. For 3DWorld, I added the furnace in the same room as the water heater if the house has a basement. Otherwise, I add it in the attic if there is one. I couldn't find a good 3D model, so I took a picture of my furnace, did a poor job of editing it and trying to fix the slight rotation, and slapped that on as a texture. I couldn't get a picture from the optimal angle and the lighting wasn't great. The various pipes that come out the front aren't properly 3D, but it works well enough. It's obviously a furnace. I'll need to add all of the duct-work and actual pipe geometry later. That should add a lot of more clutter to the attic, though I need to be careful that it doesn't block the player's path too much since these objects won't be movable by the player.
House basements now have gas lines that connect to the stove, water heater, and fireplace. I've made gas lines connect to furnaces above the basement as well. However, the only case where a furnace is above the basement is when it's in the attic, and that only happens when there's no basement to put it in, so the pipes won't be visible anyway. I'm sure I'll get back to this at some point. One possibility is to make the furnace placement random when the house has both a basement and an attic.
Attic under a hipped roof with a furnace in the back left.
I spent a lot of time improving my procedural houses last year and in the beginning of this year. Now I'm getting back to putting more work into office buildings. Two posts ago I showed some parking garages with sewer pipes in the ceilings. I've been working on several different areas in the past month rather than a single big feature. I've added cold and hot water pipes, a vertical fire suppression system pipe, electrical panels, utility rooms, water heaters, and vents since the last post. The pipes are all connected to water heaters and other plumbing fixtures to form a complete system. Each of these additions increases draw time, so some of my effort has also gone into making optimizations to the code to get back to my framerate targets of 100 FPS outdoors and 60 FPS indoors.
Here are some more details on these additions to my procedural office buildings.
Cold and Hot Water Pipes
I definitely liked the way sewer pipes turned out in my earlier post. I want to add more pipes to parking garage ceilings, and water pipes seemed like the obvious next step. And why add just cold water when I can have hot water pipes as well?
I reused most of the sewer pipe code to add water pipes. These were placed above the sewer pipes, closer to the ceiling, using a smaller pipe diameter. I used copper material for the pipes and shiny brass for the fittings. I didn't have enough space near the ceiling to route hot water pipes above cold water pipes, so I put them at the same level and added cold water pipes as blockers going into the hot water pipe routing algorithm. This way cold water had a priority, and hot water was added where there was space between everything else. In many situations the hot and cold water mains ran parallel to either side of the risers feeding the main bathrooms.
Here's a screenshot. I don't particularly like how water pipes must pass through ceiling beams, but I guess it's good enough for now. I disabled cars to avoid distracting from and blocking the view of pipes in the ceiling. Note that parking garages now have yellow curbs at the ends of parking spaces and some handicap spots near the elevator(s). I also made the occasional parking garage ceiling light flicker, though you can't see that in screenshots.
Water pipes in the ceiling of a parking garage with no cars. I've also added handicap parking spots and yellow curbs.
Hot water pipes have an additional layer of white thermal insulation. I've seen buildings with this style of pipes and feel it has good contrast against the copper while also matching the ceiling so as not to stand out too much.
Hot water, cold water, and sewer pipes in the ceiling of the parking garage.
Fire Suppression
The fire suppression/sprinklers pipe is currently just a big red tube placed near an exterior wall that extends vertically from the lowest level of the parking garage up into the building. However, I did add support for extruded N-gon shapes, which I used to
add hexagon bolts to connect the pipe sections together. Now I can use
this system to add bolts and similar details to other building objects.
I haven't added any horizontal pipes or actual sprinklers yet. I might add these to parking garage levels at some time in the future if I can find a way to fit them. Maybe they can hang down lower than the other pipes. Or maybe I can get away with only having them along walls and away from other types of pipes. I'll have to look through some reference images to help me decide what approach would work the best and fit within the constraints of my buildings.
Fire suppression/sprinkler water pipe running vertically through the parking garage, with hex bolts.
Utility Rooms and Water Heaters
Each large office building now has a dedicated utility room on the ground floor. This is assigned to a windowless room that's as close as possible to a bathroom to minimize the average length of water pipes. So far utility rooms contain only a row of water heaters. I used the same style of vertical cylinder water heater that I used for houses, except the pipes bend down and pass into the floor below instead of extending to the ceiling as with houses. This is because the plumbing is in the basement below the water heater, while water heaters are placed in the basement of houses. At some point in the future I plan to add other objects such as HVAC components to utility rooms to use up all that wasted floor space.
Water heaters have their own hot and cold water lines that connect through the floor to the pipes in the parking garage below. The hot water main connects between these and plumbing fixtures that use hot water such as sinks. The number of water heaters is determined by the number of hot water fixtures, which generally scales with building size. Hot water flow is evenly distributed between heaters. If some of them can't be connected, a section of the pipe joining the row of water heaters is moved inside the floor itself, or somewhere else not visible by the player.
I've added signs to the doors of utility rooms as well as storage rooms and libraries using the same style I previously used with men's and women's restrooms. I plan to add more types of building signs in the future. For now they're placed on the wall next to the door rather than the door itself to avoid having to deal with rotating them when doors are opened and closed.
Office building utility room with a row of five water heaters with pipes reaching down to the floor. I even added a sign next to the door.
Electrical Panels
Once I had the plumbing done I started working on the electrical system. Houses have an electrical panel with circuit breakers placed on an exterior wall of the basement. Office buildings can have multiple electrical panels placed on the wall of the underground parking garage, if there is one. These boxes have metal conduits exiting from their tops and going into the ceiling above. I found a circuit breaker texture that I can tile to show vertical rows of breakers on the inside of the box when it's open. For some reason I was only able to find marine breaker pictures. Most of the normal circuit breaker images had poor lighting, hands or tools in the way, labels for breakers that I didn't want, etc. So I clipped off the picture of a boat and used the rest of the image as the texture.
Currently the player can only open and close the metal doors of each panel. I might add more functionality to these later. For example, I can make individual breakers clickable so that the player can disable lights on different floors and possibly other electrical items such as the elevators. I'm not sure how to implement this yet, or what gameplay purpose this would serve. I can pretty easily expand electrical panels into a series of breakers that the player can interact with to switch on and off. I would need a new system to handle tracking of which areas are powered, with some sensible default positions for breakers in panels that haven't yet been opened and generated. Maybe each breaker will need to search through the lights and other appliances in the building and disable the correct ones. That means I also have to figure out what "zone" each breaker controls. I feel that having one breaker per room is too many, and one breaker per floor is too few. For example, the building I took these screenshots from has 19 floors and 913 rooms.
This is what the breaker panels currently look like when open and closed.
Two breaker panels in an underground office building parking garage, one open and one closed.
Ah, wait. It's too hard to see the panel with the poor lighting of the parking garage ceiling. Here, the flashlight makes it all better:
An open breaker panel lit with a flashlight.
Vents
I added vents near the ceiling on walls of offices, storage rooms, and utility rooms. These are placed on interior walls to avoid having to deal with windows. If you look closely you can see one in a screenshot above. They don't connect to anything yet, they're simple wall decorations. Building walls and ceilings are too thin to add internal vents anyway. I think I would have to fix that before I can add a proper ventilation system. Sorry, I don't plan on adding gameplay where the player climbs through ceiling vents any time soon.
An air vent in the wall of a bathroom near the ceiling.
There are many possible ways to improve on these systems. Buildings have thousands of different types of objects and many different interacting systems. This is certainly an endless project!
I've explained and shown how rats were added to 3DWorld's procedural buildings in a previous blog post. I had a lot of fun adding rats, so I felt it was time to add another type of animal. This time I wanted the movement and animation to be different. Maybe something that could climb walls, with more legs. How about spiders? I've never added spiders to anything in 3DWorld yet, so this sounded like an interesting challenge.
It seems that adding spiders was a similar amount of work compared to
adding rats. It's hard to say for sure because I'm not quite done with spiders, but I'm almost there. I was able to use a lot of the existing code from rat
placement, movement, drawing, and animation. However, writing an AI that
can walk on walls, floors, ceilings, doors, and room objects was far more
difficult than navigating around on the floor alone. I spent over half
my time on this task. The details can be found below.
Animations
The first step was to add leg animations. No, wait - the first step was
to generate the geometry of a spider that I can then draw. I don't want
to repeat that process I used for butterflies where I had to split the
model into multiple parts so that I could animate it. I can construct a
spider from ellipsoids (squished spheres) for the
body/abdomen/eyes/joints, and cylinders for the legs. Then I can assign
my own custom vertex attributes for the joints and leg segments to
indicate which segment of which leg of which side of the body it's on. I
can then use this information for animation inside the vertex shader without
having to split or otherwise modify the model. It would be nice to have a framework for this alternate movement and animation system.
I had to watch some videos on YouTube (such as this one) to figure out how spider legs move. It looks like I only need to create a single leg's motion, apply it to alternating pairs of legs from back to front, then mirror it to the other pairs of legs and the other side of the spider. The first and third leg pairs move together, and the second and fourth leg pairs move 180 degrees out of phase. Similarly, the left and right legs are 180 degrees shifted from each other. I created several joints which I call the "hip", the "knee", the "ankle", and the "foot." I have no idea what the correct terms for these are when applied to spiders, so I decided to map the three joints and corresponding three leg segments to the parts of a human leg. The hip moves with the body, the knee moves relative to the hip, the ankle moves relative to the knee, and the foot moves relative to the ankle. I initially created a huge house-sized spider to test animations on. All it took was several hours attempting to fit sine waves to the X, Y, and Z dimensions of these three joints to get them moving properly. It's not perfect, because spider legs don't move in a perfect elliptical path, but I think it looks good enough. Their legs tend to move so quickly that you can't easily tell what the motion patterns are anyway.
Here's an initial spider animation and floor/ceiling/wall walking test.
Movement
The task of having spiders walk on the floor was trivial. All I had to do was copy the code from rat movement (or simply draw spiders instead of rats!) Handling walls and ceilings was far more difficult for several reasons. First, movement isn't within a plane. There are turns that have to be made gradually, without clipping through objects in the process. Second, the up direction has to change based on the orientation of the surface the spider is walking on. I can't always use +Z (vertical) for up like I do with rats. Third, it's far too easy for a spider to get stuck in the spaces between multiple nearby objects.
I was about to list "path finding is more difficult," but I stopped myself because that's a lie. As far as I'm aware, spiders are pretty dumb. They don't make complex path finding decisions or otherwise think ahead very much. They simply walk in one direction until they find something. Or at least that's what they appear to be doing, so I'm sure I can get away with making my spiders act as dumb as real spiders appear to be. I don't think I even have to make them chase the player. They can instead just sit there on the floor or hanging from webs on the ceiling, waiting for the player to walk by and get bitten. Their natural defense mechanism is to bite whatever is about to step on them.
Right. I suppose now I should explain how I got spiders to walk on the walls and ceilings. I worked on that code in between implementing all the other features I discuss in this post, and then again after I was done with everything else. And then again later for good measure. I suppose I have to write enough about this to get across the idea of how long this task actually took to figure out. You can skip over this next part if you find my technical content hard to follow.
I started out by iterating over all of the surfaces and objects of the house that were near each spider. This includes walls, ceilings, floors, doors, furniture, appliances, stairs, etc. If the spider hit something that was round or otherwise not a cube shape, it would bounce back and pick a new direction. (Cubes are much easier to start with.) I then found the surface the spider was currently walking on from among all of the remaining cubes based on the spider's up vector. In addition, I found the nearest secondary cube face, which represents the surface the spider is most likely to encounter next and must adjust its position and direction to account for. I calculated the distance between the current and next surface and used the relative distances to interpolate a smooth path for the forward and up directions to transition from one surface to the next.
This worked well for most cases involving floors, ceilings, and walls. Unfortunately, it didn't work at all for outside edges of walls (such as around door frames) or corners where three different cubes/surfaces came together. Obviously, if I'm only tracking the two nearest surfaces, I can't properly handle three surfaces at once. Sometimes the collision system would switch between two of the three surfaces each frame and the spider would turn around constantly. In addition, spiders were always getting stuck between furniture and walls because that system couldn't handle a spider simultaneously colliding with two surfaces of the same orientation. So any time these situations came up, the spider would either get stuck forever, jitter/spin around randomly, or clip through an object. Clearly that's no good.
I couldn't find an incremental fix for any of these issues, so I threw out the code and rewrote the whole thing from scratch. I treated the spider as a sphere (well, technically an ellipsoid because it was shorter than it was long/wide). The goal was to always have the sphere touch one or more surfaces and never intersect an object or float in space. If a movement pushed the sphere into an object, I used collision detection/resolution to push it out. If the spider moved into empty space, I moved it back and selected a different direction or pushed it to touch the closest object. Rather than trying to special case all the different cube faces/orientations, I simply generated 50 random movement vectors in the roughly forward direction and picked the one that moved the spider the furthest without colliding or entering empty space. I also added a small preference for motion in the "up" direction to induce more frequent climbing behavior.
This new system solved all of the previous problems, but also introduced some newer, lesser issues. For example, I still didn't have a good solution for the outside cube edge case. What I mean by this is if a spider is walking along a wall and encounters a doorway, it should walk around the edge of the door frame and onto the opposite side of the wall. The reason this case isn't handled is because only the current surface is being tracked. If the spider walks in a straight line it will go off the end of the wall before it collides with the edge of the door frame since the edge isn't in its path. I eventually came up with the idea of searching for the orthogonal edge of the previous surface when the spider had run into empty space. This at least works with right angle outside corners from the same cube. Then I realized I could simply move the spider to the closest point on the cube and it would somewhat follow the wall.
At least in theory - when I implemented this the spider just clipped through the door frame. I tried several approaches and they all had the same outcome. I was determined to make it work and stayed up until past 2AM trying to get this right. (Yes, it was a Friday.) I eventually gave up and went to sleep, then figured it out in about 10 min. the next day. The spider logic was right all along, it was the door frame logic that was wrong. I thought the door frame was supposed to be added as a thin wrapper along the edges of the wall, but instead it was added as an extension to the wall and was in fact hollow inside. Spiders were following the wall itself, and this is what made them clip through the door frame and get stuck in the empty space where the wall should have been. That explains why I had a similar problem with rats clipping through the door frames that I was never able to solve!
This was an easy fix, and after that it ... almost worked. There's still some instability where spiders will randomly switch between walking up and down along the door frame. It doesn't happen too often, which makes it that much more difficult to debug. I *think* what's going on is that some of the larger spiders are wider than the wall and can't quite balance on the edge of the wall without falling off one side or the other. When they do this, it triggers that same edge-of-wall following behavior and they switch directions and try again. This only lasts a few seconds until they either finally align to the center line of the wall, or eventually reach the top or bottom of the door frame. So maybe this temporary, um, indecisiveness is acceptable. Or I could make the spiders smaller, but then I would have to more accurately handle things like wall and door trim because they would start to clip through these thin objects. I think at this point I've spend enough time on this task and can move on to something easier.
I placed all of the spiders in the basement and on the first floors of houses and office buildings, just like I did with rats. However, spiders don't always stay on the first floor. They can climb the stairs, and eventually some of them make it to the upper floors.
Here is the result of my movement work.
Scalability
The next big question is, how many spiders can I put in a single house? At first it was very slow because I had forgotten to add view frustum culling and occlusion culling. Fortunately, this works the same for spiders and rats, so I was able to reuse the code. With some minor amount of code optimizations I had the system scaling to 1000 spiders with a minimal drop from 103 FPS to 89 FPS, which is something like 100 spiders in each room. That's ... a lot of spiders, especially when they're this large in size. Good luck trying to run through even one room without getting bitten! (Yes, I've tried it, and I can tell you that my survival rate was very low.) Anyway, you end up with something like this screenshot.
This is the result of adding 1000 spiders to the ground floor of a single house. There are about 80 spiders in every room (12 rooms total), all over the walls, ceilings, and floors!
What's even scarier than a room with 100 spiders? A spider on a web by the light that casts a huge shadow on the floor below. And what's even scarier than that? I don't know, but I'll let you know when I come up with something else to add. In the meantime, I leave the answer up to the reader's imagination.
A spider hanging from the ceiling light casts an ominous shadow on the floor. The light is a point light source, even though it really should be a rectangular area light.
Webs
I've added visible white web strands since taking that screenshot above, so now you can tell the spider is hanging rather than floating in midair. They like to drop down from the ceiling when they collide with each other or reach an obstacle they can't easily climb on such as round lights and the railings of stairs. (I haven't yet figured out how the movement logic works on curved surfaces like this.) Note that the player can also collide with spiders and push them around somewhat when they're on ground, on the wall, or on a web. My daughter suggested adding spider webs in the corners of rooms. Maybe I can add that at some later time.
Spider dropping on a strand of spider web from the top of the stairs.
Gameplay
Next, I had to figure out how spiders interact with the player in zombie gameplay mode. They don't make any noise, so that interaction mechanic is out. As I mentioned earlier, I didn't want them to actively chase or follow the player. They simply ignore the player and do their thing, but they will bite the player if stepped on or bumped into. This does a small amount of damage, but more importantly it poisons the player so that health drops slowly over time until the player is "healed." This means I also had to add medicine, and the best place for that is inside bathroom medicine cabinets, which can now be opened by the player with the interact key.
Medicine cabinets with mirrors that are placed above sinks in most house bathrooms can now be opened by the player, revealing medicine that will restore full health and cure poisoning.
I haven't yet added logic to allow the player to pick up, carry, and drop spiders. I'm not sure what sane person would actually attempt that with spiders of this size. Besides, I've already implemented that mechanic for rats so it wouldn't really be classified as a new feature anyway.
I'm sure there are many ways to continue with this direction of my work. I could add other crawling bugs now that I have the "N-legged climbing bugs" code. Maybe beetles or ladybugs? I could spend another few weeks adding flying birds or insects *inside* buildings. Or I could have a spider squishing mini-game for the player.