Saturday, September 2, 2023

Basement Water

I've added a layer of water to the lowest levels of some of the office building backrooms basements. It's about a foot deep and mostly clear. The water is drawn using a physically accurate method that includes computing a Fresnel reflection term and calculating wavelength dependent absorption and scattering. Scattered light uses the color derived from nearby room ceiling lights and includes a shadow term. The top surface appears reflective at shallow view angles. The reflection code was reused from what I originally implemented for bathroom and dresser mirrors.

I've also added a system for tracking the 32 most recent splash effects and adding them as ripples that distort the water's surface. Each splash source generates sine waves that propagate out and are computed per-pixel in the fragment shader. This changes the normal used for lighting and also the texture coordinates used for reflection lookup. In addition, splashes add a local dirt/foam effect that temporarily makes the water a bit cloudy.

Everything that touches the water produces a splash with magnitude that depends on the force of the movement. This includes the player, people, and zombies walking through the water. It includes collisions of balls with the water when kicked or thrown. Pushing and dropping objects in the water generates splashes, as does opening and closing doors submerged in water.

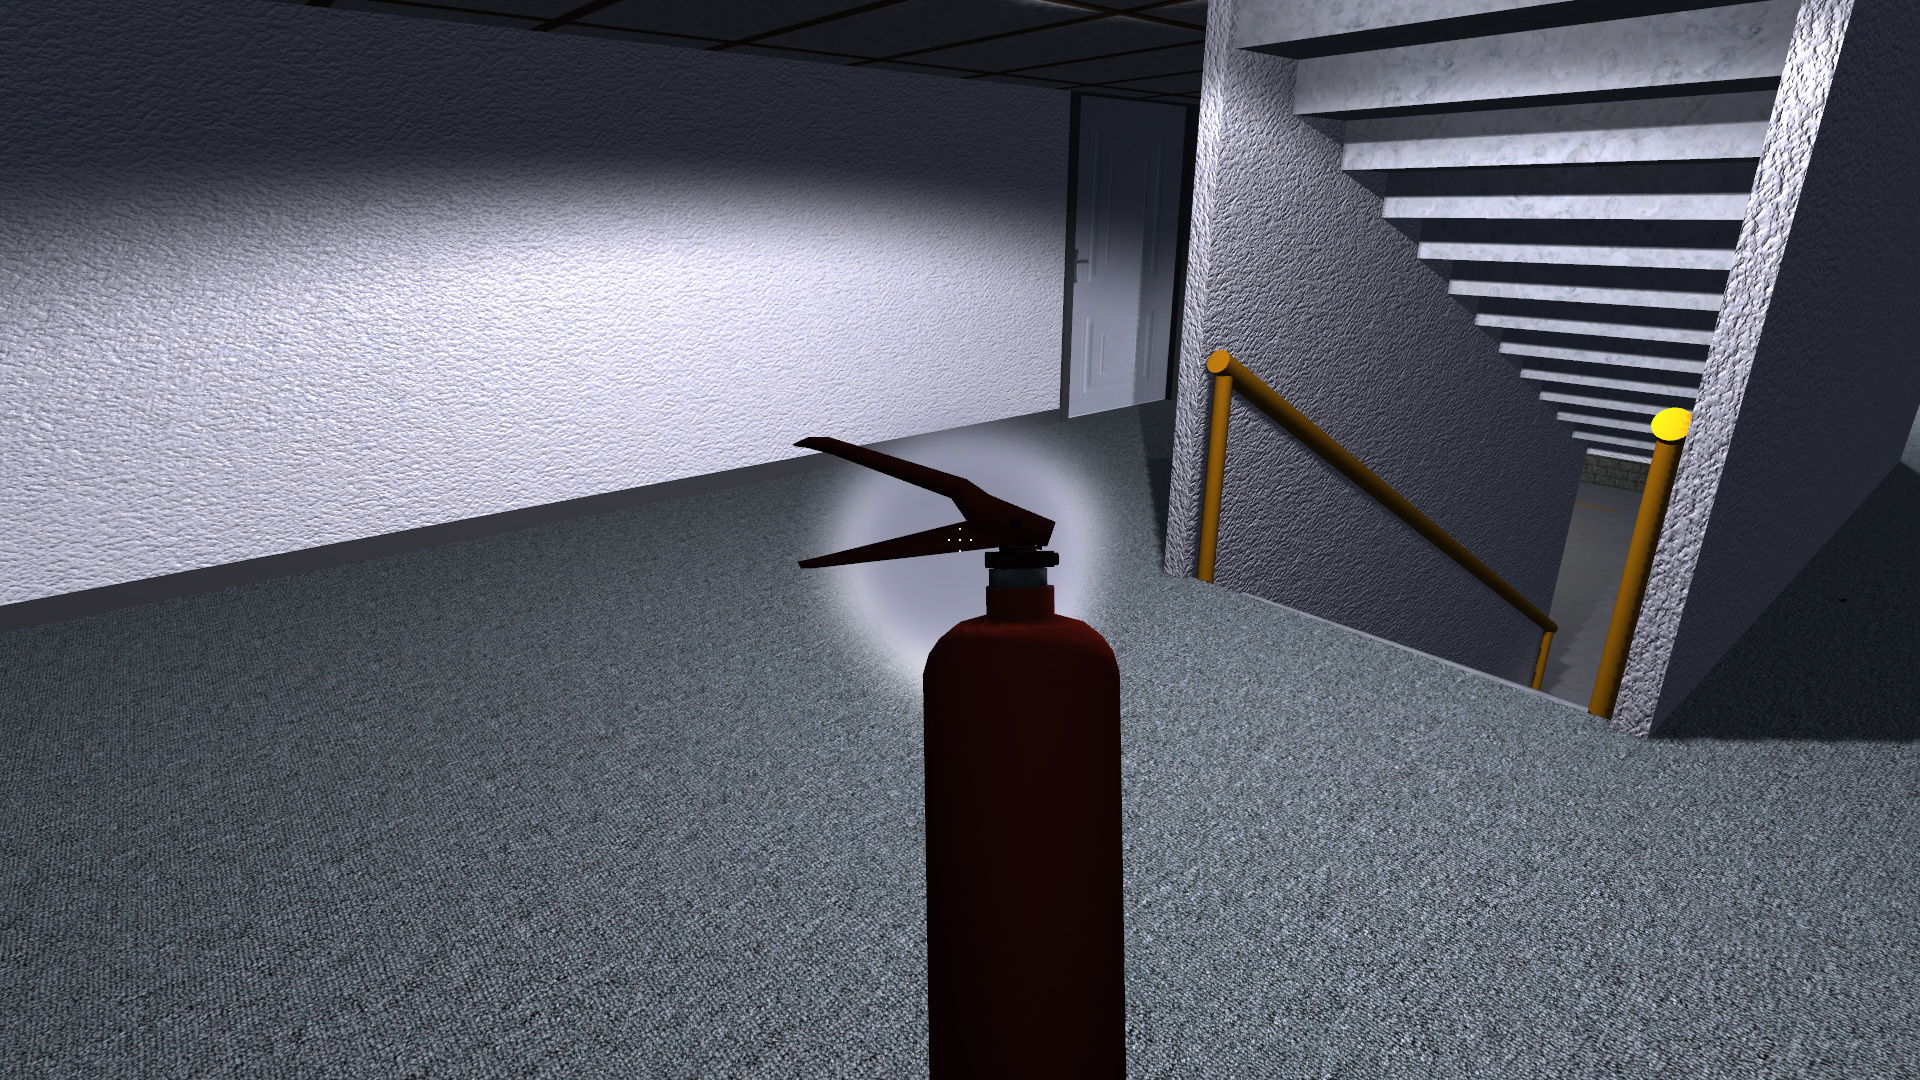
This video shows my progress so far. I initially tried to get a good splash by dropping the fire extinguisher in the water, but it was difficult to see from that steep view angle. Ripples are easier to see when viewed at an angle from further away when the reflection term is stronger. The slight lag that occurs while the zombie is chasing me is due to the loading of a different 3D model for a zombie on the floor above me that never quite comes into view.


Here's an image of the same scene. The default is clear, clean water. The water absorbs the red component of the color more than the other wavelengths, and scatters the blue color the most. This results in the water appearing to have a blue tint that varies from light blue/white nearby to a deep blue in the distance where the camera's path through the water is longer due to the view ray slope. The absorption wavelengths can be adjusted in the shader to give the appearance of other fluids such as dirty/muddy water and even blood.

A basement full of clean, clear water that takes on a blue tint.

The same scene, but with dirty, muddy water. However, it has the same reflectivity, only the absorption has changed.

The same scene, now shown with bloody water. (Now that I took the screenshot I realize the foam should be dark red rather than white.)

The main() function of the fragment shader code can be found in my GitHub repo here.

I haven't yet figured out how to add refractions for the floors and walls under the water because these have already been drawn by the time the water is drawn over them. It's not particularly easy to customize the lighting and shading of these objects based on the water above them like I do with terrain. There are no caustic lighting patterns on the underwater objects either, for similar reasons. I have a caustic texture that I use when drawing the terrain under ocean water, but that same approach doesn't work well here. I'll look into a screen space approach that reads the current buffer contents before the water is drawn and includes that in the water shading, which may allow me to add these features.

Oh, and the water is currently only a flat plane with no height displacement due to waves. Also, the simulation is mostly run on the GPU, which doesn't have access to the wall locations. This means that waves propagate along the surface and through walls rather than reflecting off of them. I may be able to partially work around this by computing the bounds of each ripple by ray casting it against the walls on the CPU, then sending it to the GPU as a uniform buffer. This is how I handled room lights.

Finally, it would be nice to have an animated splash effect when objects enter the water. This would add some 3D volume to the water surface. I may be able to reuse the technique I used for raindrop splats in previous work.

I'll continue to think about these limitations to see if I can resolve them in the future.

Thursday, August 24, 2023

Backrooms Style Basements

I've put a lot of effort into creating extended basements for houses that stretch far underground in maze-like hallways and rooms. It's time to work on something similar for office buildings. There are currently two styles of office building basements: parking garages and underground office/storage areas. I added support for creating mazes of hallways for the office/storage areas that produces something similar to house extended basements and works pretty well.

I wanted to do something different with parking garages. Parking garages are already kind of scary in 3DWorld with their dim lighting, open spaces, and small creatures (rats, spiders, flies, and cockroaches). I was looking at some images of creepy and abandoned basements and came across liminal spaces. Many of these are from the backrooms concepts and games. While I've never played any of the actual backrooms games, this looks like something that should be fun and relatively easy to procedurally generate. It's really just another form of maze-like hallways, except with a mixture of larger rooms, irregular room shapes, pillars, and oddly placed objects. So I set about trying to create something similar.

This is a long and technical post with lots of text. I'll add some images to break up the wall of text, and try to add links to some of the discussed algorithms and approaches. Here's an image of the final product before I've even discussed what I did.

Example "Backrooms" area with concrete walls, floors, ceilings, and pillars.

Here I've made all the surfaces concrete, including walls, floors, ceilings, and pillars. This gives more of an empty, unfinished space than the typical carpet, stucco, and tile materials found inside above ground building rooms. Light colors vary randomly from white to yellow. Sorry if the lighting near the ceiling appears too dark to you. I haven't finished working on the indirect lighting for these rooms yet.

Room Layout

The first step was to take the existing house extended basements hallway generation and expand it to create an underground rectangular area as large as possible in both dimensions. Well, as large as possible within reason, bounded by a distance several times the length of the building and any terrain or other buildings that block it. If the extracted area was large enough, it was made into one big room. These additions were relatively uncommon but huge, up to about a thousand feet on a side with hundreds of overhead lights. So far, so good.

The second step was to divide this area up into sub-rooms and hallways by placing random walls. I came up with a few requirements for wall placement that I added to over time while working on this:

  1. Walls can't block the entrance door (or other doors, or stairs - see below).
  2. Two parallel walls must have enough space between them for both the player and building people to walk.
  3. Two walls can't meet at right angles or corners with a gap too small for the player to fit through. The ends must be either moved further apart, or joined to fill the gap.
  4. No single line of sight can extend for more than half the length of the room, to avoid making the "maze" too easy to traverse.
  5. Multiple paths should connect in loops. In other words, it should not be a perfect maze. The goal is to make the area confusing to the player and ensure the trick of following the walls to the right or left won't reach the inner spaces.
  6. All areas are reachable by the player and building AI people. There should be no large areas of disconnected space.

Requirements 1-3 were relatively easy to meet by incrementally adding blockers and either re-placing or moving candidate walls. My fix for requirement 4 was to generate the empty space by inverting the walls after initial placement was complete. These space boxes were then split and maximally merged in both X and Y in two separate passes. Any resulting space box that was longer than the limit of half the room size had an additional wall placed randomly that cut through it. This seemed to work well.

Requirement 5 was addressed simply by not using a true maze generation algorithm. For requirement 6, I inverted the walls and constructed the space boxes again. Next, I ran a graph connected components algorithm on the space boxes to find disconnected area. I then iterated over all walls and found ones that had a different sub-graph on each side. I cut a doorway into a random place in some of these walls to connect the areas (if possible). Once all areas were connected, the algorithm was done. This didn't connect 100% of areas; in some cases there were very small walled off spaces where no door could fit. This was acceptable, as it's unlikely the player would even realize these small spaces can't be reached.

Debug visualization showing walls in red and connected regions of space (sub-rooms) with unique colors. The doors between sub-rooms are visible. These rooms typically have large connected central areas.

The next step was to add random pillars, as seen in some of the liminal spaces and backrooms images. Once again, the inverted space boxes were found to be useful in determining the large regions of empty space where I could fit pillars. I extracted maximally merged rectangular areas of spaces, and added a 1D or 2D grid of pillars to these candidates with a 50% random probability. There was also a chance to join adjacent pillars with walls in a random dimension (X or Y) to fill some of the extra space. Since pillars were placed in empty space with some border, this guarantees they can't intersect doors or other walls, and can't block the path of the player or building AI.

This is an overhead view where I've disabled the terrain and grass drawing and forced walls and floors to always be drawn even when they're not visible. Keep in mind that the room is actually underground and wouldn't normally be visible like this. It should give you an idea of the general room layout.

Overhead view of a large underground network of connected rooms that runs under a road. The walls, pillars, and ceiling light fixtures are visible.

Those white lines are the edges of the ceiling light fixtures. Their top surfaces are normally occluded and not drawn. Lights aren't actually enabled in this situation because the player is outside the building, so everything has an unlit gray color.

Sub-Rooms

The result of the above wall insertion algorithm was a set of rectangles joined into connected areas, which I'll call "sub-rooms", themselves connected by doors. These aren't true rooms because of some limitations I have on room generation:

  • Rooms must be rectangular (4 sides, 4 corners).
  • Rooms are generated at building creation time.

Technically, some of the existing rooms aren't rectangular. There are hallways that have right angles in certain office building floorplans, though these are actually two rooms joined by invisible doorways that span the entire hallway width. There are also some rooms with curved walls created from pie-slices of round buildings, but they're really still rectangles clipped to the outer walls. And we have some complex building floorplans with oddly shaped rooms, but these are due to limitations of wall placement and not really intended.

Creating rooms as part of building generation rather than deferring this until the buildings become visible is somewhat historical. The interior walls are needed to compute correct night time windowing lighting and various other effects. I also used to place people and cars in all buildings at the same time, rather than populating buildings incrementally as they come into view of the player like I do now. There are performance reasons as well: Creating all interior geometry at once allows better use of multiple threads, and packs them all into a single vertex buffer for more efficient drawing. Note that I do have tile-based building creation for infinite cities, but that has some runtime lag when generating new tiles. I don't generally use this for fixed size cities such as my current island map.

Anyway, the problem with creating all of these backrooms sub-rooms at once is that there are a huge number of them, potentially much more than the room count of the main buildings. This would take too much upfront time and memory. I could rewrite the way the interior rooms and walls are generated to make them more incremental, but that seems like too big a change to jump into when I'm already in the middle of this basement backrooms implementation. So instead I'll have to add a sub-room system that works with things like object placement, collisions, and AI path finding. This way I only need to generate the backrooms basement area when it becomes visible to the player. This happens when the player enters the building, considering it's windowless and underground.

The same performance problem exists for the walls separating these sub-rooms. Adding them to the regular building wall vectors would take significant GPU memory to store all of the geometry, and would mean that I have to rebuild the wall data structures when the backrooms are generated. It would also slow down iteration over walls that's done as part of collision detection, occlusion culling, AI path finding, and animals updates. So instead I added the walls as room objects, recording their range in the objects list so that I can more easily find them later during queries. The interior walls dividing parking garages into rows are handled the same way.

There are two types of sub-rooms: Single rectangle, and multi-rectangle. Most of the time there will be a large multi-rectangle central region connecting to the entry door. The single rectangle sub-rooms are usually small rectangular areas sandwiched between sets of intersecting parallel + perpendicular walls. We can ignore any small sub-rooms that weren't connected to the room graph by a door. We know that the remaining rooms are at least wide enough for the player to walk inside because (a) requirement 2 above, and (b) there was enough space to place a door connecting the sub-room to the adjacent sub-room. These can be assigned a function just like other building rooms. I made rooms with a single door into bathrooms. Rooms with multiple doors are typically assigned as basement utility or storage rooms, unless there's no space to add objects.

Here is an example of a utility room adjacent to a bathroom. The mirror on the medicine cabinet reflects objects as usual.

Small sub-rooms are assigned as bathrooms if they have a single door; otherwise, they become utility or storage rooms.

Object Placement

Lights are initially placed in a 2D regular grid pattern on the ceiling. This is done after wall and door addition. Any light that intersects an object is moved randomly by various amounts in all four directions until a valid location is found. If no location is found after a maximum number of attempts, that light is omitted. This tends to produce a somewhat staggered/irregular grid with occasional missing lights.

Small single rectangle sub-rooms are easy to populate. First, I check to see if each one has at least one ceiling light, and place a light if needed. Those assigned as bathrooms have the usual toilet, sink, and medicine cabinet. (No showers or bathtubs in office basements!) Utility rooms are populated with objects such as furnaces, water heaters, and boxes. Storage rooms currently have only boxes and crates on the floor. I was able to extend the existing room placement code to take the sub-room bounds so that I could reuse it for these cases.

This leaves the irregular areas. I can't use most of the existing object placement code because it only works with rectangular rooms. I can reuse the code that randomly places boxes on storage room floors because it already has wall and door detection build into it. I also added code to place some random soccer balls, basketballs, wooden chairs, office chairs, and wall-mounted fire extinguishers. These objects are placed relatively sparsely, only a few per building basement. They add to the variety of these otherwise empty areas and serve as landmarks in the maze of walls, without getting too much in the way of navigation. We don't want so many of these objects marking the way that the backrooms become easy to escape.

Why place sports balls in office building basements, you ask? Well, they're useful for gameplay mechanics. Balls can be thrown to chase away or distract zombies in the likely case you get cornered in a dead end area. Adding balls made it easier to debug collisions without requiring me to first find a ball in some other building and bring it into the basement with me. And they can be moved around to mark the player's path - assuming zombies don't kick them out of the way.

... Not that marking the path is really a problem. Now that I think of it, the player can just paint on the walls and floor with spray paint, draw with markers, leave a trail of toilet paper, or even block off dead ends with duct tape. Maybe I've made it too easy for the player?

I've marked the way to the exit stairs with a trail of toilet paper, arrows drawn on the floor and walls with spray paint and markers, and duct tape across the dead end paths. Hopefully I won't get lost this time!

I also enabled the usual placement of electrical outlets, a light switch by the door, wall vents, and ceiling vents for the larger room. Since these objects are placed on true room walls (exterior building walls in this case) and ceilings, this works independent of the interior walls and sub-rooms.

Movable Office Chairs

One downside of adding chairs to these rooms is that they can block the path of both the player and building AI people. Walls are spaced to allow everyone to pass between them, but there may not be enough space if a chair is in the way. Small wooden chairs can generally be walked around or over by the player, so they're not too much of a problem. Rotating office chairs are wider. Sure, the player can always pick these up, but chairs will quickly fill up the player inventory space with low-value objects. It's not like you can easily get outside the building from within the basement to drop off your inventory items.

My fix was to make these office chairs pushable by the player. The player can already rotate chairs because the 3D model instances have a rotation field. It was easy to add an instance translation as well and make player collisions translate these chairs. Of course, I had to add collision detection for the pushed chairs to make sure they can't clip through walls and other objects. Fortunately, updating the model instance translation doesn't require rebuilding the vertex data for room geometry. This makes it a cheap update that can be done per frame, rather than the push impulse that can be used to move furniture a fixed distance once every so many frames. However, I still need to redo AI path finding every time an office chair moves. This is needed for the AI to avoid getting stuck against or walking through a chair that was moved into its pre-planned path.

This solution works for the player, but what about for the building AI people? I was initially going to allow them to move chairs as well. But then I realized that allowing the player to construct barricades from chairs that block hallways and door would be an interesting game mechanic. So I'm going to allow these chairs to block zombies for now.

The player can push office chairs like this all around the underground room, except through doorways into other rooms and up/down stairs.

AI Navigation

The original AI navigation system treated each floor of a building as a connected graph, with rooms as nodes and doors as edges. Stairs and elevators connected to the nodes as sources and sinks to allow movement between the graphs on each floor. Since the floorplans were mostly the same for each floor of a building, I was able to reuse the navigation graphs across repeat floors. I use an A* path finding (A-star) algorithm to find the shortest path through rooms and doorways. Path finding within a single room consists of choosing random points and trying to find unobstructed paths between these points to cross the room or reach a destination point within the room. This works for most rooms because they're relatively sparse with only a few objects such as beds and tables blocking the AI's movement. Most rooms are relatively open in their central areas.

This system doesn't work for backrooms style mazes with sub-rooms. The simple point-based path finding fails to find a path in almost all cases. I don't even have a nice room/door relationship that I can use to construct a graph in this case. I thought about implementing a proper navigation mesh solution, but that seems like too much work. I don't want to simply include a third party library for this, I want to write the code myself. This is a simple case with rectangular areas on a flat plane. It should be easy to implement, right?

The solution I came up with begins by creating a 2D uniform grid that covers the entire room. Grid-based navigation is much easier, even if the objects aren't actually aligned to a grid. The grid spacing is chosen to be sqrt(2) times the radius of an AI person, and the cell size is similar to the person's diameter. This spacing guarantees that diagonally adjacent spheres are tangent to each other and there are no gaps between adjacent spheres where colliders/blockers could fit. Any grid cells that don't overlap room objects such as walls are marked as passable, while the others are marked as blocked. This means that a person can fully fit within a grid cell (because it's the size of their diameter) and walk between any two adjacent passable grid cells without colliding with an object. I cheated slightly and forced the cells in the center of each door to be passable so that people can pass through the doorway, even if the cells are misaligned from the door center such that they clip through the door frame a bit.

Here's an example of the navigation grid for a small-ish room. Some rooms are several times this size.

Debug view of grid-based AI navigation nodes. All red spheres are locations where a person can stand without colliding with any room geometry. The AI can take any path through adjacent/touching spheres.

The path finding is now relatively simple. I used another (nested) A* path finding algorithm to find the shortest path from the closest grid cell to the starting point to the closest grid cell to the ending point. This path must follow a sequence of adjacent passable grid cells, either in X, Y, or diagonally. Once a path has been found, colinear points are removed to simplify straight segments. Then an iterative algorithm is run to remove unnecessary intermediate points that are not required for a valid path. This can create shortcuts that connect non-adjacent grid points as long as there are no obstacles in the way. It partially works around the rigid grid alignment. This path simplification removes most of the 45 degree grid artifacts from the path and also makes navigation more efficient by reducing the number of segments the AI must follow.

While this grid-based system works well in most cases, there are some situations where the current location or destination aren't reachable from a passable grid cell. This can happen in tight spaces such as small sub-rooms with objects placed along the walls. There could be a path that exists only when walking in a narrow area between two existing blocked grid cells. In this case, the starting and ending segments can default to using the original point-based path finding algorithm, which works well for short distances and tight spaces.

Ultimately, the path finding adds an extra hierarchy: The overall room functions like an entire building floor, and the sub-rooms function as standard building rooms. This abstraction helped me to divide the problem (and code) into multiple independent pieces that could be written and debugged in isolation.

I spent quite a bit of time debugging this path finding code. It was quite difficult to get right, and even more difficult to debug when something went wrong. And lots of things went wrong! I had people walking through walls, getting stuck and not moving, spinning in circles, etc. I had to add debug visualization of path points and edges in different colors, debug printouts, and runtime key bindings to toggle between different path finding and visualization modes.

Debug visualization for zombie and people AI path finding includes nodes (spheres) and the edges between them (lines). Green is for grid-based A* paths, while yellow is for point-based local paths. Red and orange are used for incomplete/failed paths and aren't present here.

Multiple Levels

We're almost done. The last thing I added was multi-level backrooms. Back when I was working on the room generation, object placement, and path finding, I was thinking this would be too difficult. Once I got everything else working I decided to give it a try. I already had code to split rooms into multiple floors, place stairs, cut holes in floors and ceilings for stairwells, and path find through stairs for AIs. The main difference is that most vertical rooms have the same floorplan (rooms, walls, and doors) on each floor. I didn't want that. I wanted each floor of this basement area to be unique, to make player navigation more difficult. The only thing more difficult than a maze is a multi-level maze. This turned out to not be very difficult to implement though. The AI path finding actually worked the first time!

Unfortunately, the framerate was unexpectedly bad. The problem wasn't related to the number of sub-rooms, walls, objects, etc. No, my system can handle a huge number of all of these efficiently. The problem was related to ceiling lights. In particular, there's a special case that does a complex occlusion query when a light is on a different floor from the player in a room with stairs. See, this is a single room, and it now has stairs. Every light on every floor other than the floor the player is currently on is "on a different floor from the player in a room with stairs." In my test case, this was 1208 total lights. 3DWorld was attempting to do an occlusion query for each of these lights, testing every single wall across every level of the backrooms.

This is important because we need to enable the lights on the floors above or below so that the opening in the floor or ceiling where the stairs are doesn't show a black hole. Light from the floors above and below must pass through the gaps created by the stairs openings. For example, the player could be in a dark room where the only light comes down the stairs from the floor above.

Example of light shining down the stairs from the floor above. I've turned off the lights on the lower floor to increase the contrast. This shows how important these lights are to the scene.

The first optimization was obvious: Separate the walls out per-floor and only test the walls on the floor the player is standing on. This was about a 4x speedup for the four story room I was using as a performance test case: 13.8ms => 3.6ms. Even with this optimization, it was still slower than I would have liked as this was more than a quarter of the frame time. The next optimization was to only run this logic if the stairs were visible to the player. This used view frustum culling and another occlusion query, but it only had to be called twice (once for stairs going up and again for stairs going down) rather than 1208 times. That reduced runtime from 3.6ms to 0.8ms, at least when the stairs weren't visible.

We're getting closer. Now it's only a performance problem when the stairs are visible. They key to solving this is realizing that there are only two cases where lights from floors above and below are visible to the player. The first is when the light itself is directly visible, meaning the path from the player/camera to the light passes through the bounding box of the stairs. This is simple and efficient test to perform. The second case is where the light itself isn't visible, but it illuminates a wall that's visible. The light has a finite and relatively small radius of influence. This means that we can use an approximate test of whether the stairs are within the light's radius and only enable the light if it is. The good news is that the vast majority of backrooms lights are neither visible through the stairs nor within a radius of the stairs. These two tests combined reduce the number of lights to draw in my test case from 1208 to only 177, a savings of nearly 7x! I went back later and added additional tests that rays from the camera passing through the four corners of the stairs cut in the floor/ceiling intersect the light bounding volume.

Ah, wait, there's one more case to handle. A ceiling light can cast its light rays through the hole cut by stairs that are behind the player such that the light illuminates a wall or floor that the player can see. Think of a shaft of light through an opening. So we have to track invisible stairs as well, and use them for culling lights from the floor above. The approach I used projects four rays from the light center to the corners of the stairs cut, similar to how I handled culling at the end of the paragraph above. Then we calculate the intersection points of those four rays with the lower floor that the player is standing on. The AABB (axis aligned bounding box) of the pair of end points unioned across each ray forms a volume that encloses the light that can pass through the cut. The light must be included if this volume is visible to the player. The check includes both view frustum culling and occlusion culling.

Flickering lights were also causing a performance problem because every flicker required recalculating indirect/ambient lighting for all objects in the entire room. I later realized that a single light had almost no effect on a large room like this, so I disabled that behavior.

At this point I feel that everything looks good and is working. I'll likely come back to this at some time  in the future.

Monday, July 31, 2023

Stacked and Multi-Family Houses

I've recently put a lot of effort into improving building interiors by adding new types of objects and other details. Now it's time to revisit exterior geometry and room assignment, in particular for houses. I wanted more variety in house geometry, so I added a new type of house that has a smaller cube stacked on top of a larger cube. Then I made some of the larger houses multi-family homes split by floor. I'll describe these two additions below.


Stacked Houses

Houses initially came in two general floorplans, a rectangle and an L-shape. The L-shaped houses were formed from two rectangles placed next to each other with possibly different heights. This formed either an L-shaped floorplan, an L-shaped exterior vertical profile in cases where heights were different, or both. Each floor had the same floorplan so that a single set of vertical walls extended through all floors, and a set of stairs connecting them. Some houses also had rectangular basements, and some of those had a network of extended basement hallways as explained in this blog post. The combination of different heights, aspect ratios, roof styles, garages, sheds, porches, chimneys, etc. added a lot of variety to these otherwise simple shapes. However, I wanted to add even more house variety.

I've already created some styles of office buildings that have vertically stacked sections, where the upper stacks usually had a smaller footprint. There are some overhangs, but these are rare. This same stacking approach can be applied to houses, allowing me to place a smaller cube on top of a larger cube. Both the upper and lower cubes can have multiple floors. I added a 50% chance that each of the four sides of the upper cube is shifted inward to create a smaller footprint. If none of the four sides are moved, we simply end up with a single cube that has two different interior wall floorplans for the upper vs. lower levels. This is fine too as it adds variety to house interiors.

Here are some examples of houses created with this approach. These next three screenshots show houses with a combination of one, two, and three inset sides.

Two stacked part houses: Foreground house has a tall and narrow upper part; Background house has a small sloped roof section over one side of the lower part.

Two more stacked part houses next to each other, viewed through the power lines. Note that all houses in the same block use consistent exterior materials and styles.

A house with a wide bottom floor with garage, and a narrower upper part.

This was quite a bit of work to implement. I can't remember everything I changed, but it must have been over a dozen blocks of code. There are some obvious additions such as the custom sloped and overhanging roof quads on the lower cubes of the houses.

Note that the original version of these houses had steeper roofs on the lower parts, but I couldn't get the windows to look right. Removing the windows from the inset walls on the floor above the wider bottom parts created windowless rooms and caused other problems. While I did prefer the exterior look of theses houses, I just couldn't get the interior to be correct in enough cases.

The attic code had to be modified to only add attics to the upper parts of these houses. That change was relatively easy. What really got messy was adding stairs. Keep in mind that stairs are placed after adding walls and interior doorways. In some situations it was possible to add a single stairwell that extended all the way from the ground floor to the top floor without hitting any obstacles or blocking any doors. In other cases there was simply no valid location to add stairs, so stairs had to be split into two or three sections that were placed in different rooms. For example, the house in the foreground of that first screenshot has three sets of stairs: one connecting the bottom two floors, a second connecting the top three floors, and a third connecting the bottom part to the top part. Oh, and there's also a fourth set of stairs connecting the ground floor to the basement. The logic to place all of these stairs is quite complex and was difficult to implement. Updating the building AI (zombie) logic to navigate using these stairs also took some effort to get right. I actually had code in place to handle multiple sets of stairs, but it was broken in a way that wasn't triggered by the multiple sets of stairs that already existed in office buildings.


Multi-Family Houses

3DWorld's generated houses are typically smaller than office buildings, both in height and in their terrain footprint. Of course there can still be large houses. This usually happens with single cube houses rather than L-shaped houses, because the cube can fill the entire lot with no space cut out of it. Sometimes a house is generated at the max height of five floors and also near the max width in both X and Y. These are unrealistically large for a normal single family home.

For example, we have this monster house shown below. It has five floors with 17 rooms per floor, for 85 total rooms. There are 38 bedrooms and 8 bathrooms. My entire living family tree can stay in this house!

This house is too large for a single family, so I split it by floor into a five family apartment building. You can see the vents from all of the kitchens on the roof.

The solution is to split houses that are both wide and tall into multi-family homes. These can be anywhere from duplexes to small apartment buildings. The simplest solution was to assign one family to each floor and keep the same floorplan for each level. Here I mean the same walls and doors. The room assignments can be different, and they generally should be different, at least for the ground floor entry area.

This required significant changes. The most obvious change is that each individual apartment should have at least one bedroom and one bathroom, plus a living room, dining room, and kitchen when possible. This means that living rooms, dining rooms, and kitchens are no longer constrained to the first floor. Of course only the ground floor resident will have access to the basement (if there is one), but that may be okay for now. Room assignment is quite different, with some new constraints.

The second change was related to the front door placement. Regular houses usually have the front door connecting to either a small entryway room, or to the living room. However, it doesn't make sense in multi-family houses that someone should walk through the ground floor resident's living room to get to their upper floor apartment. No, we want the front door to connect to the room with stairs instead. If this isn't possible because the stairs room has no exterior wall, then the next best room for the front door is a hallway connected to the stairs room. Since hallways cross the entire part, and cube-shaped buildings only have a single part, we can place the door at either end of the hallway. Most of these larger houses already have a hallway, and most hallways connect to the room with the stairs. It should be rare to have stairs in a room that's neither along an exterior wall nor connected to a hallway. So far I haven't seen a house where this approach failed.

The above door assignment algorithm still has some flaws. In some cases the room with the stairs is assigned a function such as a living room, or it's not possible to reach every room in the house without crossing through the public stairs area. In fact the stairs room often has multiple doors, rather than the single apartment front door we would expect. I think I would have to go back to the floorplanning step to fix this. What we would really need to solve this is a dedicated entry + stairs room that connects to the front door and has exactly one door leading out to the rooms on each floor. Or we could possibly have an exterior stairwell with front doors above the ground floor. That could work, but would require significant code changes.

The third change I had to make is related to family names shown when the player enters the house. I kept the main generated last time for the ground floor tenant. This is what's shown on the sign above the front door (if present) and what's printed when the player enters the house from an exterior door. I used the hash of this name as a random number seed to generate different family names for the other floors above the ground floor. This is shown when the player uses the stairs to move to a different floor. The building's address and other string properties remain unchanged.

This system isn't perfect. Sometimes it's not possible to assign the required room types to each floor. Sometimes an exterior door can't lead to the room with stairs or a hallway connected to stairs. There are other ways of creating multi-family houses that avoid these problems, at the cost of introducing a different set of problems. For example, another approach I considered was to create duplexes by placing either two mirrored houses next to each other, or two symmetric parts (cubes) of the same house next to each other. This would make it easier to ensure the room assignment and connectivity requirements were met. Each part of the house could have its own front door without needing to connect through stairs.

This solution is more difficult to implement because it requires changing the exterior geometry and wall floorplan to work with duplexes. I would need to add logic to handle shared walls between units that doesn't assign windows or doors to these walls. There's also no easy way to guarantee symmetry for the two houses in the current procedural generation system. It's unclear how much better this would work and what other problems might arise. I decided it's too much effort to experiment with this approach since it's not an obvious improvement. I may change my mind about this later, so there may be a future post on this topic.

Saturday, July 22, 2023

Adding Building Interior Items

This past month I've been busy with summer related tasks and I haven't had as much time to work on 3DWorld. Much of my 3DWorld development time was spent fixing bugs in preparation for, and as a result of, demos I made to various relatives who visited me.

The new features I've added for July are fire extinguishers, pizza boxes, and shirts. I'll describe each of these in the sections below, along with showing some screenshots.

Fire Extinguishers

Interactive objects are the most fun to add. I don't remember how I came up with the idea of adding fire extinguishers, but I'm glad I did. They were both relatively easy to add and serve a gameplay purpose. They can be found in two places: hanging on the walls on each floor in office building hallways, and inside some kitchen cabinets in houses. Fire extinguishers are placed as three separate objects in office buildings: The sign, the holder, and the extinguisher itself. The player can take the sign and extinguisher but not the holder.

Fire extinguishers can be sprayed for up to a few seconds until they're empty. Empty extinguishers serve no purpose, but they can still be picked up and put down on the floor or the top of another building object. (Now that I think of it, I should have them squish spiders and cockroaches like books.) Spraying them produces a stream of smoke-like particles affected by low gravity that spread out until they collide with a floor, wall, or other object. These particles have two effects. First, they cause nearby zombies to temporarily retreat, similar to hitting them with basketballs and soccer balls. Fire extinguishers are more effective at keeping zombies away, but they have a limited number of uses. I think they can be used about five times on a zombie before they're empty.

The second use is to put out fires that were started on rugs by sparks from broken basement lights. This isn't very helpful for the player at the moment since these fires will go out on their own after a few seconds. However, if I decide to add fire propagation and increased fire damage later, this could be an important gameplay mechanic.

Fire extinguishers are drawn as 3D models and oriented so that the spray nozzle is facing away from the player when being held. They're put down with the same orientation/rotation the player was most recently holding them in.

Fire extinguisher attached to a holder hanging on the wall of an office building hallway. Notice the sign pointing to it near the top of the image.

Fire extinguisher removed from the holder by the player an in the process of being sprayed.

Fire extinguisher placed on a table by the player.

Pizza Boxes

My mother came up with this idea, as well as the idea to add shirts. I found a pizza box lid texture and slapped it onto the top of a flat white cube to create a pizza box. Pizza boxes are procedurally placed on surface such as tables, desks, and counters. They start out closed. The player can use the action key to open and close the box.

When the box is open the pizza is visible and can be taken by the player. If the player's health is low, pizza is eaten with a special chewing sound and adds +50 health. Otherwise it goes into the player's inventory, and is added to both their accumulated money and carry weight. Pizza boxes are therefore the first food/non-drink consumable in the game. I plan to add more types of food in the future, and assign them different gameplay effects.

Closed pizza box, ready to be picked up or opened by the player.

Opened pizza box showing the jalapeno pepperoni pizza inside.

Shirts

I had already added a T-shirt image that was originally used for shirts hanging in closets. Then I replaced the shirts with 3D models, and the image went unused. Why waste an image that's already in the git repo (online version control system); let's reuse it for non-closet objects. Shirts now can be found in two places: on the floors of bedrooms, and in the larger sized dresser drawers. (I don't add them to smaller drawers because they're always spread out rather then being folded.)

Shirts don't have a gameplay use, they're simply low-value, low-weight collectable inventory items. I did have to put some extra effort into making spiders, rats, and cockroaches walk over shirts rather than around or through them. I also had to add a special case so that rolling soccer balls and basketballs don't collide with and get stuck on "floor shirts".

A T-shirt left on the bedroom floor by some lazy person.
The two top dresser drawers have been opened, showing the T-shirts inside. The player's reflection can be seen in the mirror.

Bonus Image

I'll end this post with a bug I found in the algorithm that places stairs to connect different floors of houses. Well, technically it may be more of a closet placement bug. In any case, the problem was that I never wrote the code to handle intersections between stairs and closets. Closets are technically room objects, but they have their own walls and doors and are therefore somewhat special to place in a building.

A closet with stairs going to an upper floor hidden inside it. Definitely not a bug in the stairs placement code!
This bug was quickly fixed. I'm not sure how long it has been around, but this is certainly the first time I've noticed it. I think it's because I recently added the ability for stairs placement to cut through walls of houses when connecting multiple floors with different floorplans. Ah, I don't think I've written a post on the new house floorplans yet. That will have to wait until next time.

Sunday, June 18, 2023

Procedural City Stop Signs

Up to this point, 3DWorld's procedural cities have traffic lights at every 3-way and 4-way intersection for both roads inside the city and connector roads between cities. This works well for cities that are full of cars, but it may be overkill for residential neighborhoods with lighter traffic. Stop signs may be a better fit for these situations. I've added stop signs to residential cities, except for the intersections with roads connecting to other cities, which continue to use traffic lights.

It was easy to find a stop sign texture to use. Each sign is a two sided textured quad with the red "STOP" texture on one side and a white octagon on the other. The sign is placed on a square post, with an additional smaller "4-WAY" sign underneath the main sign at 4-way intersections. These are placed at all corners facing cars that will be entering the intersection. Stop signs are positioned close to where the traffic lights would be and can mostly use the same pedestrian and player collision detection system.

The next problem was adding street signs. I really like how every road has a unique procedurally generated name, but there's no traffic light to attach the signs to. It doesn't look right adding the street sign to the top of the stop sign with a vertical extension. So instead I added a second, taller vertical pole just behind the stop sign with the street name on a green horizontal banner at the top. I had to make this high enough that the largest vehicle (the truck) can pass underneath.

Here is an example stop sign on a 4-way intersection with cars and pedestrians enabled.

A 4-way stop sign with a street sign above and behind it. Cars and people are both waiting to cross.
 

The most difficult step was writing the traffic logic that controls cars reaching stop signs. As with traffic lights, the only real function of this stop sign logic is to tell each car that's about to enter the intersection whether it must stop or can proceed. Once the car is in the intersection, it's free of the intersection control logic and only subject to the car and pedestrian collision checks.

The first step is obvious: Each vehicle must stop at the stop sign, independent of the intersection state. This is accomplished by braking/decelerating when approaching the intersection, starting a timer when fully stopped, and waiting until 0.25s has passed before querying the intersection for permission to enter. This small time delay is enough to prevent a rolling stop. I may decide to make the wait randomly generated per-vehicle to add some variation.

The next step is to determine whose turn it is. We conveniently already have a timer recording when each car reached the intersection for stopping purposes. Each car will then check if there are any other waiting cars with earlier times that should enter first. This check only applies to cars that will cross paths, using the following logic:

  • If cars start at the same location, this is an error.
  • If cars end at the same destination (one of the 3 or 4 exit directions), they definitely cross.
  • If either car is turning right, they don't cross.
  • If either car is turning left, they cross.
  • If we got here, both cars are going straight. They cross if they're going in different axes (one north-south and the other east-west).

I later discovered that the trucks make wider right turns and will in some cases clip through other vehicles making left turns. So I had to add an extra step into the logic:

  • If either one is a truck, one is turning right, the other is turning left, and their paths are diagonally opposite each other, then they cross.

This set of cases appears to be correct. But it's actually more complex than this, because we also have to consider other cars currently in the intersection. My solution was to have cars register themselves with the intersection when entering and remove themselves when exiting. The intersection has 3 or 4 slots corresponding to its entry points that store the turn direction and is_truck flag for each car that's using it. Then the intersection must run the same logic above on any active slots that cross the path of the current car that is asking for permission to enter.

The next problem I ran into was a deadlock case where cars were waiting at each stop sign but no one was going. This took me a long time to reproduce, debug, and fix. I eventually had to add code to detect this case by looking for cars waiting for more than 60s, show where it was happening in the world, and print debug state for the intersection. It turned out that this was caused by cars blocking the intersection because there was no space for them to turn and exit the intersection. This was because cars were queuing up waiting at a traffic light to exit the city, and the line of cars was backing up all the way to the intersection. This in turn was causing the car attempting to enter the intersection to stop while partially inside. The problematic car had already set the "entering intersection" flag for that lane/direction as it had started to move. But when transitioning back to a "waiting" state while space for it to turn became available, it was actually blocking itself from continuing when it was able to. The fix was to have a car clear it's own intersection usage state when stopping while inside and intersection. This will also allow other cars to continue while one car is blocked, which may or may not be correct. I think this is okay because we know they can't pass the initial car as the destination spot is known to be blocked by another car. Therefore, they must be waiting as well, and only one car can claim any spot that opens up.

This overall solution mostly works. There are still some rare cases when cars spawn inside an intersection, or a lag in frame rate causes them to cross through an intersection without properly registering a matching enter + exit event. If left unchecked, this can lead to deadlock where none of the cars can enter. I think one correct fix is to record time stamps for entry events and automatically remove them after a few seconds in the per-frame logic update pass of each intersection. However, I haven't seen this happen after some other tweaks, so it's either fixed now or very rare. I may have to let the simulation run for hours in the background to see if anything fails with the stop sign logic.

Here is a video showing cars following stop sign rules at an intersection. The only issue is that trucks cal still get too close to cars when turning. This can lead to odd behavior as they attempt to avoid collisions that shouldn't actually be possible. I haven't come up with a good fix for this, so I'm calling it done for now.


Wednesday, June 14, 2023

Procedural Building Additions, Interior and Exterior

Once again I have a number of procedural building changes that are too small for their own blog post. I'm working on stop signs, which is a larger topic, but they're not done yet. This post will list the various additions I've made to building interiors and exteriors.

Fires

I showed off the spark particle effects that were added for broken TVs and basement lights in a previous post. When I reviewed that video, it made me think that all of those sparks landing on the rug should set it on fire. So this is what I implemented. Now a spark landing on a rug while it's still hot and glowing has a chance of starting a small fire. I haven't worked out how to handle large fires that spread to the rest of the building, so for now the fires will go out after a few seconds. They do, however, leave lasting burn marks on the rug.

Fires also serve a minor gameplay purpose. In the (unlikely) event the player starts a fire and then walks through it in game mode, they take some small amount of burn damage. This provides a minor distraction from other gameplay tasks and forces the player to pay more attention in rooms with broken lights. Other animals such as rats and cockroaches have updated logic that attempts to avoid the fires. I haven't yet updated the building AI and zombie logic to avoid fires. I feel that zombies should be able to walk through small fires to get to the player.

Here's a short video showing fires created from sparks in the same room as the earlier sparks video.


Attic Vents

I wrote about 3DWorld's interior-exterior geometry in a previous post. This is where "room" objects can be added to building exteriors and will be lit from the sun and moon outdoor lighting rather than interior room lights. I used this a few weeks ago to add window frames and window sills. Now that I have this system in place, I can use it for more exterior detail objects.

One object I'm missing is exhaust vents that pass through the attic and its roof. I added these for furnaces, water heaters, and stove hoods. These are simple pipes that are split into two sections with the lower section inside the attic using interior lighting, and the upper section on the roof using exterior lighting. The vent sections inside the attic also participate in player collision detection and act as blockers for attic object placement. Anything I can do to increase attic clutter improves the realism of the scene.

Here is what these look like from both inside and outside the building.

House attic with a vent from the furnace on the left and another larger vent from the stove hood two floors below on the right.

The same two vents protruding through the roof with end caps that use sky/sun/moon lighting.

I may add more details in the future if I get around to it. Maybe I can make some of them have rotating blades like a fan? I might also add vents for the various plumbing fixtures such as sinks and toilets. I'm not sure exactly what needs a vent. My real life house has something like eight different vents on the roof of various sizes, and the roofs of my procedural buildings don't seem to have enough of them.

Parking Garage Sprinklers

I added large vertical fire suppression/sprinkler pipes to office building parking garages over a year ago. Then a few months ago I added smaller horizontal pipes that lead away from the main water pipe across the roof of each parking garage level. I finally got back to working on this sprinkler system by adding secondary horizontal lines that extend from these first lines. These pipes are placed relatively close together in a grid pattern that attempts to cover all reachable areas of the parking garage.

The placement system must check for intersections with objects such as stairs, elevators, and support pillars. I allow sprinkler pipes to pass through parking garage separator walls in a similar way to water, gas, and sewage pipes. I hung these lower than most other pipes so that they touch the bottoms of the ceiling support beams and stay out of the way of many other ceiling objects. They're placed after other types of pipes, so I need to check for pipe intersections as well. I wrote some code that is able to place partial sprinkler pipe sections in incrementally shorter lengths when the full pipe fails to be placed. In some situations, sprinkler pipes can clip through ceiling lights. I fixed this by a combination of moving the lights to the side and shortening the pipes. I would say that about 75% of the total pipe length can be added on average, which is good enough for now.

Next came the sprinklers themselves. I added upward pointing vertical sprinklers at regular intervals along the smallest diameter (last placed) horizontal pipes. Once again, I had to check for overlaps with other objects near the ceiling and omit the sprinklers in those cases. I also shortened pipes to remove extra segments that had no sprinklers or other connecting pipe sections. Short pipes that don't end at walls are attached to the ceiling with small metal loop hangers/brackets.

All sprinkler pipes are drawn as red cylinders with brass fittings, connectors, and end caps. The bright red color makes them stand out and adds contrast to the otherwise gray parking areas. Sprinklers are formed from three cylinders of different lengths, radii, and colors. I considered using real 3D models for each one, but I'm worried that too many will be visible in large parking garages and this will hurt the framerate. In some cases nearly 100 sprinklers can be seen in the player's view.

Here are two screenshots of a parking garage with pipes and sprinklers. The first is without cars, while the second is with cars and indirect lighting enabled.

Parking garage with a network of red pipes and sprinklers attached to the ceiling.

The same parking garage as above, this time with cars and indirect lighting enabled. I feel it's easier to see the pipes with this lighting.

Newsracks

This one was suggested by my mother. I've added newsracks along the sidewalks of some city streets. They come in four different shapes/styles and a number of different colors taken from reference images of real newsracks. These are all drawn with geometry generated from code, mostly cubes of different sizes. I added a fake newspaper image I found online to the transparent doors of each one. As usual, newsracks are collisions objects that block the player and participate in pedestrian path finding. At some point I may decide to make these interactive so that they player can open them up and take a newspaper. Maybe the player will need to find coins in a building to do so.

Here are two example images, again without and with cars.

An example city sidewalk with newsracks of various sizes and colors along the edge of the road.

More "The Fake News" newsracks, this time with cars enabled.

Rooftop Water Towers

A few weeks ago I did a Google search for other people's procedural buildings to see if any of them inspired me to do something new. One YouTube video showed buildings with rooftop water tower models. That seemed like something easy to add to 3DWorld's buildings that would increase the variety of their roof areas and improve city skylines. Water towers are relatively simple to model out of cylinders and cones for the tower and pipes, plus cubes for the support structure. So I decided to generate the geometry rather than using an existing 3D model from somewhere online. I used a metal plate texture for their exteriors and pipes.

Water towers are placed on some buildings above a certain height and a minimum rooftop area. These are skipped for buildings that already have helipads, skylights, antennas, or other previously placed objects. Water towers are placed before smaller objects such as AC units, signs, and roof access doors, so these objects must check for existing water towers before being placed. Each water tower is also connected to the network of water pipes in the basement, if present.

I may as well continue the trend with two images of the water tower and different sun positions. I added a vertical pipe under the tower in the second image. That Ferris wheel in the background is a great landmark for navigation!

Initial metal water tower 3D model created from a texture cylinder, a cone, and five cubes.

The same water tower viewed with a different sun position and a metal cylindrical pipe added to the bottom to carry water.

Pool Decks

At this point I had both in-ground and above ground swimming pools in the back yards of some houses in my residential neighborhoods. The above ground pools had ladders, but the in-ground pools were simply surrounded by grass. This isn't realistic. All of the in-ground pools I've seen, including the one in my own back yard, have decks around them. So I placed a randomly selected concrete or wooden deck on the ground between the pool and the house. In rare occasions there was some other object between the pool and house, so the deck is omitted in that case. I added some additional random variation that extends the deck to the length of either the house, the pool, or both rather than only inserting it between the shared edges of the two objects. Sometimes the deck will line up with the back yard fence, which I think is a nice touch. This was a minor change that was easy to add.

As expected, two images of concrete and wood pool decks. I think I need to add more details around these pools to make them look interesting.

Simple concrete pool deck placed between the house and a rectangular in-ground swimming pool, enclosed by a fence.

Another swimming pool with a long wooden deck connecting it to the house.

House Balconies

Some of the other procedural building posts and videos I looked at included balconies in their residential buildings. I decided to use the exterior geometry system yet again to add balconies to upper floor rooms of some houses. There are a variety of different balcony styles with wood slats, metal railings, and 45-degree rotated railings, possibly with metal trim of different colors.

Next, I added potted plants to some balconies. These initially didn't work well because the plant leaves aren't drawn as they're on the wrong side of the transparent windows. It took me awhile to rearrange the transparent and alpha mask drawing code to make this work properly. I plan to add small tables and chairs to balconies, but I haven't gotten around to doing that yet.

Balconies are somewhat incomplete at this point and have some issues. First, they're not actually connected to the houses with a door, so the player can't walk out on them. Adding this type of door appears to be complex and difficult. I have the same problem with fire escapes. It may require significant changes to the building creation control flow because currently the balconies (and fire escapes) are added after the doors and windows.

Second, the lighting and shadows aren't quite right. Since balconies are between the exterior and interior, they should have interior light shining through the windows onto them. At this point they don't. Balconies receive shadows from the house but don't self shadow because room objects don't contribute to the sun and moon shadow pass. This also means they don't shadow the rest of the house or the ground below them. I don't have a good fix for this, so I'm hoping the player doesn't notice. I actually didn't notice the lack of shadows at first.

I'll add several screenshots this time since balconies come in so many varieties. I also changed some settings and fixed a few things (like the missing plant leaves) in the process of taking these.

A house with a small balcony with white metal railings and an empty flower pot. The edge (non-corner) railings are rotated 45 degrees just to show I can add shapes other than axis aligned cubes!

Balcony with wooden slat sides and black metal railing and edges.

A longer railing along the side of a house, this time with a black metal railing and bars. This one has two "empty" flower pots.

A balcony with wooden sides and a brown railing, with two flower pots. These ones have actual plants because I fixed the alpha mask material drawing to work outdoors.

I should probably add vertical posts to support the corners of some of the larger balconies. That means I do have to figure out how to enable collision detection for what are supposed to be indoor room objects that happen to be placed outside the house. The lack of shadows may also be more obvious when I add the posts. I'll have to experiment with this later.

I think this post is long enough now. The next post will probably be on the topic of stop signs.