Thursday, December 10, 2015

Reflective Surfaces

This past week I decided to go back and work on rain effects again. The ground doesn't look "wet enough" - it needs to be more reflective. So I reused the plane reflection technique from tiled terrain water to get a reflective wet surface effect in ground mode.

I specify a reflection cube in the config file to enable reflective surfaces in the scene. Any objects with a flat top surface (currently cubes and vertical cylinders) that intersects this cube are treated as reflective. The cube is very narrow in Z height so that all of the objects have their top surfaces close to a single Z-value and can use the same reflection plane. For the office building scene, this includes the first floor walkable area inside and outside of the building. This covers most of the surfaces that get wet in the rain.

The general idea is to draw the scene twice in different modes. In the first pass, the reflection pass, the scene is drawn from the eye position mirrored about the reflection plane, which puts the eye/camera below the reflective surface. This image is stored in a texture at half screen resolution to reduce runtime and memory usage and improve framerate. Then the scene is rendered as usual. The reflective surfaces are drawn using a special shader that looks up the reflection texture and computes a Fresnel reflection term for the material.

I'm using the normal maps of the surfaces for the reflection normal, which effects the reflectivity through the Fresnel equations. Wet surfaces with accumulated water have a smoother, planar water surface (ignoring ripples), so their normal is close to +Z. I blend between the normal map normal and +Z depending on the water depth, which produces an effect of water filling the cracks between the concrete blocks and also a thin layer of water on top of the concrete. The idea was taken from this blog post. Take a look at these screenshots:

Reflections on the wet concrete block floor. Water has accumulated in the cracks between the blocks.

Reflections on wet concrete from another angle.

Reflections also work on smaller objects, even dynamic objects that can be moved by the player, as long as their top surfaces are near the Z reflection plane. Here I have pushed a glass block down the stairs so that it's top surface is at the right height for reflections. The glowing, light emitting spheres are there to test dynamic object reflections and dynamic lighting on reflected objects.

Reflections of the scene with glowing spheres on the top of a glass block.

Reflections are not only for wet surfaces. Shiny indoor surfaces such as tile and marble can also reflect the scene. This greatly improves the realism of these materials, at the cost of increased GPU time and lower frame rates. This tile floor is reflective with a normal map that results in the Fresnel reflection term varying over different parts of the tile, changing the reflectivity per-pixel. The raised marble platform is a smooth reflective surface (like a mirror).

Reflections of the scene with glowing spheres on shiny tile and marble floor.

I ran into a few problems using this approach. First of all, there are several objects at slightly different heights that all use the same reflection texture with the same mirrored Z-value. In the office building scene, there is a raised marble platform slightly above the tile floor, which itself is slightly above the outside concrete. All three surfaces are at different Z values and reflective/visible at the same time when rain is enabled. I use the average Z value from the top surface heights of all visible reflective surfaces. When there is only a single reflective surface it works great, but it's not always so simple. This can produce a small amount of light leaking from under an object that is occasionally visible, but difficult to remove. Here is an example image where the very bottom of the windows are visible in the reflection on the marble, just under the desk. It makes the desk look like it's floating a few inches in the air, because the reflection plane is off by a few inches from the surface. The only real fix for this is to render the scene at multiple Z values in multiple passes, which is slow.

Light leaking under the desk due to top marble surface slightly above the reflection Z plane.

Another bug I ran into is related to objects below the reflection plane that are incorrectly rendered into the reflection image. Think of it like this: The view vector and camera frustum are reflected about the top surface of the floor. This is effectively like moving the camera down by twice the distance it is above the floor, so that the reflection camera is under the ground. What do you see when under the ground? Tree roots! Take a look at this screenshot:

Incorrect reflection of roots under the ground resulting from missing Z clip of geometry.
The problem here is that the tree roots aren't actually visible because they're occluded by the reflective top surface itself, which isn't drawn in the reflection pass. This fix is to clip/discard all object pixels below the reflection Z value in the fragment shader when rendering the reflected scene. This contributes a bit more light leaking to reflective surfaces that are misaligned slightly with the reflection plane, but otherwise fixes the problem.

I found a third bug, where the bottom of the columns that support the stairs appeared to be misaligned with the top of the floor. Here is what it looks like. Notice the apparent gap between the columns and there floor where you can see the reflection of the bottom of the columns.

Small gap between the bottom of vertical columns and the floor exposed by reflections.

At first, I thought this was a problem with the reflection plane similar to the screenshot of the desk above. But the tile floor is the only visible reflective surface in this screenshot (since rain is disabled), so the reflection plane Z should be exactly at the floor height. I spent quite a while trying to debug this. It turns out that it was really an error in the scene geometry - there actually was a small gap between the bottom of the columns and the floor! I could only see it by disabling collision detection so that I could move the camera to near floor height. Once I figured it out, the problem was trivial to fix by editing the scene geometry.

Reflections can be enabled in all scenes that contain flat horizontal surfaces. Here is a view of the wet road and driveway surfaces in the house scene. The reflections are perturbed by the road's normal map to create a rough/bumpy wet surface effect.

Reflections of the house, fence, and trees on the wet road and driveway surfaces.

I suppose the next step is to implement reflections for more than one plane. The goal is to find a way to do this without needing to render the scene reflected about more than one Z value, and to allow reflections in other directions. A further improvement would be to support reflections on curved surfaces. This likely requires rendering to the six faces of an environment cube map. Environment mapping techniques work well for static scenes, but are more challenging when dynamic objects are involved. It's probably too slow to render the scene multiple times (3?) each frame for the visible faces of the cube map. I'll have to put more thought into it.


Tuesday, December 1, 2015

Shadows Update

I worked a bit more on tiled terrain shadows and fixed a few problems from the previous post, so I'll post a few updated images here.

Scenery Shadows
I forgot to add shadows for the other ground scenery, which includes rocks, stumps, and logs. This has been fixed - they now use the same shader as the tree branches. Everything in the scene now receives shadows.

Leaf Back Lighting
I took a screenshot of the leaf back lighting from the sun during sunrise or sunset (not that there's a difference between them in 3DWorld). The unshadowed leaves on the lit side of the tree transmit some light to their back sides, but the shadowed leaves on the unlit side remain dark. This creates a halo of light around the trees similar to "rim lighting" sometimes used in graphics and photography.

Back-lit trees at sunset.

Here are some examples of real photos of back-lit trees, though they were taken with brighter lighting conditions:
Example 1
Example 2
Example 3


Water Shadows
I finally fixed the mesh shadows on the water surface so that they work even when the water is deep/high above the mesh. I folded the terrain mesh into shadow map creation by determining which tiles fall within the frustum (bounding area) between the light source (sun) and the tile to be shadowed. Any tiles whose bounding volume (bounding cube in this case) intersects the light frustum may contribute shadows and need to be drawn into the shadow map. When the sun is high in the sky (large +z component), only the current tile and it's 8 neighbors in {N, NE, E, SE, S, SW, W, NW} are included. The neighbors may contain trees and other objects near/crossing the tile boundary that cast shadows on the adjacent tile. When the sun is low on the horizon, any additional strip of tiles stretching from the sun to the receiver tile are included. I was worried that this would be too many tiles, but it turns out that only 3 or 4 additional tiles are needed. The increased shadow map creation time is barely noticeable. Here is what it looks like in a screenshot where a distant peak casts a long shadow across the surface of the water.

Shadows of a distant peak on the water surface.

Mesh Shadows
3DWorld supports importing of 3D models in the Wavefront object file format. These models can be instanced in the scene with various transforms and colors. I have added three instances of the Chinese dragon statue and one instance of the Sibenik Cathedral to my scene. Each object model casts shadows on itself and on the rest of the scene, including the terrain mesh, trees, grass, and plants. Their shadows can extend far across the mesh. Here are some examples of what it looks like.

Shadows from Chinese Dragon models on the mesh, trees, and grass.
Shadows from Chinese Dragon models cast on the terrain from several tiles away.

That's it for now. I'm moving on to implementing reflections for planar surfaces that should significantly improve the wet surface rain effect. This will be the topic of a future post (assuming I get it working).


Wednesday, November 25, 2015

Tree Shadows

I've been working on improving the 3DWorld trees again. I feel that trees are one of the best looking elements of 3DWorld, and are in general very difficult to get correct. This time I decided to add real shadows to the tiled (infinite) terrain tree branches and leaves, as well as other vegetation such as plants. 3DWorld has included mesh and grass shadows for a while now, but I hadn't really added shadows for the other vegetation because I felt the texture fill rate was too high and wouldn't give me good frame rates. That may have been true on my old computer/GPU, but the new system has much better performance. This is going to get pretty technical, so you might want to jump down to the pictures that I added later in the post.


Shadow Map Creation

The terrain is too large to use a single shadow map texture for the entire scene as it would be too coarse and would produce blocky shadows at that size, assuming a reasonable texture resolution of around 4096x4096. The dynamic scrolling nature of the scene also makes it difficult to use a single shadow map, since it would become misaligned with the scene bounds as the player moved. Scenes like this containing thousands of trees make for very slow shadow map generation because the leaves produce very high overlap/fill rate. I can get away with rendering distant trees as billboards/sprites (textured rectangles containing generated images of each tree), but using the billboards to create shadows looks terrible since they're not true 3D. The tree billboards are designed to be viewed from the side as the player is walking around on the ground. They're not intended to be viewed from above in the direction of the sun, which is required for shadow map generation. The shadow map needs to be rendered once and cached rather than recreated every frame to get good performance. This rules out perspective shadow maps, cascaded shadow maps, and trapezoidal shadow maps as they all require regenerating the shadow map as the view frustum changes (when the camera rotates). In the worse case - every frame.

Instead I decided to create one shadow map per tile, and only for the nearby tiles. This was a reasonable trade-off between shadow map quality and performance. Nearby objects could have very highly detailed shadows that blended to low-resolution precomputed ambient occlusion in the distance. A smooth transition between the two minimized the visual artifacts. Since the shadow maps of each tile are independent, their creation can be parallelized and spread across frames, they could be cached for later reuse, and could have multiple levels of detail (not yet implemented). A per-tile shadow map size of 2048x2048 texels seemed to work well. For reference, a tile is around 130 feet on a side for these scenes and there are about 400 total tiles with 100 or so visible on average.


Water Shadows

I decided to start with something simpler though - water shadows. In theory the surface of the water is the same as the terrain mesh, just with a different shader to handle the different material properties. Tree shadows work just fine for the water surface mesh, using per-tile shadow maps. Here are two images showing deciduous trees and pine trees shadowing the mesh, grass, and water. Both types of trees can be mixed together, but it looks cleaner if I show separate screenshots of the two types of trees.

Deciduous tree shadows on the water surface.
Pine tree shadows on the water surface.


Note that the terrain mesh doesn't cast a shadow on the water, trees, etc. This is because it's difficult to determine which mesh tiles are shadow casters for each receiver tile. A distant mountain can cast a shadow very far away when the sun is low in the sky, and searching for that mountain for each tile can be time consuming. The distant mountain would need to be rendered into the shadow map of every tile it cast a shadow on, even tiles that are far away. However, the mesh and grass are correctly shadowed by the terrain. Rather than using a shadow map, the mesh shadows use a modified "wave surfing" algorithm to trace shadow rays across the grid of 2D mesh tiles. This is done on the CPU, and uses the mesh surface height arrays directly. For each mesh vertex/shadow texel, a single 0 or 1 weight is determined from testing whether the mesh height at that vertex is above or below the shadow ray. This works well for the mesh, is fast (especially using multiple threads), and is compact to store. However, it only works for a fixed z height value at each {x,y} vertex. This doesn't work for the water surface, which has a different height from the terrain mesh. If I reran the algorithm using the max(water height, mesh height) and cached a different set of shadow weights it would be correct, but this is twice the computation and storage cost. It's even more difficult for objects such as trees that can have many branches/leaves at the same {x,y} position but different z heights.


Tree Trunk and Branch Shadows

Next, I added shadows for deciduous tree trunks and branches. This seemed like the easiest part of the tree to add shadows to, since the shader is the same as the one used in "fixed ground mode" (those smaller scenes with houses and buildings), which already has tree branch shadows. All I needed to do was to setup the shader variables and bind the shadow maps of each tile as was done when rendering the mesh and grass. Here is how tree branch shadows look:

Deciduous tree trunk and branch shadows. The sun is behind the camera.


The branches have shadows but the leaves don't. It looks a bit odd and unnatural, since the leaves on the bottom of the tree are too bright. We'll get back to this issue later.

Next I added shadows for pine tree trunks. These generated pine trees don't have any smaller branches, only needles - I just call the green parts "leaves". Originally, the pine tree trunks used a unique custom shader, so the first task was to change them to use the same shader as the deciduous tree branches, which already included shadow map support from the previous step. After that it was easy to enable shadows. Here is what they look like:

Pine tree trunk shadows. The sun is behind the camera.


Shadows don't add too much realism to pine tree trunks, since they are mostly in shadow anyway and don't often face toward the light. You can only see the trunks lit when trees are on a steep hill or the sun is low in the sky. However, they are basically free in terms of runtime and code complexity. Also, the trunks are no longer so bright compared to the rest of the tree.


Leaf Shadows

I decided to make an attempt at plant shadows before moving on to tree leaf shadows. Plants and trees use the same leaf shader. I wanted to start with plants since they're easier, because they're smaller on screen and performance/pixel fill rate isn't a big issue. The existing leaf shader performed lighting per-vertex (4 leaf corners per quad) for efficiency. Since the 4 vertices all have the same normal, the lighting terms are the same for every pixel in the leaf. Well that was the case, but this is no longer true when shadows are involved, since shadow boundaries can cross through the center of a leaf. Thus, the first task was to move the lighting computation from the vertex shader to the fragment shader for per-pixel lighting. After that, it was more copy-and-paste from the tree branch shader code to make it work. Oh, and merging in the two-sided translucent leaf lighting code where leaves can be lit from behind. Here is the result - you can ignore everything but the small (tall/thin) plants.

Plant leaf soft shadows. The sun is behind the camera.


Great! Tree leaf shadows should be easy now, since they use the same shader, right? Not exactly. Yes, they did mostly just work the first time, but the performance was poor. In some cases this cut the frame rate nearly in half. The worst case was under 30 FPS (frames per second), which was unacceptable for a realtime engine. I knew this would happen, which is one of the reasons I waited to long to add leaf shadows. The problem is that tree leaves overlap on the screen - a lot. When the camera is deep in the middle of the trees there could be dozens of leaves covering every pixel, and they're all drawn on top of each other.

Fortunately, there were various optimizations to make:
  • Sorting the trees front to back (based on camera position) helped improve early Z fragment culling on the GPU. If the leaves from the nearest tree block most of the camera's view, then the leaves behind them don't need to be drawn.
  • Disabling multisample anti-aliasing for tree leaves helped somewhat (see below)
  • Skipping shadow map lookup for leaves facing away from the sun helped for pine trees
  • Other various shader optimizations gave minor improvements
Even after all of these optimizations, the framerate was still too low for some views, in particular when looking down at a dense area of trees from above. This is the case where trees don't occlude each other, but instead occlude themselves top-to-bottom, which would require sorting every leaf of a tree front-to-back. I decided to go back to computing per-vertex leaf lighting. Since the leaves are so small, it's hard to tell the difference between per-vertex and per-pixel lighting anyway. From a distance they looked identical, and the framerate was much better. In fact, it was about the same as the framerate before I enabled tree shadow maps since the optimizations above helped so much, even when shadow maps were disabled. Nearby leaves had gradual shadow transitions across their surface rather than sharper shadow boundaries. This is less precise, but actually looks better considering the softer nature of leaf shadows. Here is how tree leaf shadows looked at this stage:

Tree branch + leaf soft shadows.


Here's another screenshot that includes water as well. There are some difficult-to-see reflections of the trees in the water, where the reflections also have shadows. Maybe I'll add a reflection screenshot in a later post.

Tree branch + leaf and water shadows.


I made a few final tweaks to my shadow map PCF (percentage closer filtering) to blur the sharp edges a bit more. This change mostly affects the mesh and tree branch shadows, which are per-pixel. It's difficult to tell the difference in the final image, unless the camera is very close to the mesh. But here is the final version anyway:

Final tree shadows after some addition tweaks to make them softer.

There was still one final problem to solve. Distant trees occasionally had bright pixels that randomly sparkled as the leaves moved in the wind. It was especially noticeable at night when the lighting level was low. The effect looked like fireflies and was actually pretty neat, but not what I was looking for. It took me a while to experiment with the shaders to track this one down. It turned out to be some problem with multisample anti-aliasing that I couldn't quite understand. I disabled anti-aliasing on tree leaves and the problem went away. In addition, this improved the frame rate slightly and made the nearby trees blend with the distant tree billboards better, improving the level-of-detail transition. This is because the billboards use a single large polygon rather than many small polygons, where anti-aliasing has little effect. The only downside is that medium distance trees (geometry where leaves are a few pixels in size) were not anti-aliased and flickered a bit when the camera moved. However, the benefits seemed to outweigh this so I left MSAA disabled. Here is an updated screenshot that's not much different:

Trees with leaf multisample anti-aliasing disabled - higher framerate, blends better with billboard trees, but sharper leaves.

If I increase the density and number of trees, it starts to look more like a forest and less like a meadow. However, the framerate drops significantly. I'm not sure the framerate is high enough for a game, but it will do for a demo where I can get some good screenshots.

Dense forest shown at ground level. Shadows make the forest floor seem darker.


Here is a view from above, where you can see just how many trees there are. I estimate there are 10,000 visible trees here, each one with 10K-20K leaves. That's 100M-200M total leaves! Do we have enough for a real forest yet? The framerate is down to 30 FPS but still feels fast enough for a demo. I have never seen a game or tech demo with nearly this many trees at this detail level. I've even implemented player collision detection with all these trees. Can you tell which trees are real geometry and which are billboards? I can't tell very easily in this screenshot. I'll give you a hint: the billboard trees don't have true shadows. I suppose I could add billboard tree shadows; however, they are normally beyond the distance at which I have shadow maps cached (due to performance reasons noted above).

Dense forest from above: 10,000 visible trees of 5 different species with shadows at 30 FPS.

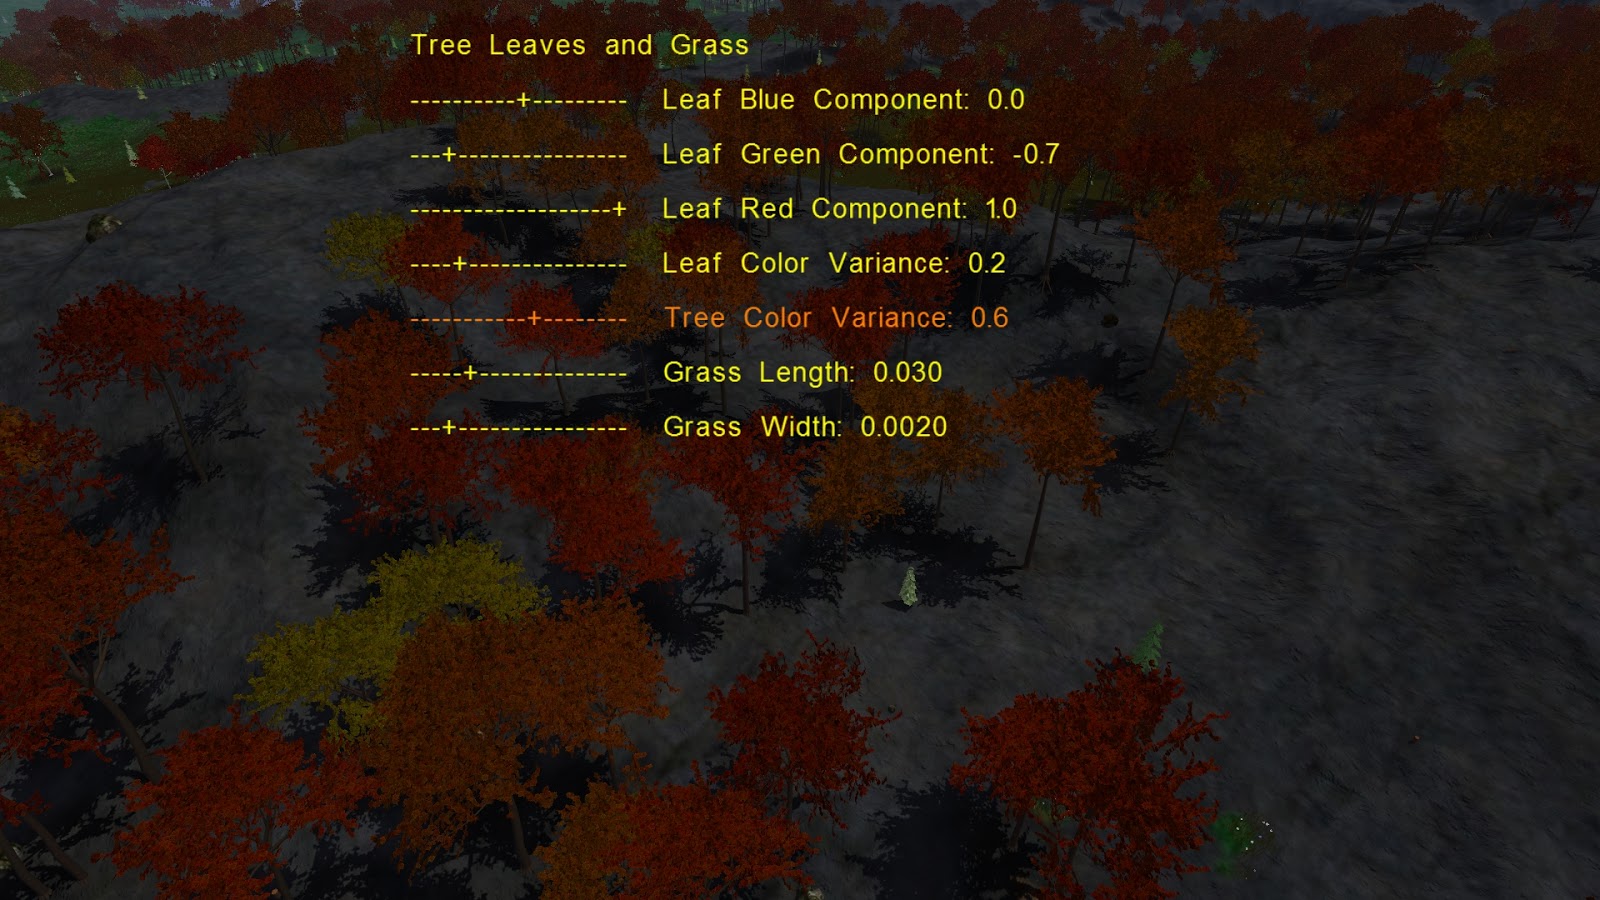
The forest consists of 5 different tree species, each with their own parameters, branch textures, and leaf textures. Some of these parameters can be configured at runtime. There are also some smaller bushes mixed in at ground level (a new addition) to improve the amount of "ground clutter". The probability of generating each species of tree varies spatially over the scene, which is why different areas are dominated by one type of tree. This is intended to simulate multiple biospheres, at least at a small scale. There are a total of 50 unique trees that are each instanced many times. The number is limited by GPU memory for storing the leaf + branch geometry and all of the billboard textures.


Pine Tree Shadows

The final step was to add shadows for pine tree needles/leaves. The pine tree model assumes fully opaque leaves that transmit no light to the back side. This is basically the same as tree branches, and can use almost the same shader. The only real difference is support for alpha masks for transparency. Each pine tree is composed of only 30 quad billboards / 120 vertices with an alpha mask to produce the different branches. I was able to factor out all of the shadow map code and share it between the tree trunk/branch and pine tree shaders. This change added pine tree self-shadowing, at least for nearby trees, which made them loom more real. Since the leaf quads are large relative to the shadow map resolution, I had to use per-pixel lighting/shadowing. Here is a another screenshot:

Pine trees with full self-shadows and shadows from nearby trees.

Day and Night Cycle

3DWorld has a full day/night cycle, with both sun and moon. Here you can see how the trees look in moonlight. Both the sun and moon produce shadows, and for a brief period of they light the scene together, with two sets of shadows (not shown).

Trees at night, illuminated only by moonlight. With shadows.

There is an option to enable continuous time elapse at various scales from realtime to around 10s per simulated day. When the sun and moon positions change, this invalidates the shadows and requires rebuilding the shadow map and terrain mesh shadow matrices. The rebuild time is around 100ms: interactive, but not realtime. Instead of rebuilding the shadow maps every frame, they are only rebuilt when the sun or moon move by a specified incremental amount. This way, most of the frames are fast and rendering can mostly be in realtime.

Update: I just replaced some of the tree and plant leaf textures with higher quality versions. They look better close-up, but don't look much different (other than differences in  average colors) from further away. I need to do a bit more work on the colors at the leaf edges where the texture fades to transparent. Right now the leaf colors are more consistent across the species of trees, which makes the different clusters less obvious. I'm not sure if that's good or bad - maybe more realistic, but less variety? I already have too many screenshots in this post so I won't add any more. Maybe next time, if I continue to work on trees.

Update 2: I fixed the tops of the pine trees so that they look better.

Pine trees with shadows.

Update 3: I adjusted the deciduous tree trunk curvature parameters to make it smoother and remove that odd bend near the base of the tree.

Friday, November 6, 2015

Simulating Rain Effects

It has been raining here in San Jose this week, so it seems like a good time to talk about rain. I finally rewrote the rain system in 3DWorld to be faster and also look better, with denser raindrops, animated splashes, and wet surface lighting effects. I was originally planning to make a post about precipitation, including both rain and snow. However, it would probably be too long, and instead I'll talk about rain first, then add a later post on snow during the winter.

Rain can be toggled using the "B" hotkey in 3DWorld. The "m" and "M" keys control precipitation rate. The user can also enable "auto time advance", which moves the sun and moon to simulate changing time of day and enables random temperature change and weather effects such as rain, snow, clouds, wind, etc.

The old rain system simulated and drew individual raindrops as ellipsoids (spheres stretched vertically), and had no splash effects other than water ripples. This was slow on the CPU as every raindrop was checked for collision with the scene geometry every frame. The max number of droplets I could have in the scene before the framerate started to drop was around 40,000. That's not enough for a heavy rain effect, so I decided to take a different approach on the second attempt.

I found the following series of online articles helpful for creating realistic rain effects: here and here. I actually started working on the "lines" method of drawing raindrops before reading these articles, but they did lead to some improvements. Lines look better than small spheres when they're moving because they simulate motion blur, an effect our eyes see when observing fast moving, small objects. Lines are also more efficient to draw, since they cover more of the scene than points and therefore require fewer of them for a given perceived density of rain. Also, they're only two vertices, rather than many vertices used to draw a nearby sphere.

The lines move in the direction of the rain, which depends on the wind but is mostly downward. Rain/wind speed and direction can be changed in realtime using hotkeys or the onscreen display slider. Collision detection doesn't have to be very exact: nearby rain lines move too fast to see clearly, and distant rain lines are too thin/small to tell exactly what they're intersecting. Instead of checking each raindrop/line for collision with the exact scene geometry every frame, the detail intersection test is only done if the line intersects a rough grid-based (voxel) approximation to the scene. If a collision is found, the raindrop is respawned somewhere else above the player's field of view. Any raindrops that fall outside the simulation region (a cylinder around the player) are also respawned within the cylinder. The improved collision performance allows for up to 100,000 raindrops in the scene. This results in both a heavier apparent rain density and higher frame rate than 40,000 "old" raindrops.

Animated splashes are created whenever a raindrop's line intersects the scene geometry, at the exact point of intersection. These are small, partially transparent billboards rotated to face the player. They increase in size and fade to transparent over the course of several frames to give the effect of an expanding surface of water. I tried to capture these in the screenshots and video below, but they're small and short lived, which makes them difficult to see at lower resolution. There are typically a few thousand intersections per frame, but only a few hundred may be visible to the player. If the animation lasts for 10 frames then there will be a few thousand splashes to draw each frame, which has a negligible impact on frame rate.

Here is a screenshot comparison before rain vs. during rain. The rain lines and clouds are obvious, the splashes can be seen if you look closely, and the ground is darker and shiny/reflective.

Building scene before rain.
Building scene during rain with raindrops, splashes, and a wet surface lighting effect.

The bottom (rainy) image shows some procedural rain clouds in the sky. These were generated by rendering thousands of partially transparent 2D billboard sprites distributed in 3D space into a 2D texture. The texture is projected onto the sky and moved with the camera to get correct parallax. Lighting is computed per-cloud particle on the CPU every time the sun moves by ray marching through the cloud volume from the sun's position to the particle center and integrating cloud density along the ray. This makes the bottom of the clouds appear darker than the top.

Here is an overhead screenshot of several materials showing the specular/glossy wet surface. The lighting is mostly determined by the normal maps of each material (concrete, stone, brick, and wood).

View of wet objects from above where specular reflections from the sun can be seen

It took a bit of work to make the wet lighting effect work correctly and look convincing. I had to run a preprocessing step to tag scene objects as indoors vs. outdoors by casting vertical rays through all of the upward facing polygon vertices and center points to determine which objects were visible to the sky. If any rays reached the sky, that surface could receive raindrops and would be (at least partially) wet. If all rays were blocked, the polygon was likely indoors and would stay dry. The indoor/outdoor state also needed to be updated when objects moved or parts of the scene were destroyed. This information was passed to the shader to control the lighting diffuse and specular weights, and the glossiness (specularity). This method worked well for the sun and moon, which always shine down from above in a similar direction to the rain, and mostly light outdoor areas rather than indoor areas. It didn't work as well for dynamic light sources, in particular for large polygons that were half occluded from ran and should have been only half wet. It also didn't work well for surfaces that didn't work up, so I restricted dynamic lighting wetness to upward facing surfaces only.

Here is a screenshot with two dynamic light sources reflecting off the ground. There is a floating, moving green emissive sphere that produces green light. This sphere also casts soft shadows from the sun. There are actually 100 spheres in the scene, though only a few are in view. The second dynamic light source is the player flashlight, which casts the yellow circle of light seen in the foreground.

Dynamic light sources (green glowing sphere and yellow flashlight) on wet bricks. Note the green sphere's soft shadow.


Here is a screenshot of heavy rain, viewed from above. The framerate is still around 100 FPS. The brick floor, tile fountain, and wooden benches all show sparkly wet surfaces. The trees are not specular (the leaf shader doesn't support this effect yet).

Scene with heavy rain, viewed from above, showing a high density of raindrops rendered as lines

Here is a short video showing rain, splashes, and specular reflections of the sun on wet surfaces.


Do you see any differences between this video and previous 3DWorld videos that I have uploaded? This one was created by a new, internal video recording system rather than with Fraps. My implementation creates a pipe from 3DWorld to a ffmpeg process and feeds video frames to ffmpeg using a thread safe locking queue. There is no time limit or Fraps watermark, and I have more control over the recording parameters. In addition, the video is compressed in realtime in multiple background threads and requires no postprocessing. The only disadvantage is that there is no sound. I haven't figured out how to either capture or record OpenAL audio. So sorry, no rain or wind sounds this time.

I can record at 720p resolution (1280x720) with no problems, and the MPEG compression running in the background can keep up with little impact on the framerate. However, recording at the default 1080p full screen monitor resolution (1920x1080) I use to view 3DWorld fills the video buffer after a few seconds and starts to reduce the framerate so that it can keep up. If I use more threads for compression, I get an overall lower frame rate as this competes with 3DWorld for CPU resources. If I use fewer threads, the video buffer fills and stalls the pipeline for a few second every so often trying to keep up. Fortunately, recording at 720p is fine, since uploading the video will further reduce the resolution anyway. This should allow me to record longer videos in the future (though with no sound).

Update: Here is a new video showing a thunderstorm in tiled terrain mode, including rain, thunder, lighting, and wind. It's hard to see at this low resolution though.


Update 2: I recorded another lightning video in the house scene using Fraps (so that there can be sound).


Tuesday, November 3, 2015

Fall Leaves

We're finally getting to see the fall leaves here in California. The weather has been colder this week, and the leaves on the trees outside my house are bright red and orange. Seeing the bright leaves reminded me that I had a way to set leaf colors in 3DWorld, so I decided to try that out. I haven't used fall leaf colors in tiled terrain mode before, and they're not as bright as I would like, but they do look reasonably good.

Leaf color can be set interactively by using an onscreen slider interface to change the various leaf parameters. Nearby trees are updated in realtime, and distant tree billboards are updated using the "T" key to recreate trees. These color parameters also affect grass, which looks a bit odd against the bright green terrain texture. At some point I should probably tune the leaf and grass colors in tiled terrain mode to make them brighter. Right now I'm working on other things, so that will have to wait until later.

Here are some screenshots of how fall trees look in 3DWorld. Click to view larger images.


Here is what the onscreen display looks like. It reminds me of my computer monitor's onscreen display. Since 3DWorld doesn't have any real UI or dialog boxes, everything is done within the main rendering window using hotkeys. Arrow keys move up and down in the list and move the slider positions left and right. The 'X' key switches between menus.

This image shows the onscreen display used to set tree leaf and grass colors.

The leaf red, blue, and green colors are actually color biases. They adjust the amount of color for leaves from the default greenish value. It's not possible to set the color exactly because of the way the leaf texture color is modulated with the base color. Leaf color variance sets the amount of random color difference between leaves on the same tree. Tree color variance sets the amount of random color difference between two different trees. These two numbers added together determine the overall color variation for a given leaf. Grass length and width are self-explanatory.

When I say the update is interactive, I mean 3DWorld actually destroys and recreates all of the trees and grass when these parameters change. It's surprisingly fast to regenerate everything, especially when using the GPU and 8 threads on a quad core machine. So the update only generates a slight pause.

Tuesday, October 20, 2015

Postprocessing Effects


I've been experimenting with full-screen postprocessing effects in 3DWorld using the fragment shader on the GPU. The shader has access to the color and depth buffers from the current frame, and overwrites the color buffer before displaying it. Some of the effects worked out well, but others did not. Here is a list of what effects have been added (in no particular order). This is a long post, but it's mostly images and videos and not too much text.

Fog
This is a very simple and common shader effect. It's also very cheap, so it doesn't affect the framerate much. However, I'm not really using it as a full-screen postprocessing effect. Instead, it's added as a postprocessing effect at the end of the regular draw shaders for all objects.

I'm doing more than the standard fog here, where the standard fog technique uses the depth (distance from the camera) of each pixel to select the fog color from no fog near the camera to full gray fog in the far distance. The 3DWorld fog is actually computed by ray marching a few steps through the scene and using the precomputed indirect lighting at each step to determine the fog color. Brightly lit areas have light gray fog, and dark shadowed areas have black fog. That way, the basement has black fog rather than the normal white-ish outdoor fog. For performance reasons, I'm doing a few ray steps, and only for some object types. It looks much better (with smoother color transitions) with more steps, but it's slower. Here are two screenshots for comparison.

Without Fog
With fog

God Rays
God rays, or crepuscular rays, are shafts of sunlight that hit small particles in the air, producing a glowing effect. Many games use God rays to increase the realism of bright direct lighting. 3DWorld uses a common approach of sampling the color buffer, ray marching from the sun position outward in screen space, and using the depth buffer to occlude the smear of color. This gives bright lines that radiate outward from the sun between other objects that block it. I have it working for scene objects, trees, and other solid objects, but not clouds (which don't contribute to the depth buffer). Here is another pair of screenshots showing the effect.

Without God rays
With God rays

Here is an image of God rays and fog in tiled terrain mode, looking through some trees. Note how the sunlight shines though the backs of the leaves as well. Real leaves are partially transparent to light.

A foggy morning, with God rays showing through the tree leaves. Also note the sunlight illuminating the backs of the leaves.
Another view. This time I remembered to turn off the onscreen display text.

Bloom
Bloom is a type of HDR (High Dynamic Range) postprocessing effect that makes bright objects appear even brighter than maximum monitor white by bleeding their color into surrounding pixels. If a light source is only a few pixels wide, the addition of a halo around it makes it seem brighter. This works well for small light sources that are only a few pixels wide, where the max white RGB value of {255, 255, 255} is not enough.

I'm using a 9x9 X/Y separable filter kernel (also used by the DOF and underwater blur effects). The color blur is done independently in X and Y using a 9x1 filter and a 1x9 filter. This requires 2*9 = 18 color texture lookups rather than 9x9 = 81. This is much faster and looks almost as good.

I think the bloom effect works well for small local light sources, but I don't like the effect on the sun and clouds. It's not clear how the fragment/pixel shader knows which pixels are sun vs. other light sources. Right now it's only testing for color intensity greater than 75%. Here are two comparison screenshots.

Without bloom
With bloom. The sun and sky are very bright! The courtyard lights are also bright. (but why are they on in the daytime?)

Heat Waves
I added screen space vertical heat waves as a postprocessing effect when the player is near a heat source such as fire. This is just a simple vertical wavy line effect on the entire screen, with decreasing wave amplitude from bottom to top. The shader doesn't actually know where the fire is on the screen, or if it's even visible in the view frustum. All it can do is add the effect or not. Here you can also see the billboard smoke particles effect. Smoke is colored based on lighting and shadows, so the smoke near the fire appears more reddish.

Heat waves rising from the fires. Don't get too close or you'll be burned!


Depth of Field
Depth of Field (DOF) is a common effect used in many games. The general idea is that the player is focusing on some particular object at a particular distance from the eye/camera. Objects both nearer and further than the object are out of focus and appear blurry. This simulates focusing of the human eye and of some types of camera lenses. Personally, I don't like this effect in games. I don't like anything that makes the scene look blurry - better to have sharp, crisp images. I added this effect to 3DWorld because it looked neat, but it's not used in-game. Here is what it looks like - click on the image for a larger view.

Depth of Field test image. The camera is focusing on the lamp in the center of the screen (in the white circle).

Here is a DOF video. I hope the blurriness of the video due to image compression artifacts doesn't mask the effect.


Underwater Blur and Distortion
Underwater blur is used to increase the realism when the player is underwater, and make it more obvious when the water boundary is crossed by the eye/camera. A wavy distortion is also added when the player is out of oxygen and drowning to simulate dizziness. When you see this effect, you know to get out of the water fast! I originally came across this effect through random experimentation, and I wanted to use it for something. It would make a great drunk effect if I ever add alcoholic drinks to 3DWorld. Here is an example of this rather strange effect.

Underwater drowning effect. Or maybe drunken effect? Watching this sure makes me dizzy.


Screen Space Ambient Occlusion
Not all of my postprocessing effects experiments were successful. SSAO was actually my first attempt at a postprocessing shader, but I should have started with something simpler. It works by calculating light occlusion in screen space using the depth and normal information, and then darkening screen pixels based on the amount of occlusion. That way, small folds and crevices appear darker than open areas. It doesn't work perfectly: for example, occluders that are off-screen or blocked by other objects can't be used.

This effect never really worked correctly in 3DWorld, for a number of reasons. First, 3DWorld uses a forward rendering pipeline, not a deferred rendering pipeline, so there is no normal buffer. Without object normals, it's impossible to tell front faces from back faces and which faces point toward each other. This results in incorrect darkening of areas that aren't actually occluded from the light source.

Second, SSAO doesn't really work with transparent objects. If the transparent object such as a glass window writes to the depth buffer, the front of it is darkened as if it was an opaque wall, which looks wrong. If it doesn't write to the depth buffer, the ambient occlusion isn't blended correctly and the dark area appears in front of the window, which also looks wrong. Here is a pair of screenshots with and without SSAO. The effect is subtle, so you probably need to click on the bottom image to get a higher resolution view.

Without SSAO
With SSAO. Not the intended effect. The color banding, black outlines from the transparent windows, false occlusion, etc. ruin the realism of the scene. Oh well, it was worth a try.
I'll see if I can think up any additional full-screen postprocessing effects.